Use knitCompanion with any pattern or skip the setup with one of our kCDesigns. knitCompanion links with Ravelry and supports share/open from other pattern sources, apps, clouds, and websites.
Sagitta by Amanda Scheuzger
Rainshine by Boo Knits
Once Again by Debra Gerhard
Atascadero Cowl by Stephannie Tallent
William by Ann Kingstone
Akoya by Carol Feller
Salt Hill by Andi Smith
Helen by Deb Hoss
Bubbles by Woolly Wormed
Plaits and Lace by Mary Beth Temple
Colorwork Crescent by Kieran Foley
Lalique from Fiber Dreams
Afloat by Cindy Garland
Citadel by Joji Locatelli
Antler Cardigan by Tin Can Knits
Serendipity by Hayley Tsang Sather
Aquamarine by Agnes Kutas-Keresztes
Acacia by Shellie Anderson
Yomut by Hunter Hammersen
Vacation Butterfly by Marin Melchior
Acacia by Shellie Anderson
Kiko by Pam Powers
Coconino by Carol Sunday
Miss Adler's Shawl by Romi Hill
Annulaire by Hilary Smith Callis
Winterberry by Jennifer Wood
Guernsey Pullover by Norah Gaughan
Spigato Mitts by Barbara Benson
Winter Chill by Staci Perry
Paradise Apples by Alla Borisova
Koi Pond by Casapinka
Birch Hill Pullover by Danielle Chalson
Boon Lay by Asa Tricosa
What Is Hip by Elizabeth Beach
Snowy Day Blanket by Jenise Hope
Lokta by Joan Forgione
Welcome September by Connie Peng
Bermuda by Ilga Leja
Sprossling by Anne Hanson
Forest Weave from DanDoh
Rainbow Trail by Cristina Ghirlanda
Forever Yours by Boo Knits
Leaves Shell by Kay Hopkins
Inara Wrap by Ambah
Tredegar by Jo Anne Klim
Planetary by Melanie Berg
Mayur Wrap by Jaya
Hug You Me by Laura Nelkin
Knitter's Dude by Andrea Rangel
With kCDesigns, pick your size and options and then kC generates a project just for you.
Love to write notes, hashmarks, and scribble on your patterns? With knitCompanion you can mark up your pattern with different colors and highlights, and all marks are easy to erase too! How to use Scribble.
Here we see a border chart being added to a center motif. Drag and drop each part into position. Your parts can come from different pages. You can use join anywhere you want to put parts together or re-organize the instruction layout. And you can use Templates to create a part once and use it many times. How to join parts.
First time subscribers will be offered a free trial. You will not be charged until the end of the trial period. If you cancel your subscription at any time during the trial period you will not be charged.
Yes. knitCompanion is free to download and provides free access to Basics that you can use for all your patterns. Below is a breakdown of all the free and paid features.
All in-app purchases are restored via your app store account. You MUST use the same app store and store account across devices. Apps must be installed on your device using the same app store account as you purchased with.
There may be a short delay while your information is being retrieved from the server. If it does not do so, make sure you are using the same account as your purchase.
First time subscribers will be offered a free trial. You will not be charged until the end of the trial period. If you cancel your subscription at any time during the trial period you will not be charged.
On the knitCompanion Home page, you can browse projects, PDFs, kCDesigns, and manage your Upgrade status and Settings. Show Me
Use the buttons on the right to switch between viewing Projects, PDFs, kCDesigns, Upgrade, and Settings.
Select a location—Local, iCloud, Dropbox, Ravelry, or kDesigns Stash—using the top buttons. Sort, filter, and manage multiple files with the top controls.
When the next clue to a mystery kal comes out, you can add it to your existing project. This is also useful if you want to make a single project using pages from different PDFs.
Pick the PDF from your list of PDFs. You must have the PDF in your knitCompanion to add it to your project, see step 1.
By default all pages are selected (indicated by the red numbers). You can select just the pages you need. Show Me
Tap Add Selected Pages.
The new pages are added to the end of your project’s PDF. If you have turned QuickStart off, you will need to use Setup to create new pieces. If QuickStart is on, you will see each new piece at the top, which scrolls side to side to see more. Change your QuickStart option in Settings. Show Me
If your device always opens a PDF with the same app, and will not let you choose which app to use, then clear your device’s default app setting. See how.
Ravelry Downloads
To download from Ravelry, your pattern must be a Ravelry Download that you have access to. Learn More
Your knitter’s name must match on each device. To open a project you must use the knitter’s name that was used at the time the project was created. Find your name by tapping Settings (Show Me)
. It is recommended that you keep your knitter’s name in a safe place in case of device failure. Please note your knitter’s name is case sensitive.
To open a project you must use the knitter's name set at the time the project was created.
Before turning iCloud on, be sure your knitter name matches on all devices and you can open the projects on each device.
Find your name by tapping Settings(Show Me)
. It is recommended that you keep your knitter's name in a safe place in case of device failure. Please note your knitter's name is case sensitive. Learn more
Look through your knitCompanion files on each device. This is an excellent time to clean up old projects and PDFs to reduce the amount of clutter you add to your iCloud.
Once everything is backed up to Dropbox, delete projects and PDFs you are not using. It is a best practice to keep only the files you are actively using in your knitCompanion. How to delete
De-cluttering will reduce the amount of space needed in your iCloud and on each device. Manage your iCloud storage
Apple will also automatically remove files if your local storage drops too low. The files remain safe in iCloud and will download the next time you start the app. To avoid having to wait for them to download, ensure you keep 5G of local storage space available.
If you turn iCloud on for multiple devices simultaneously, iCloud may create duplicate files. This happens when two devices are doing the initial upload of the same file at the same time to the iCloud server. To avoid this conflict, enable iCloud on one device at a time.
Start with your main device. Turn iCloud on and allow it to sync. Depending on your internet speed and the number of files you have, it may take time for all your files to transfer to the iCloud server. You can monitor this in the Files app (iCloudDrive/knitCompanion).
Repeat the above as needed for each additional device, continuing to do one device at a time. If there are duplicate files, the latest modified version of each file will be retained.
No. iCloud is designed to automatically sync files between your devices. When using iCloud, if you delete or change a project on one device it will be deleted or changed across all your devices. See Archive Projects below for creating a backup.
Yes. Your projects will be available offline as of the last time iCloud synced them to your device.
Before going offline be sure to open knitCompanion before turning the internet off. This ensures the most recent version is synced and that your device has plenty of local storage.
Be sure to allow iCloud to sync when returning online before using other devices. Changes made while offline will sync after you use your device when it is connected to the internet.
Other devices available for AirDrop will appear at the top. It can take a few seconds for devices to appear. If you do not see a device or the user you expect, see here.
Select any available cloud app such as Google Drive, Box, etc OR Save to Files to store your project in a linked cloud or the folder of your choice in the files app. If you choose Files, be sure to save to a folder other than knitCompanion's app folder to backup outside the app's main storage.
Select any available cloud app such as Google Drive, Box, etc OR File Browser app to store your project in that cloud or the files app. If you choose a File Browser, be sure to save to a folder other than knitCompanion's app folder to backup outside the app's main storage.
To add a project to your knitCompanion from the cloud or email, use Android's built in open with and/or copy to option.
You can customize the image used for your project when viewing local projects and PDFs. Show Me
Set Custom Project Image (requires Setup+Essentials)
In most cases* the image shown for a project will be the first piece of the project. To customize your image, set your first piece to your desired image. You can crop a pretty picture from the PDF or add a PDF that contains your own personal picture for the project.
* If your project does not have any pieces, the image will be the first page of the PDF used for the project. If your project is packed, the image will be the default project icon.
By default, all pages are selected (indicated by the red numbers). You can select just the pages you need for the project. Show Me Example: You have a large ebook and want just a few pages. Tap Deselect All, then toggle on the pages you want.
Tap Start Project at the top. You may be prompted to enter your knitter’s name so you can share the project with your other devices. Note: you must have at least one page selected In order to make a project.
Packing a project removes all the temporary (cache) files associated with a project. This includes things like thumbnail images. Packing can fix issues and reduces the amount of space used on your device. When a project is shared or uploaded to a cloud, these temporary files are not included in the upload which saves you bandwidth and space.
We all have patterns in books, from websites, or that are documents other than PDF. There are many ways to transform just about anything into a PDF. Most all word processor, spreadsheet programs, note taking programs, etc, offer the option to create a PDF. See below for a variety of platform specific options for making a PDF from just about any format:
You do not need a super hi-res scan when doing a flat bed scan. Keep a lower dpi (dots per inch) such as 150.
Before making a PDF, be sure to "square" the scan or image. Many of the apps listed above provide features to help you square the image and some also provide features to correct distortion caused by the book binding.
Disclaimer: kC is not affiliated with any of these apps or websites. This is by no means an exhaustive list of the options, but it should get you started. For more feedback from a wide range of users visit our Ravelry Group.
knitCompanion works with any PDF. kCDesigns are an extra option where the pattern is already setup for knitCompanion by our tech editors so you can use the full capabilities of the app with no setup. Things like one-tap row markers, row reminders, smart counters, sizing, motif and design options, and other knitCompanion features are setup so you can start knitting right away.
You pick your size and any motif or design options specified in the pattern. Then the magic happens, knitCompanion creates a custom project just for you.
kCDesigns are available in our shop and are available across all platforms: Android, iOS, Kindle, and MacOS.
Are you a designer interested in making your patterns available as kCDesigns?
It’s easy and the effort on your part is minimal.
The knitCompanion team does all the work to transform your patterns into kCDesigns and there is no fee for the transformation work.
Our team consists of professional knitting tech editors who are also knitCompanion experts.
We also handle support for kCDesigns and errata changes as needed.
Want a quick tour? VeryPink Knits has a new video showcasing kCDesigns. Take a look
here
Which patterns?
This is totally up to you. You can add new, old, or your most popular, your choice. We are happy to work with you to make recommendations.
Email us!
To get your patterns added to our schedule, email designer@knitCompanion.com so we can coordinate with you. We will send you detailed information explaining the Sign-up Steps and the Designer Agreement. Our terms are very favorable for designers.
Our tech editing team then takes over and begins setting up the pattern as a kCDesign. We create a unique page just for you in the Create2Thrive Shop. Go to shop.knitCompanion.com and have a look around.
Your knitters can skip the knitCompanion setup and just knit!
Yes. kCDesign is an add-on to the PDF. However, if you previously purchased the pattern from Ravelry, you can purchase just the kCDesign because the Create2Thrive Shop is integrated with Ravelry. You do not have to purchase the pattern again. Be sure to login and link to your Ravelry account.
You can purchase both the PDF + kCDesign together from our shop. We will put the purchase directly in your Ravelry library.
When a designer offers both charted and written instructions, kCDesigns will offer options for Standard Charts or Guided Charts. Guided Charts will show the written instructions for each charted row automatically as you advance the one-tap marker. Show Me
Guided Charts are a great way to become more comfortable with charts, and when working on a chart with symbols that are new to you
knitCompanion works with any PDF. kCDesigns are an extra option where the pattern is already setup for knitCompanion by our tech editors so you can use the full capabilities of the app with no setup. Things like one-tap row markers, row reminders, smart counters, sizing, motif and design options, and other knitCompanion features are setup so you can start knitting right away.
You pick your size and any motif or design options specified in the pattern. Then the magic happens, knitCompanion creates a custom project just for you.
kCDesigns are available in our shop and are available across all platforms: Android, iOS, Kindle, and MacOS.
Every project has its own Main Knitting page so you can have many projects going at once and never lose track! Show Me
knitCompanion provides three modes for you to work with:
Knit: Where you will be knitting your project.
Edit: Customize your project using tools to add highlights and notes, customize markers and counters, add project info, etc.
Setup: Overcome challenges such as joining charts together, adding row reminders, repeats, and shaping. Setup is also where you add a one-tap marker.
You can switch between Knit, Edit, and Setup modes anytime. Show Me
Because of the smaller width of the phone screen or when using slide over and split screen, use the Mode button to switch between Knit, Edit, and Setup. Show Me
knitCompanion provides a blank Note Page that you can add to any project or use as the starting point for a project with no pattern. It is great for adding extra space to scribble on!
This PDF is automatically added to your knitCompanion, it is called Note Page.pdf. This PDF is blank, allowing you to scribble any notes you need. You can add as many blank pages as you need, using the same steps for adding any PDF to your project.
If you have deleted the Note Page.pdf, you can add it again by tapping Reset Built-In Content under Settings.
See here to add a PDF to your project (including the Note Page.pdf).
See here to create a new project from any PDF (including the Note Page.pdf).
knitCompanion includes a variety of knitting calculators. Easy to read results are provided that can be placed directly in your Project Info notes and copied to your clipboard. Calculators are included in your subscription.
In Knit, if the bottom panel is not showing, tap the toggle at the top right. Show Me
You can adjust the size of the bottom panel with the blue handle.
Tap the Project Info button to toggle through each option until you see Project Timer & Ruler. Show Me
Get instructions to taper a sleeve using your gauge and desired sleeve length. Instructions can be for top-down (decreasing) or cuff-up (increasing). You will need to provide:
If you are using inches or centimeters
Rows per 4 inch/10cm
Starting stitch count
Ending stitch count
Sleeve length from underarm (not including cuff or sleeve cap)
Every page has two markers by default: a row marker and a stitch marker. They are available on every page (written or chart) when on the main knitting page. Show Me
Row Marker: Slides up and down or advances with the one-tap. Your row marker will be either the sliding row marker or a one-tap marker.
Stitch Marker: Slides side to side.
Markers stay in place as you zoom and scroll. Drag a marker to move it, moving a marker affects only the current page so you can drag on one page without losing your spot on other pages.
The sliding markers default to the center of the page so you may need to scroll or zoom to bring them into view when you first create a project.
You can set your preferred default settings in Settings. We recommend you experiment with the settings on an individual page before changing your global settings.
Customize Your Markers (Setup+Essentials)
You can adjust the width, color, transparency, and invert settings for the markers. You can have different settings for each page.
Use the controls at the bottom to set the width, color, transparency, and invert settings for the markers.
Your changes here will not affect other pages..
To change the markers on another page, repeat steps 2-4.
To set your preferred default, close your project and select Settings.Show Me
Customize the Sliding Row Marker
On pieces without any visible rows defined, you will see the following when editing the marker:
Notice the top left says Row Slider.
You can customize the Sliding Row Marker settings and the Stitch Slider settings.
Change the color and transparency.
Tap the color and select a new color from the palette.
Use the slider above the palette to adjust the transparency.
Adjust the width of the marker.
Use the slider to adjust the width of the marker.
Don’t want to see the markers on a specific page? Toggle the Show setting ON or OFF.
Important! If you turn the markers OFF for a specific page, you will not see the markers on this page until you turn them back ON.
Customize the One-Tap Marker
On pieces with visible rows defined, you will see the following when editing the marker. When editing the one-tap marker, you will see:
Notice the top left says One Tap.
Set the color you want for odd rows and even rows.
These are used as you tap through a page with a one-tap marker.
Invert Setting
See below for information on this setting.
Row Reset Setting
None: The default setting. When this is selected and you advance your one-tap, your chart will not slide left or right.
Right: This setting returns your chart to the far-right edge when you advance your one-tap marker. Great for knitting in the round!
Left: If you are following a chart and start at the left edge, this setting returns you to the far-left edge when you advance your one-tap.
Note: For the Right and Left settings to have effect, you must be working a chart that is zoomed wider than your screen.
Reset Slider
Toggle the Reset Slider setting ON or OFF.
When the Row Reset is set to Right or Left and the Reset Slider setting is ON, it shifts your sliding STITCH marker to the far right or far left. This setting is active even when working a chart that is not wider than the screen, this is because when knitting in the round it can be handy for your stitch slider to be automatically shifted, ready to start tracking on the next row.
Note: If the Row Reset is set to None, your sliding stitch marker will not shift.
Inverted Markers (Setup+Essentials)
Inverted markers are an extremely popular option and are unique to knitCompanion. An inverted marker can be any color, in this example it is shown in gray.
Inverted markers make it very easy for your eye to stay on track.
Inverted markers make working color charts a breeze.
Adjust the invert setting from within the Marker settings. Toggle the Invert setting ON or OFF.
Notes can be added to every project. You can add anything in the notes section. For example, the size you are knitting, the yarn you are using, and who you are gifting the project to.
In Knit, if the bottom panel is not showing, tap the toggle at the top right. Show Me
Tap the Project Info button to toggle through each option until you see Project Information. Show Me
Notes can be added while in Knit or Edit. Tap the Project Info button to toggle through each option until you see Project Information. Show Me
You may have a pattern where the key is not on the same page as your knitting instructions. With knitCompanion you can see both the key and instructions at the same time.
You can use your finger, Apple Pencil (1st or 2nd Gen), Samsung Pen, or a stylus to write on your pattern. Scribble is included in the subscription for Setup+Essentials.
On iOS, Scribble uses Apple’s standard tool palette. You can choose from several drawing tools, select colors, switch to the eraser, and tap any tool to change its thickness and opacity. To learn more about using the tool palette and Apple Pencil see here.
On Android and Windows we provide a custom palette. You can chose from several drawing tools, select colors, switch to the eraser, and long tap any tool to change its settings.
On MacOS knitCompanion provides a Scribble menu. Show Me
Tap Scribble again to toggle it off.
Note that scribbles are platform specific. Scribbles made on Apple will not appear on Android, and scribbles made on Android will not appear on Apple. No scribbles will be lost when syncing between Apple and Android.
Scribble on Your Key
If you have used Setup+Essentials to add keys, you can scribble on these keys.
Tap Keys at the top and Scribble on the right. Show Me Don’t see scribble? Be sure to tap Keys at the top left. Show Me
Add a Note Page to Your Project
knitCompanion provides a blank Note Page that you can add to any project or use as the starting point for a project with no pattern. It is great for adding extra space to scribble on!
This PDF is automatically added to your knitCompanion, it is called Note Page.pdf. This PDF is blank, allowing you to scribble any notes you need. You can add as many blank pages as you need, using the same steps for adding any PDF to your project.
If you have deleted the Note Page.pdf, you can add it again by tapping Reset Built-In Content under Settings.
See here to add a PDF (including the Note Page.pdf) to your project.
See here to create a new project from any PDF including the Note Page.pdf.
Use the slider above the palette to adjust the transparency.
Tap the color and select a new color from the palette.
Change the name
Tap in the Name field and change the name.
Change the direction of counting
The default is to count up as 1, 2, 3. But you can change the direction to count down. Pattern example: If the pattern says to decrease from 101 stitches to 95 stitches you can set the direction to count down and tap it each time you decrease.
Set a minimumand maximum
Pattern example: If the pattern for a row says to repeat from * to * 3 times, you can keep track of the number of times you complete the repeat on each row. Set the direction of the counter to up with a minimum of 1 and maximum of 3. The counter will count 1, 2, 3 on the first row. Then on the next row it starts back at 1. So, you can count 1, 2, 3, 1, 2, 3 automatically without extra fiddling or reset
Designate how to count by (Apple Only)
Example: Count by of 2 counts as 0, 2, 4, 6, 8...
Pattern example: If the pattern says to increase 2 stitches each row until you have 10 increased stitches, you can use count by. Set to count by 2 and then you can tap once per row and count both increased stitches with that one tap.
Loop to min (currently not available on Android)
If the count is greater than 1, you can specify to loop to the min/max. For example, if it counts 0 - 10 by 2 and loop to min/max is: - ON, it will count 0, 2, 4, 6, 8, 10, 0, 2, 4... - OFF, it will count 0, 2, 4, 6, 8, 10, 1, 3, 5... This is useful when handling upper and lower bounds when incrementing by anything that does not equally divide into the looped amount.
Adda counter. Six counters not enough? Add more!
Delete a counter. Delete any counters you aren’t using.
Use the slider above the palette to adjust the transparency.
Tap the color and select a new color from the palette.
Change the name
Tap in the Name field and change the name.
Change the direction of counting
The default is to count up as 1, 2, 3. But you can change the direction to count down. Pattern example: If the pattern says to decrease from 101 stitches to 95 stitches you can set the direction to count down and tap it each time you decrease.
Set a minimumand maximum
Pattern example: If the pattern for a row says to repeat from * to * 3 times, you can keep track of the number of times you complete the repeat on each row. Set the direction of the counter to up with a minimum of 1 and maximum of 3. The counter will count 1, 2, 3 on the first row. Then on the next row it starts back at 1. So, you can count 1, 2, 3, 1, 2, 3 automatically without extra fiddling or reset
Adda counter. Six counters not enough? Add more!
Delete a counter. Delete any counters you aren’t using.
Make the most of your small screen devices and split screen with these tips.
Because of the smaller width of the phone screen or when using slide over and split screen, use the Mode button to switch between Knit, Edit, and Setup. Show Me
Toggle top and bottom areas, as well as the top toolbar, using the toggles at the top right. Show Me
Adjust the size of the bottom area to perfectly divide your screen for the content you are working with.
Use portrait or landscape based on your current task and what best fits your content. For example tall and narrow instructions such as a tall chart or column of written instructions will fit best in portrait. A wider chart or full page width written instructions will fit better in landscape.
In some cases controls in the bottom area will scroll side to side when in portrait. You can switch to landscape to see more controls at once.
Use cropping so you are able to have only the instructions you need on screen. This will reduce clutter and help use your screen space more efficiently.
Use kC’s unique tools for working with large format instructions such as double tap zones and auto row resets. Learn more
To include a video in knitCompanion, be sure to use a direct link for the video (e.g., youtube.com, youtu.be, etc). Links in your pattern that are not for videos will launch directly in your browser.
Add Video Links from PDF (Setup+Essentials)
You can add video links that are in a pattern’s PDF to your project.
You can add a video that is not part of your PDF. Maybe you like to watch your favorite provisional cast on or short row video while working on the project but neither of these are in the pattern’s PDF.
At the bottom you will see Notes, the Timer, and Videos. Show Me
Tap the Video button.
To add a new video, tap the blue +.
Name the video. When in Knit, this name appears when the video is selected.
Add the video link.
The link is a standard share link (sometimes called embed).
Tap OK.
Watch Videos
In Knit, if the bottom panel is not showing, tap the toggle at the top right. Show Me
You can adjust the size of the bottom panel with the blue handle.
Tap the Project Info button to toggle through each option until you see Linked Videos. If there is more than one video, tap the Project Info button to find the video you want. Show Me
You can play and pause the video, Internet is required. If supported by your device, bring it Full Screen, or switch to picture-in-picture (PIP). You can then move the video around on your screen and watch it while you work the pattern.
Every project has its own Main Knitting page so you can have many projects going at once and never lose track! Show Me
knitCompanion provides three modes for you to work with:
Knit: Where you will be knitting your project.
Edit: Customize your project using tools to add highlights and notes, customize markers and counters, add project info, etc.
Setup: Overcome challenges such as joining charts together, adding row reminders, repeats, and shaping. Setup is also where you add a one-tap marker.
You can switch between Knit, Edit, and Setup modes anytime. Show Me
Because of the smaller width of the phone screen or when using slide over and split screen, use the Mode button to switch between Knit, Edit, and Setup. Show Me
Select the page you want to highlight. You can zoom and scroll as needed until the page is comfortably positioned.
Tap the (+) to make a new highlight.
If your piece is a Chart Piece you will have the option for a Highlight or a Stitch Marker.
There are several options for creating highlights of different sizes:
Tap to place a small highlight (sized to mark a number/size).
Drag horizontally to create a long highlight to mark a lifeline or longer line of text.
Drag vertically to create a tall line or a stitch marker.
Drag diagonally to create a larger highlight box of any size.
Adjust the size of the highlight by using the red squares.
Move the highlight by dragging it with your finger.
Adjust the color and transparency by tapping the Color button at the bottom.
To make a new highlight, repeat steps 3-6. You can color-code your highlights!
When you have multiple highlights on a page, tap any highlight to select and edit it. The selected highlight has a red handle in each corner.
To highlight another piece, select it at the top.
Highlight a Key or Template
Select the category upper left and follow the steps above.
Copy a Highlight
Tap the highlight you want to copy and tap the Copy button. Drag to place the new highlight. Show Me
Delete a Highlight
Tap the highlight you want to delete and tap the Trash button. Show Me
Select the page you want to add a note to from across the top. If you do not see your pages across the top, tap the top toggle. Show Me
Tap the (+) to make a new note.
Tap Popup.
Popup will make a note with a tappable icon that will pop up the note when in Knit.
Tap where you want to place the popup note. Move the note by dragging it with your finger.
Type your note in the bottom.
Adjust the color and transparency by tapping the color button at the bottom.
Multiple Popup Notes
When you have multiple notes on a page tap any note to select and edit it. The selected note is colorful while other notes are grey.
Modify Popup Text
To modify the text content of a popup from Knit Mode, tap the popup to open it and tap in the text area.
Adding Audio to a Popup Note
Tap the Audio button.
Tap the (+) to record a new audio.
Name the new audio recording and tap OK.
Tap Start to begin recording.
Record the note.
Tap Stop.
To play an audio, tap the down arrow and then tap play.
To add an audio clip to your note, tap to select the audio clip and tap the Choose button upper left. To leave without adding an audio, deselect any currently selected audio (tapping on an audio toggles its selection on/off) and tap Done.
Text Notes (Apple)
Text will allow you to type in your note directly on the page.
Tap where you want to place the note. Move the note by dragging it with your finger.
Type your note. The text inside will resize to fit.
You can drag the red squares to adjust the size and shape of your note.
You can adjust the backing color and the text color.
Every page has two markers by default: a row marker and a stitch marker. They are available on every page (written or chart) when on the main knitting page. Show Me
Row Marker: Slides up and down or advances with the one-tap. Your row marker will be either the sliding row marker or a one-tap marker.
Stitch Marker: Slides side to side.
Markers stay in place as you zoom and scroll. Drag a marker to move it, moving a marker affects only the current page so you can drag on one page without losing your spot on other pages.
The sliding markers default to the center of the page so you may need to scroll or zoom to bring them into view when you first create a project.
You can set your preferred default settings in Settings. We recommend you experiment with the settings on an individual page before changing your global settings.
Customize Your Markers (Setup+Essentials)
You can adjust the width, color, transparency, and invert settings for the markers. You can have different settings for each page.
Use the controls at the bottom to set the width, color, transparency, and invert settings for the markers.
Your changes here will not affect other pages.
To change the markers on another page, repeat steps 2-4.
To set your preferred default, close your project and select Settings.Show Me
Customize the Sliding Row Marker
On pieces without any visible rows defined, you will see the following when editing the marker:
Notice the top left says Row Slider.
You can customize the Sliding Row Marker settings and the Stitch Slider settings.
Change the color and transparency.
Tap the color and select a new color from the palette.
Use the slider above the palette to adjust the transparency.
Adjust the width of the marker.
Use the slider to adjust the width of the marker.
Don’t want to see the markers on a specific page? Toggle the Show setting ON or OFF.
Important! If you turn the markers OFF for a specific page, you will not see the markers on this page until you turn them back ON.
Customize the One-Tap Marker
On pieces with visible rows defined in setup, you will see the following when editing the marker. When editing the one-tap marker, you will see:
Notice the top left says One Tap. Width of the one tap marker is defined in Setup, see here.
Set the color you want for odd rows and even rows.
These are used as you tap through a page with a one-tap marker.
Invert Setting
See below for information on this setting.
Row Reset Setting
None: The default setting. When this is selected and you advance your one-tap, your chart will not slide left or right.
Right: This setting returns your chart to the far-right edge when you advance your one-tap marker. Great for knitting in the round!
Left: If you are following a chart and start at the left edge, this setting returns you to the far-left edge when you advance your one-tap.
Note: For the Right and Left settings to have effect, you must be working a chart that is zoomed wider than your screen.
Reset Slider
Toggle the Reset Slider setting ON or OFF.
When the Row Reset is set to Right or Left and the Reset Slider setting is ON, it shifts your sliding STITCH marker to the far right or far left. This setting is active even when working a chart that is not wider than the screen, this is because when knitting in the round it can be handy for your stitch slider to be automatically shifted, ready to start tracking on the next row.
Note: If the Row Reset is set to None, your sliding stitch marker will not shift.
Inverted Markers (Setup+Essentials)
Inverted markers are an extremely popular option and are unique to knitCompanion. An inverted marker can be any color, in this example it is shown in gray.
Inverted markers make it very easy for your eye to stay on track.
Inverted markers make working color charts a breeze.
Adjust the invert setting from within the Marker settings. Toggle the Invert setting ON or OFF.
Use the slider above the palette to adjust the transparency.
Tap the color and select a new color from the palette.
Change the name
Tap in the Name field and change the name.
Change the direction of counting
The default is to count up as 1, 2, 3. But you can change the direction to count down. Pattern example: If the pattern says to decrease from 101 stitches to 95 stitches you can set the direction to count down and tap it each time you decrease.
Set a minimumand maximum
Pattern example: If the pattern for a row says to repeat from * to * 3 times, you can keep track of the number of times you complete the repeat on each row. Set the direction of the counter to up with a minimum of 1 and maximum of 3. The counter will count 1, 2, 3 on the first row. Then on the next row it starts back at 1. So, you can count 1, 2, 3, 1, 2, 3 automatically without extra fiddling or reset
Designate how to count by (Apple Only)
Example: Count by of 2 counts as 0, 2, 4, 6, 8...
Pattern example: If the pattern says to increase 2 stitches each row until you have 10 increased stitches, you can use count by. Set to count by 2 and then you can tap once per row and count both increased stitches with that one tap.
Loop to min (currently not available on Android)
If the count is greater than 1, you can specify to loop to the min/max. For example, if it counts 0 - 10 by 2 and loop to min/max is: - ON, it will count 0, 2, 4, 6, 8, 10, 0, 2, 4... - OFF, it will count 0, 2, 4, 6, 8, 10, 1, 3, 5... This is useful when handling upper and lower bounds when incrementing by anything that does not equally divide into the looped amount.
Adda counter. Six counters not enough? Add more!
Delete a counter. Delete any counters you aren’t using.
Use the slider above the palette to adjust the transparency.
Tap the color and select a new color from the palette.
Change the name
Tap in the Name field and change the name.
Change the direction of counting
The default is to count up as 1, 2, 3. But you can change the direction to count down. Pattern example: If the pattern says to decrease from 101 stitches to 95 stitches you can set the direction to count down and tap it each time you decrease.
Set a minimumand maximum
Pattern example: If the pattern for a row says to repeat from * to * 3 times, you can keep track of the number of times you complete the repeat on each row. Set the direction of the counter to up with a minimum of 1 and maximum of 3. The counter will count 1, 2, 3 on the first row. Then on the next row it starts back at 1. So, you can count 1, 2, 3, 1, 2, 3 automatically without extra fiddling or reset
Adda counter. Six counters not enough? Add more!
Delete a counter. Delete any counters you aren’t using.
Before discussing Linked Counters, let’s define what we mean by Fabric Pattern. The Fabric Pattern is the stitch pattern being used to create the fabric of your knitting. The Fabric Pattern can be very simple or very complex.
Simple: An example of a simple Fabric Pattern is garter stitch or stockinette stitch.
The instructions may state: Continue in Stockinette for 5 rows. Show Me
Complex: An example of a complex Fabric Pattern is a pattern described in charted or written instructions.
The instructions may state: k4, p, yo, k2sp, yo, p, k4. Show Me
What’s the difference between Linked Counters and Smart Counters?
Linked Counters are designed for simple fabric patterns that are not written out and do not have a one-tap marker. Linked Counters track repeats and actions as you knit each row. Show Me
Smart Counters are designed for more complex patterns that have a one-tap marker. Complex fabric patterns can be written or charted. The one-tap marker keeps your spot in the fabric pattern and Smart Counters add reminders for shaping, color changes, repeats, etc. as you knit each row. Show Me
What is a Linked Counter?
Linked Counters are counters that are joined (linked) to a single button so you can advance a group of counters with a single tap. Show Me
Repeat Counters: These counters loop through a number range. Show Me
You specify the number range, the starting row (or a manual start), and the number of times to repeat (zero for unlimited repeats).
Example #1: Your cable pattern sweater requires you to work from two charts on each row: a 4 row double seed-stitch chart and a 10 row cable chart. Use 2 repeat counters to always know which row of each pattern you are on for your current row of knitting.
Example #2: Your patterns says to place a Buttonhole every 10 rows 7 times.
Action Counters: These counters show a reminder at a given interval. Show Me
You specify the action to take, the starting row (or a manual start), how often it should happen, and how many times it should happen.
Example: You need a reminder to do Waist Decreases every 2 rows a total of 8 times.
Uses include reminders for increases, decreases, changing yarn, etc.
Tap the (+) to add a counter and select Action or Repeat. Action Example: You want a reminder to do waist shaping on a specific row. Repeat Example: You need to place a buttonhole every 10 rows.
Type the action to be performed, such as Dec 1 stitch at end of row.
Specify how many times and how often the action should happen. For example, Waist Decreases need to happen every 2 rows a total of 8 times.
Specify if you want to display the repeat information. Show Me ON: If you toggle the Show setting ON, then the repeat information displays. OFF: If you toggle the Show setting OFF, then the repeat information does not display.
Start Row: Use this if you know the specific row the action should start on. In our example, the first Waist Decrease happens on Row 5. Manual Start: Use this if you need to begin the action after a specific distance.
Specify the number range. For example, if the pattern says to place a buttonhole every 10 rows 7 times, your range is 1-10.
Specify how many times the repeat should happen. In our example, there are 7 buttonholes so type 7.
Specify if you want to display the repeat information. Show Me ON: If you toggle the Show setting ON, then the repeat information displays. OFF: If you toggle the Show setting OFF, then the repeat information does not display.
Start Row: Use this if you know the specific row the action should start on. In our example, the first buttonhole should be placed on Row 5. Manual Start: Use this if you need to begin the action after a specific distance.
Advance your linked counter
Once a linked counter is set up, when you tap the large green button it advances all your linked counters together. Show Me
Frog back 1 row
Tap the Back One button to frog back 1 row for each tap. This will step you back through the linked counters in reverse order.
Reset to the beginning
To reset the linked counter to the beginning, use the Reset button. This is useful when you want to make a 2nd sleeve just like the first sleeve.
Add new counters later
You can add new counters later, but they must start after your current row. If you have advanced the linked counters and realize you need to adjust a counter that has already started, use the Reset button.
Long description
If your To Do item is a long description, long tap on the To Do to see the full description in a larger window.
When the next clue to a mystery kal comes out, you can add it to your existing project. This is also useful if you want to make a single project using pages from different PDFs.
Pick the PDF from your list of PDFs. You must have the PDF in your knitCompanion to add it to your project, see step 1.
By default all pages are selected (indicated by the red numbers). You can select just the pages you need. Show Me
Tap Add Selected Pages.
The new pages are added to the end of your project’s PDF.
If you have turned QuickStart OFF, you will need to use Setup to create new pieces. If QuickStart is ON, you will see each new piece at the top, which scrolls side to side to see more. Change your QuickStart option in Settings. Show Me
Notes can be added to every project. You can add anything in the notes section. For example, the size you are knitting, the yarn you are using, and who you are gifting the project to.
knitCompanion includes a variety of knitting calculators. Easy to read results are provided that can be placed directly in your Project Info notes and copied to your clipboard. Calculators are included in your subscription.
Make the most of your small screen devices and split screen with these tips.
Because of the smaller width of the phone screen or when using slide over and split screen, use the Mode button to switch between Knit, Edit, and Setup. Show Me
Toggle top and bottom areas, as well as the top toolbar, using the toggles at the top right. Show Me
Adjust the size of the bottom area to perfectly divide your screen for the content you are working with.
Use portrait or landscape based on your current task and what best fits your content. For example tall and narrow instructions such as a tall chart or column of written instructions will fit best in portrait. A wider chart or full page width written instructions will fit better in landscape.
In some cases controls in the bottom area will scroll side to side when in portrait. You can switch to landscape to see more controls at once.
Use cropping so you are able to have only the instructions you need on screen. This will reduce clutter and help use your screen space more efficiently.
Use kC’s unique tools for working with large format instructions such as double tap zones and auto row resets. Learn more
To include a video in knitCompanion, be sure to use a direct link for the video (e.g., youtube.com, youtu.be, etc). Links in your pattern that are not for videos will launch directly in your browser.
Add Video Links from PDF (Setup+Essentials)
You can add video links that are in a pattern’s PDF to your project.
You can add a video that is not part of your PDF. Maybe you like to watch your favorite provisional cast on or short row video while working on the project but neither of these are in the pattern’s PDF.
At the bottom you will see Notes, the Timer, and Videos. Show Me
Tap the Video button.
To add a new video, tap the blue +.
Name the video. When in Knit, this name appears when the video is selected.
Add the video link.
The link is a standard share link (sometimes called embed).
Tap OK.
Watch Videos
In Knit, if the bottom panel is not showing, tap the toggle at the top right. Show Me
You can adjust the size of the bottom panel with the blue handle.
Tap the Project Info button to toggle through each option until you see Linked Videos. If there is more than one video, tap the Project Info button to find the video you want. Show Me
You can play and pause the video, Internet is required. If supported by your device, bring it Full Screen, or switch to picture-in-picture (PIP). You can then move the video around on your screen and watch it while you work the pattern.
Every project has its own Main Knitting page so you can have many projects going at once and never lose track! Show Me
knitCompanion provides three modes for you to work with:
Knit: Where you will be knitting your project.
Edit: Customize your project using tools to add highlights and notes, customize markers and counters, add project info, etc.
Setup: Overcome challenges such as joining charts together, adding row reminders, repeats, and shaping. Setup is also where you add a one-tap marker.
You can switch between Knit, Edit, and Setup modes anytime. Show Me
Because of the smaller width of the phone screen or when using slide over and split screen, use the Mode button to switch between Knit, Edit, and Setup. Show Me
When you setup your chart, it is important to ensure the grid from your setup matches the grid of the chart. The purpose is to ensure all chart tools (one tap marker, magic markers, voice control, reminders, etc) are optimal.
To make the setup streamlined and easy, use intelligent chart recognition. For detailed instructions on setting up a chart and intelligent chart recognition, watch the video above.
Bad Grid CheckThe grid lines do NOT match the chart.
If needed, you can manually set up a chart. The following steps will walk you through this process.
Step1: Cropping to the edge
Crop all the way to the edges of the chart at its widest/tallest part. Be sure to remove any row and stitch numbers the designer may have put in. Show Me
Step 2: Visible rows
How many rows are VISIBLE on the chart? Charts are really graph paper. Count the boxes vertically up the chart, each box is a row. Show Me
Remember, if wrong side rows are not charted, they are not visible. Only count the rows you can see. For example, if the chart counts 1, 3, 5…15, it has 8 visible rows.
Still having issues? Check the bottom row number. Some charts do not begin with row 1. If the chart does not begin on row 1, adjust your visible row count accordingly. When in doubt, manually count boxes, sometimes the numbers are wrong. **
Step 3: Stitches
How many stitches are there from the right to left edges of the crop? Charts are really graph paper. Count the boxes horizontally across the width of the chart. If there are “no stitch here” spots, count those as stitches since even though you do not have a stitch on your needle, it is taking up an actual spot in the width of your chart. In the same vein, if your chart has repeat sections, they only count once even if you have more stitches on your needles. Show Me
Step 4: First Row and Count By
You can enter the row number that the chart starts on and what it increments by. Enter the number shown as the starting row of the chart. Count By indicates how the rows increment. For example, if the chart counts 1, 2, 3 (count by is 1). If the chart counts 1, 3, 5 (count by is 2).
Step 5: Check the Grid
You can check the results of your work using Check Grid. This will overlay a colored grid-line on your chart. The grid lines should match your chart’s grid lines (zoom in for a good look!). If they don’t, be sure to recheck your edges and your Visible Rows and Stitches. Show Me
The default grid color is yellow. If you have a hard time seeing it, you can change the grid color in Settings. Show Me
** A note on arithmetic: If your bottom row is not 1 and you decide to subtract the top row from the bottom, BE SURE TO ADD 1. The count of rows is the difference between top and bottom row PLUS ONE. if you need to prove this to yourself, consider a chart with a bottom row of 1 and top row of 10. 10-1=9. So be sure to add one to the difference!
You can flag pages of the PDF in your project. Flagged pages will show a flag when you view the PDF and when picking a page to setup a piece or other activities.
Is the information you need on different pages? Would you like to reorganize the information in the pattern? Use Join to join new parts to an existing piece.
Tap Add New Part or Add Template (templates are for pieces only). Show Me
Select the PDF page that has the information you want to join to the existing piece and tap Next.
Crop the information you want to join by dragging diagonally over the part you would like to crop. You can adjust your crop by dragging the crop lines.
Tap Clear if you want to start your crop again. Show Me
If you are adding for a chart, enter the number of rows and stitches for your new part. Use Grid Check to check your work and make any adjustments. Learn more
To align the existing piece correctly with the join piece, tap Align.
The new part is shown with a border so you can easily identify what you are joining. To reposition the new part, drag it into proper position.
Zoom and scroll to check your work. If you need to make a change to your crop, tap Crop at the top. To back out of Join without saving, tap the (x) upper left.
Once you have everything aligned the way you like, tap Save. Don’t see Save? You must be in Align in order to save.
Important! Be sure your work is correct before tapping Save. You can change your new part by tapping Edit at the top or exit join without saving by tapping back upper left.
When you setup your chart, it is important to ensure the grid from your setup matches the grid of the chart. The purpose is to ensure all chart tools (one tap marker, magic markers, voice control, reminders, etc) are optimal.
Bad Grid CheckThe grid lines do NOT match the chart.
Good Grid CheckThe grid lines match the chart.
Manual Setup
If the wand is unable to detect your chart, you can do the setup manually. In this case the wand isn’t used. The following steps walk you through this process.
Step1: Cropping to the edge
Crop all the way to the edges of the chart at its widest/tallest part. Be sure to remove any row and stitch numbers the designer may have put in. Show Me
Step 2: Visible rows
How many rows are VISIBLE on the chart? Charts are really graph paper. Count the boxes vertically up the chart, each box is a row. Show Me
Remember, if wrong side rows are not charted, they are not visible. Only count the rows you can see. For example, if the chart counts 1, 3, 5…15, it has 8 visible rows.
Still having issues? Check the bottom row number. Some charts do not begin with row 1. If the chart does not begin on row 1, adjust your visible row count accordingly. When in doubt, manually count boxes, sometimes the numbers are wrong. **
Step 3: Stitches
How many stitches are there from the right to left edges of the crop? Charts are really graph paper. Count the boxes horizontally across the width of the chart. If there are “no stitch here” spots, count those as stitches since even though you do not have a stitch on your needle, it is taking up an actual spot in the width of your chart. In the same vein, if your chart has repeat sections, they only count once even if you have more stitches on your needles. Show Me
Step 4: First Row and Count By
You can enter the row number that the chart starts on and what it increments by. Enter the number shown as the starting row of the chart. Count By indicates how the rows increment. For example, if the chart counts 1, 2, 3 (count by is 1). If the chart counts 1, 3, 5 (count by is 2).
Step 5: Check the Grid
You can check the results of your work using Check Grid. This will overlay a colored grid-line on your chart. The grid lines should match your chart’s grid lines (zoom in for a good look!). If they don’t, be sure to recheck your edges and your Visible Rows and Stitches. Show Me
The default grid color is yellow. If you have a hard time seeing it, you can change the grid color in Settings. Show Me
** A note on arithmetic: If your bottom row is not 1 and you decide to subtract the top row from the bottom, BE SURE TO ADD 1. The count of rows is the difference between top and bottom row PLUS ONE. if you need to prove this to yourself, consider a chart with a bottom row of 1 and top row of 10. 10-1=9. So be sure to add one to the difference!
Reminders are additional information you would like to appear as you move your one tap marker. They can be used for anything, including the option to see the written and charted instructions for each row at the same time. Show Me
Add Reminders
You can add reminders to any piece, written or charted, that has a one-tap marker.
Tap each row you would like to copy the currently selected reminder to.
A great example of this is when all WS rows use the same instruction. Create the WS row for Row 2 and then copy Row 2 to all remaining WS rows.
These steps cover the basic steps to crop. For more detailed instructions on setting up a Key, Written Instructions, or Chart, watch the videos above. If you are cropping a chart the app has Intelligent Chart Recognition, please use Cropping Chart.
Select Text Piece, Chart Piece, Key, Text Template, or Chart Template. Show Me
Select the PDF page you want to use and tap Next.
To orient your piece, use the Rotate and Mirror buttons at the bottom left as needed. If you do not see them next to crop, be sure to toggle crop back on.Show Me
Crop your piece by dragging diagonally over the part you would like to crop. You can adjust your crop by dragging the crop lines, and make small adjustments by tapping just to either side of the lines. Show Me Tap Clear if you want to start your crop again.
When finished cropping, tap the Crop button to see the result. Your new crop shows at the top. To change your crop, tap the Crop button again.
Be sure to enter the first row and set count by. If your chart counts 1, 2, 3 then leave count by as 1. If you chart counts 1, 3, 5, then set count by to 2.
The wand automatically turns grid check on. Zoom in on the chart and ensure the system correctly found the edges of the chart and that the grid overlay matches the actual chart.
If you have too MANY rows or stitches, slide to Less and tap the Wand again.
If you have too FEW rows or stitches or if part of the chart is cropped off, slide to More and tap the Wand again.
If your chart is especially tricky or is a scan that is skewed (not straight on the page), you can manually crop the edges and count your rows and stitches.
Bad Grid CheckThe grid lines do NOT match the chart.
Good Grid CheckThe grid lines match the chart.
The default grid color is yellow. If you have a hard time seeing it, you can change the Check Grid color in Settings. Show Me
Follow the General Cropping Steps to create your Text Piece.
Enter the number of visible rows for your piece. Your entry doesn’t have to be exact, you can add or remove rows if needed.
Starting at the top, adjust the height of the first row.
Tap the next row and adjust as needed.
Continue down the piece adjusting as needed.
If you need to add or remove rows, tap the + or - button. This will add or remove a single row at the bottom, without affecting the rest of your row alignments.
if your piece counts 1,3,5, be sure to set count by to 2. Note: if your piece shows 1,2,3,5,7… you can include row 1-2 in the first row and set count by to 2. Optionally you can add reminders for the “between” row instructions. See here.
If you have an existing piece you can adjust it. From Setup, select your piece at the top and tap the crop button to use the wand or adjust the crop. Show Me
You may be asked to reset your progress, clear markers, or scribbles in order to adjust your crop. Confirm to proceed.
Templates are very useful in helping to assemble complex pieces. Reusable building blocks are created for quick assembly with minimal cropping. Templates work for chart or text pieces.
For example, a sweater pattern we are working has two separate charts.
Border Chart: The first chart is a border seed stitch chart. Show Me
Cable Chart: The other is a center cable chart. Show Me
We are instructed to repeat the border seed stitch chart up both sides of the center cable chart. Therefore, as you work across a row, you work the charts in this order: Seed Stitch chart, Cable chart, Seed Stitch chart.
Rather than cropping the Seed Stitch chart many times, we can create a template of this chart once and then use it to rapidly assemble our complete motif.
Tap the Wand. Show Me Be sure to set the first row and count by information. Zoom in on the chart and ensure the system correctly found the edges of the chart and that the grid overlay matches the actual chart.
Next, we will make a template of the Seed Stitch Chart.
Make the most of your small screen devices and split screen with these tips.
Because of the smaller width of the phone screen or when using slide over and split screen, use the Mode button to switch between Knit, Edit, and Setup. Show Me
Toggle top and bottom areas, as well as the top toolbar, using the toggles at the top right. Show Me
Adjust the size of the bottom area to perfectly divide your screen for the content you are working with.
Use portrait or landscape based on your current task and what best fits your content. For example tall and narrow instructions such as a tall chart or column of written instructions will fit best in portrait. A wider chart or full page width written instructions will fit better in landscape.
In some cases controls in the bottom area will scroll side to side when in portrait. You can switch to landscape to see more controls at once.
Use cropping so you are able to have only the instructions you need on screen. This will reduce clutter and help use your screen space more efficiently.
Use kC’s unique tools for working with large format instructions such as double tap zones and auto row resets. Learn more
When using Intelligent Chart Recognition, the wand can be adjusted to find “more” or “less”. By default the wand is in the center position, which is tuned to be the best setting for most charts. Show Me
Some charts will have grid lines that don’t “connect”, leaving small gaps in the grid lines Show Me. Sliding to more and then tapping the wand again can help the wand jump those gaps to properly count rows and stitches.
Some charts will have symbols that connect across a grid line, inadvertently creating “extra” rows or stitches Show Me. Sliding to less and then tapping the wand again can help the wand detect these small gaps to properly count rows and stitches. Note that if there is no gap at all, the wand may still mis-count.
You should always check the results of the wand, and can manually adjust the crop edges, row count, and stitch count to ensure the grid aligns.
Bad Grid CheckThe grid lines do NOT match the chart.
When cropping a chart, the wand will always find the edge of the chart. Sometimes you might want to keep additional things from outside the chart edge. This might include extra annotations or numbers. To do this:
Add a one-tap marker so you can follow pattern instructions step-by-step, with voice commands (apple), reminders, and smart counters for each row. Show Me
A one-tap marker can be added to text and chart pieces on any pattern. Move the marker by tapping it or using voice commands (apple).
Never miss a step! When you have one or more shaping steps to do on a row, knitCompanion will prompt you to check them off before you proceed to the next row. This ensures you won’t miss a critical step such as shaping, color changes, and other “at the same time” instructions.
To check off a step, tap the check in the shaping list. Show Me
Voice Commands (Apple only)
You can use Voice Commands to clear shaping steps. Each time you say Clear the system will clear the step at the top of the list just as if you manually checked off the step.
Sometimes a chart will be wider than your device screen. knitCompanion provides a variety of tools so you can easily keep track, even when scrolling side-to-side for a wide piece. The row marker will always stay on the current row as you zoom and scroll.
The following additional tools are helpful for navigation and tracking your progress along a row.
Double-Tap Areas
Center: Double-tap in the center to toggle between fit-width and fit-height.
Edges: Double-tap on the edge (left, right) to scroll directly to that edge of the piece.
Stitch Markers
Sliding Stitch Marker: Use this to keep track of your spot along a row as you knit across. Very handy for knowing the last stitch you worked when scrolling side-to-side.
Stitch Markers: Use these to mark convenient spots along the width of your chart. Then you can knit to a Stitch Marker, slide to the next stitch marker, knit to it. Repeat as needed across the width of your chart. Add Stitch Markers
Row Reset Style
When knitting in the round or when wrong side rows are not charted, the Row Reset Style and Reset Slider options will automatically scroll back to the starting edge of the chart. Show Me
None: This is the default setting. When you advance the row marker, the chart will stay in the same position and will not shift left or right. This is most useful when all rows are charted.
Right: This will scroll your wide chart back to the right edge ready to start the next row. Very handy for knitting in the round or when wrong side rows are not charted.
Left: This will scroll your wide piece back to the left edge. Very handy for wide text pieces and some styles of left hand knitting.
Reset Slider: This will shift your sliding marker based on your Row Reset Style so it is ready for the next row.
Voice Commands (Apple only)
You can use Voice Commands to slide your piece side-to-side without putting your knitting down. Each slide will be slightly less than one screen width. Pro Tip: Add Stitch Markers spaced so you can see one on both right and left edges as described above.
Right: Drags piece to the right (no effect if the left edge already showing)
Left: Drags piece to the left (no effect if the right edge already showing)
With the one-tap marker you can move to the next row with a single tap or voice command (Apple). It will also track your total rows and repeats. Show Me
You can add a one-tap marker to any pattern using Setup. Setup a one-tap marker. The one-tap marker is also included in kCDesigns. There are over 1500 kCDesigns available at shop.knitCompanion.com and they can be used on Apple, Android, and Kindle.
The top number is the current row of the piece. The bottom number is the total rows knit for the piece. The total rows will be higher than the current row if you repeat the piece or repeat rows in the piece.
If you are working a row repeat, your repeat progress will be shown above the one-tap marker.
Long-tap the one-tap marker to Frog, Reset, and see more details about your progress including piece repeats and row repeat progress. Show Me
If your current row has a shaping reminder, tap the check to clear it in order to advance to the next row. Show Me
On Apple devices, knitCompanion’s one-tap marker includes a hands-free option. This allows you to use voice commands to move your one tap marker. You can move the one-tap marker to the next row or previous row. You can also clear the shaping steps on a row without having to tap the screen.
The microphone button will change color based on the current status of Voice Control.
OFF
ON
DISABLED*
*There are two conditions that will cause the button to be disabled:
You are not running iOS 12 or higher.
You have turned Voice Control off in Settings. Show Me
Tips for Best Performance
Use a Headset. If you chose to not use a headset the system may not work as well. Be sure you are in a quiet room with your device very close by. Also make sure nothing is blocking the microphone on your device (this includes a case, stand, or even small crumbs). Ambient sounds, blocked ports, and more distance from your device impacts the ability of the system to hear you.
Siri Train. Siri can learn to understand your voice better, so it can understand your commands right on your local device without using Apple servers. Instructions to train Siri found here.
Strong Internet. Sometimes Siri needs the extra power of Apple’s servers. A strong internet connection will speed up communication.
Drags piece right (no effect if the left edge is already showing)
LEFT *
Drags piece left (no effect if the right edge is already showing)
CLEAR
Clears any shaping steps for the current row (if you have no shaping steps nothing will happen)
OK
Closes a popup (i.e., for voice control on, clear steps, or top of piece)
STOP
Turns off Voice Control
* Swap Left and Right commands in Settings if you prefer to say what you want to see rather than the direction you would drag. Pro Tip: Add Stitch Markers spaced so you can see one on both right and left edges as you shift across a wide chart. For more about our tools for working with large Charts see here.
Voice Control is turned off automatically when you leave Knit Mode, leave your project, or leave the app.
There are two options for Voice Control in Settings. Show Me
Disable Voice Control.When Voice Control is disabled the button is grey and tapping the microphone will not turn Voice Control on.
Swap actions for the Left/Right Voice commands.
In order to use Voice Control, you must grant knitCompanion access to your microphone and to Apple’s Speech Recognition system. These settings are found in your device’s Settings app under privacy.
You must have an internet connection and either Siri or Dictation (General/Keyboard) turned on.
System Requirements
iPad/iPhone: iOS or iPadOS 12 or higher
Mac
MacBook Pro or Air 2018 or later
iMac Pro
iMac 2020 or later
Some earlier Macs will also work if using AirPods with Siri support.
With Magic Markers you can find, color, and count the stitches in your chart. No need to hunt for all the k2tog stitches. Instead, select a sample stitch, tap the wand, and Magic Marker finds the rest.
Color Code Stitches. Want your ssk blue and your k2tog green? Or, would you like to make all 2x2 left cables blue and 2x2 right cables red? Magic Markers can do this!
Count Stitches. Are there long stretches of knits or purls between "action"? Magic Markers can count how many stitches there are in a long stretch and automatically display the count. No more counting!
Change Colorwork Colors. Make your colorwork chart match your chosen knitting colors. Find each color (or symbol in place of color) and apply your own color choice.
Tap the sample stitch. The best sample will generally be placed in the center area of the chart rather than at the edges. Show Me What about cable stitches? Learn more.
Tap the Wand and it will find all the matches. Show Me
Name: Name the stitch.
Wand Sensitivity: You can adjust the wand sensitivity. Learn more.
Color Search: You can set the wand to search based on color or grey. Learn more.
Search Rows: You can search all rows, only odd rows, or only even rows. Learn more.
Manually Trim: You can manually trim the search results by tapping. Learn more.
Count: Once the correct stitches are found, Magic Markers can count long runs of stitches in the chart. Learn more.
Color and Transparency: Once the correct stitches are found, set the color and transparency.
Custom Markers Watch Tutorial
Similar to Magic Markers but without the wand, these are useful for marking specific stitches. Examples include marking bead placement or errata, and counting longer runs of non-matching stitches.
When you setup your chart, it is important to ensure the grid from your setup matches the grid of the chart. The purpose is to ensure all chart tools (one tap marker, magic markers, voice control, reminders, etc) are optimal.
To make the setup streamlined and easy, use intelligent chart recognition. For detailed instructions on setting up a chart and intelligent chart recognition, watch the video above.
Bad Grid CheckThe grid lines do NOT match the chart.
If needed, you can manually set up a chart. The following steps will walk you through this process.
Step1: Cropping to the edge
Crop all the way to the edges of the chart at its widest/tallest part. Be sure to remove any row and stitch numbers the designer may have put in. Show Me
Step 2: Visible rows
How many rows are VISIBLE on the chart? Charts are really graph paper. Count the boxes vertically up the chart, each box is a row. Show Me
Remember, if wrong side rows are not charted, they are not visible. Only count the rows you can see. For example, if the chart counts 1, 3, 5…15, it has 8 visible rows.
Still having issues? Check the bottom row number. Some charts do not begin with row 1. If the chart does not begin on row 1, adjust your visible row count accordingly. When in doubt, manually count boxes, sometimes the numbers are wrong. **
Step 3: Stitches
How many stitches are there from the right to left edges of the crop? Charts are really graph paper. Count the boxes horizontally across the width of the chart. If there are “no stitch here” spots, count those as stitches since even though you do not have a stitch on your needle, it is taking up an actual spot in the width of your chart. In the same vein, if your chart has repeat sections, they only count once even if you have more stitches on your needles. Show Me
Step 4: First Row and Count By
You can enter the row number that the chart starts on and what it increments by. Enter the number shown as the starting row of the chart. Count By indicates how the rows increment. For example, if the chart counts 1, 2, 3 (count by is 1). If the chart counts 1, 3, 5 (count by is 2).
Step 5: Check the Grid
You can check the results of your work using Check Grid. This will overlay a colored grid-line on your chart. The grid lines should match your chart’s grid lines (zoom in for a good look!). If they don’t, be sure to recheck your edges and your Visible Rows and Stitches. Show Me
The default grid color is yellow. If you have a hard time seeing it, you can change the grid color in Settings. Show Me
** A note on arithmetic: If your bottom row is not 1 and you decide to subtract the top row from the bottom, BE SURE TO ADD 1. The count of rows is the difference between top and bottom row PLUS ONE. if you need to prove this to yourself, consider a chart with a bottom row of 1 and top row of 10. 10-1=9. So be sure to add one to the difference!
If your chart is a colorwork or grayscale chart, Magic Markers can see the color differences.
You can make the magic wand sensitive to color, greyscale, or to even ignore color by using the BW / Color / Gray options. Show Me
B/W: If you leave the wand at B/W (black and white) it will ignore color on your chart and find all matches to your sample no matter the color. This is the default setting and works well for most charts that are not colorwork.
Color or Gray: If you select COLOR or GRAY (next to the wand) and then tap the wand, it will find the shade of gray or color you picked as your sample.
Important! Tap the wand after making this adjustment.
Tip: Once you have each marker set as desired, use the Show All option to see all markers together, allowing you to visualize and experiment with different color choices.
Magic Markers are pretty smart, but computers are not always as smart as our human brain! To adjust the selection yourself, tap on a stitch to toggle it on or off.
You can manually trim the search results by tapping a stitch to toggle it ON or OFF.
Toggle it ON to include it in the search results.
Toggle it OFF to exclude it from the search results.
Manually trimming stitches also adjusts the counts. Note that tapping the wand after will clear your manually selection so be sure to adjust more/less and other wand settings first.
Magic Markers can search all rows, only odd rows, or only even rows. Show Me
This is helpful with flat knitting when wrong side rows have symbols that need to be worked differently when they are on the right side. Tip: Apply color to help you remember how to work stitches when they are on the wrong side.
Once you are sure your setup is correct, you can adjust the sensitivity of the wand, and trim the final selected stitches. This is why Magic Markers can work on so many different charts. If your chart isn’t perfect, picking a sample stitch from the center rather than an edge will work best.
You can change how Magic Markers search. Magic Markers are designed to work with lots of different charts, even paper scans. If you have a lower quality chart or if the chart symbols are very similar to each other, you may want to ask Magic Markers to find more or less matching sts.
1. More/ Less Slider
You can adjust the wand sensitivity using the more/less slider. Show Me
Slide to MORE if you want the wand to find morematching stitches, because it is not finding them all.
Slide to LESS if you want it to be more selective and find fewermatching stitches.
Important! Tap the wand after making this adjustment.
2. Handle Color and Greyscale Stitches
If your chart is a colorwork or grayscale chart, Magic Markers can see the color differences. This means you can find sts based on color and shades of gray when you tap the wand.
You can make the magic wand sensitive to color, greyscale, or to even ignore color by using the BW / Color / Gray options. Show Me
B/W: If you leave the wand at B/W (black and white) it will ignore color on your chart and find all matches to your sample no matter the color. This is the default setting and works well for most charts that are not colorwork.
Color or Gray: If you select COLOR or GRAY (next to the wand) and then tap the wand, it will find the shade of gray or color you picked as your sample.
Important! Tap the wand after making this adjustment.
3. Trim Selection
Magic Markers are pretty smart, but computers are not always as smart as our human brain! To adjust the selection yourself, tap on a stitch to toggle it on or off.
You can manually trim the search results by tapping a stitch to toggle it ON or OFF. Manually trimming stitches also adjusts the counts.
Toggle it ON to include it in the search results.
Toggle it OFF to exclude it from the search results.
Important! Tapping the wand after will clear your manually selection so be sure to adjust more/less and other wand settings first.
With Magic Markers you can find, color, and count the stitches in your chart. No need to hunt for all the k2tog stitches. Instead, select a sample stitch, tap the wand, and Magic Marker finds the rest.
Color Code Stitches. Want your ssk blue and your k2tog green? Or, would you like to make all 2×2 left cables blue and 2×2 right cables red? Magic Markers can do this!
Count Stitches. Are there long stretches of knits or purls between “action”? Magic Markers can count how many stitches there are in a long stretch and automatically display the count. No more counting!
Change Colorwork Colors. Make your colorwork chart match your chosen knitting colors. Find each color (or symbol in place of color) and apply your own color choice.
Or Use a kCDesign (all the setup is done so you can just knit). There are over 1500 kcdesigns available from over 100 designers. And our shop is linked to Ravelry so there is no need to repurchase the pattern.
Would you like to view the description for a stitch symbol while knitting? You can! This feature can be used in various ways, such as quickly referencing the steps to create a specific type of stitch. Another example is to provide specific instructions to indicate which type of bead to use in a multi-bead project. Show Me
When using a Named Color (About Named Colors) for a Magic or Custom Marker and the Named Color has a description; you can see the description for a stitch by tapping on the stitch. Enter the stitch definition or steps in the description field so you can see them while knitting. Show Me
Named Colors are project specific. You can name a color and give it a description.
Each project has its own Named Colors. These project-level Named Colors are included in your project just like all your other settings, notes, progress, etc.
From the Color Picker, tap Name at the bottom. Show Me On some screen configurations you may need to scroll down.
Set the Color, Saturation, Brightness, and Opacity. Show Me
Enter a Name and Description in the fields at the top. The Description field is optional. To enter a multi-line description, see Edit > Named Colors. About Named Color Descriptions. Pro Tip: Toggle back to view recent colors by tapping Recent at the bottom.
Tap Select at the bottom. The current color is saved as a Named Color in your project. Show Me
Tap the 3 dots at the upper right and select Make New Color. Show Me
Set the Color, Saturation, Brightness, and Opacity. Show Me A sample of your color appears in the center of the Color Wheel.
Enter a Name and Description in the fields at the top. The Description field is optional and may contain multiple lines to help differentiate steps. About Named Color Descriptions.
Tap Save. The current color is saved as a Named Color in your project. Show Me
Tap Save. Changes to Named Colors will be reflected across your project. For example, if you change the k2tog color from red to purple, all the places that k2tog is used within the project will show the new purple color.
Tap Delete. Once a Named Color is deleted, the name and description are no longer associated with the color. However, the color is still in place within your project.
Within knitCompanion, there are numerous areas where you can apply color. For example, your preferred highlight color, row marker color, or colors you are using in a chart.
To apply color, use the Color Picker, which provides unlimited color choices. Show Me
Use the Color Picker to:
Select a recently used color.
Use the Color Wheel to select a color and set its Saturation, Brightness, and Opacity.
When you make additional color selections, both the new and existing colors are displayed in the center of the Color Wheel for comparison. The new color is shown on the right. Show Me
To apply the new color (the color shown on the right), tap Select. The new color is applied and added to Recent Colors at the top. The Color Picker closes.
To apply the old color (the color shown on the left), tap Cancel and choose the color again.
System Colors can be used across multiple projects. System Colors are Named Colors that are stored outside of a specific project so you can use them across all your projects. This enables efficient management of colors across multiple projects.
If you add a System Color to your project, it becomes a Named Color within your project.
If you change or delete the System Color, it does NOT impact the project’s Named Color.
If you change the Named Color within your project, it will NOT impact the System Color.
Tap the 3 dots at the upper right and select Make New Color. Show Me
Set the Color, Saturation, Brightness, and Opacity. Show Me A sample of your color appears in the center of the Color Wheel.
Enter a Name and Description in the fields at the top. The description can be multiple lines and is optional. Pro Tip: To enter a multi-line description for your color go to Named Color Descriptions.
Tap Save. The current color is saved as a System Color.Show Me
Tap the 3 dots at the upper right and select Save to System.Show Me
Select a Category to add your Named Color. For example, the Destination Category selected below is Lace. All Named Colors you select will be added to the Lace category. Show Me
Tap each Named Color you wish to include in the chosen category. Multiple colors can be selected.
Tap Save. The current color is saved as a system color.
Open the Color Picker and tap System Color at the top.
Optionally, select the appropriate category.
Tap the desired System Color. The System Color is added to your project and is now a Named Color in your project.
If you add a System Color to your project, it becomes a Named Color within your project.
If you change a System Color, it does NOT impact the project’s Named Color.
If you change a Named Color within your project, it will NOT impact the System Color.
IMPORTANT!
Once a System Color is used in a project, there is not a link between the System Color and Project/Named Color.
Changing a System Color does not impact the Project/Named Color and vice versa.
This means you can alter the System Color without worrying about how it will affect projects, and you can alter the Named Color in your project without worrying about how it affects the System or other projects.
System Colors can be synced between devices using iCloud, Dropbox, email, any cloud, Airdrop/Nearby Share, Google Drive, etc.
If you are using iCloud to sync your projects, System Colors will also be kept in sync across devices (note that iCloud is great for sync but it is not a backup).
Pro Tip: If you have created a large collection of System Colors, be sure to back up your System Colors in a safe place.
To backup or sync your System Colors using a method other than iCloud:
From the Home Page, tap Settings on the right. Show Me
To export/share from your current device, tap the 3 dots at the upper right and select Export to Dropbox or Share.Show Me
To import/receive onto another device, use your device's built in share or select Import from Dropbox from the menu in step 3.
STRONGLY RECOMMENDED:
Keep a backup of your System Colors file. That way if you have created a more extensive list of colors across many categories you always have a safe copy.
We recommend using Dropbox for this, as Dropbox also automatically keeps a 30 day history of any changes you make to the file.
File Name
System Colors are stored in a file named SystemColors.kccol.
System Colors can be categorized. For example, you may want to create categories for Lace, Cablework, Brioche, etc. This makes it easier to manage a larger number of colors, across many categories of crafting.
Managing Categories
From the Home Page, tap Settings on the right. Show Me
Smart Counters provide a way to keep track of repeats and additional instructions, such as shaping, while you are knitting from written or charted instructions. To use Smart Counters, the piece must have a one-tap marker.
If your fabric is simple such as garter or stockinette it may not have a one-tap marker. In this case Linked Counters are a better fit.
Smart Counters are best for patterns where the fabric pattern rows are written or charted. The fabric might be lace, cables, texture, color work, etc.
If you do not see the Smart Counter button be sure your selected piece has at least one visible row so there is a one-tap marker.
Set the basic information about your piece, including how many times to repeat the entire piece. You can also specify if you are knitting flat or in the round and the direction of the first row.
Tap the Blue+ on the right side and select Row Repeat. Show Me
Select the row or rows to be repeated by dragging the highlight to cover the rows you want to repeat.
For written instructions always add repeats from the top down.
For charted instructions always add repeats from the bottom up.
The From and To Row at the bottom is automatically updated based on your selection.
Set the number of times you would like to repeat the selected rows.
Name the repeat and optionally adjust the color and transparency by tapping the Color button.
If you do not see the Smart Counter button be sure your selected piece has at least one visible row so there is a one-tap marker.
Set the basic information about your piece, including how many times to repeat the entire piece. You can also specify if you are knitting flat or in the round and the direction of the first row.
Tap the Blue+ on the right side and select Shaping Counter. Show Me
Tap your new Shaping Counter at the bottom left and set its information. Show Me
Name the Shaping Counter, for example Waist Shaping or Place Buttonhole.
Set the color and transparency.
Specify whether this counter should start on a specific row or choose Manual if this counter should start at a specific distance (for example, 4″ from the cast on edge).
Every Shaping Counter has at least one Step. The Step is where the instructions will go. To see a counter’s steps tap the arrow. Show Me
Tap the Step inside the Shaping Counter to edit its information. Show Me
Let’s use this example: The pattern says to place a button hole every 10 rows 9 times.
Name the step. Example: Place Button Hole.
Set how often it should appear. Example: Every 10 rows.
Define how many times it happens. Example: 9 times.
Use Until if you want the step to continue until you manually stop it.
Your step can have an audio reminder. Tap the Audio button to record the reminder.
Tap the Text button to type the step’s instructions or tap Piece to crop the instructions directly from the PDF.
Every shaping counter can have as many steps as needed.
Steps within a Shaping Counter happen in order. The first step finishes before the next step starts. The Shaping Counter is complete once all its steps are complete.
To add a new step, select the Shaping Counter or one of its steps and tap the Blue + at the bottom. Show Me
To copy a step, select the step you want to copy and tap the Copy button at the bottom. All information for the step is copied: Name, How Often, How Many, Audio, and the Instruction. Show Me
To delete a step, select the step you want to delete and tap the Trash button at the bottom. Show Me
To re-order steps within a Shaping Counter, drag the step using the grey handles to the right of its name. Show Me
To leave the Step Details tap the arrow to return. Show Me
You can define as many Shaping Counters as needed.
Shaping Counters work in parallel. In other words, instructions that happen “at the same time“.
In our example, we need to shape the waist “at the same time” as we place decrease for the waist. Therefore, we need two Shaping Counters.
Tap the arrow upper left to return to main setup.
Steps within a Shaping Counter happen in order. The first step finishes before the second step starts. The Shaping Counter is complete once all its steps are complete.
Never miss a step! When you have one or more shaping steps to do on a row, knitCompanion will prompt you to check them off before you proceed to the next row. This ensures you won’t miss a critical step such as shaping, color changes, and other “at the same time” instructions.
To check off a step, tap the check in the shaping list. Show Me
Voice Commands (Apple only)
You can use Voice Commands to clear shaping steps. Each time you say Clear the system will clear the step at the top of the list just as if you manually checked off the step.
By default knitCompanion allows you to repeat your piece. When you get to the last row and tap the one-tap marker, it returns you to the first row of the piece to begin the next repeat. It keeps track of:
the number of times you have repeated the piece.
the total rows knit for the piece.
To view your progress on a piece, long tap the one-tap marker. Show Me
You can set a limit to stop after a specific number of repeats. Use this when you know exactly how many times you want to repeat the piece and want knitCompanion to stop you from advancing beyond that fixed number. For example, the pattern says to repeat a chart a total of 3 times. Set the Piece Repeat Limit to 3. Then when you get to the last row of the 3rd repeat, knitCompanion will let you know you are finished.
Smart Counters provide a way to keep track of repeats and additional instructions, such as shaping, while you are knitting from written or charted instructions. To use Smart Counters, the piece must have a one-tap marker.
If your fabric is simple such as garter or stockinette it may not have a one-tap marker. In this case Linked Counters are a better fit.
Smart Counters are best for patterns where the fabric pattern rows are written or charted. The fabric might be lace, cables, texture, color work, etc.
Used to keep track of additional instructions such as shaping, placing buttonholes, changing yarn colors, etc. Show Me
Use shaping counters to get reminders of instructions as you move the one-tap marker.
For example, the pattern says to begin waist shaping on row 5 and begin placing buttonholes on row 7.
As we work through the pattern and tap the on-tap marker after completing each row, the waist shaping instruction will display when we reach row 5 (Show Me
) and the first buttonhole instruction will display when we reach row 7 (Show Me
).
Select any reminder in the list to see its detail.
To view your progress, select the shaping counter. Show Me
When you have completed the reminder, check it off before moving to the next row. If there are multiple reminders on a row, all must be checked off before you can move to the next row.
The Fabric Pattern is the stitch pattern being used to create the fabric of your knitting. The Fabric Pattern can be very simple or very complex.
Simple: An example of a simple Fabric Pattern is garter stitch or stockinette stitch.
The instructions may state: Continue in Stockinette for 5 rows. Show Me
Complex: An example of a complex Fabric Pattern is a pattern described in charted or written instructions.
The instructions may state: k4, p, yo, k2sp, yo, p, k4. Show Me
Linked Counters are designed for simple fabric patterns that are not written out and do not have a one-tap marker. Linked Counters track repeats and actions as you knit each row. Show Me
Smart Counters are designed for either simple or complex patterns that do have a one-tap marker. Fabric patterns can be written or charted, and the one tap is always setup for the fabric pattern. The one-tap marker keeps your spot in the fabric pattern and Smart Counters add reminders for shaping, color changes, repeats, etc. as you knit each row. Show Me
knitCompanion can be used with all your cross stitch patterns. It does not require a special file format or a specially created PDF. You can mark done stitches, mark where you parked a thread, and find and color the different symbols. You can also combine your pattern together into one large chart. Watch the Cross Stitch Tutorials Part 1 and Part 2 below to learn how.
knitCompanion for Cross Stitch Part 1
Learn how to use knitCompanion Edit Tools for tracking done and parked stitches, as well as finding and coloring based on symbols.
knitCompanion for Cross Stitch Part 2
Learn how to use knitCompanion Setup Tools to rapidly assemble your cross stitch chart. knitCompanion will work with any PDF and does not require a special type of file or specific format of PDF.
knitCompanion can be used to keep track as you work your weaving draft while you thread your loom and during weaving to track treadling.
Keep it Simple with Sliders
Use sliders and counters in knitCompanion to keep track as you work your weaving draft. Using these tools will get you up and running quickly and does not require any setup. How to make a PDF from your Weaving Draft.
Add a one-tap marker so you can keep track of treadling with a single tap or hands free using the Setup tools. It is a little extra upfront work to do the setup, but once done it simplifies advancing your progress and tracking repeats to a single tap or totally hands free with voice control.
When you setup your chart, it is important to ensure the grid from your setup matches the grid of the chart. The purpose is to ensure all chart tools (one tap marker, magic markers, voice control, reminders, etc) are optimal.
To make the setup streamlined and easy, use intelligent chart recognition. For detailed instructions on setting up a chart and intelligent chart recognition, watch the video above.
Bad Grid CheckThe grid lines do NOT match the chart.
If needed, you can manually set up a chart. The following steps will walk you through this process.
Step1: Cropping to the edge
Crop all the way to the edges of the chart at its widest/tallest part. Be sure to remove any row and stitch numbers the designer may have put in. Show Me
Step 2: Visible rows
How many rows are VISIBLE on the chart? Charts are really graph paper. Count the boxes vertically up the chart, each box is a row. Show Me
Remember, if wrong side rows are not charted, they are not visible. Only count the rows you can see. For example, if the chart counts 1, 3, 5…15, it has 8 visible rows.
Still having issues? Check the bottom row number. Some charts do not begin with row 1. If the chart does not begin on row 1, adjust your visible row count accordingly. When in doubt, manually count boxes, sometimes the numbers are wrong. **
Step 3: Stitches
How many stitches are there from the right to left edges of the crop? Charts are really graph paper. Count the boxes horizontally across the width of the chart. If there are “no stitch here” spots, count those as stitches since even though you do not have a stitch on your needle, it is taking up an actual spot in the width of your chart. In the same vein, if your chart has repeat sections, they only count once even if you have more stitches on your needles. Show Me
Step 4: First Row and Count By
You can enter the row number that the chart starts on and what it increments by. Enter the number shown as the starting row of the chart. Count By indicates how the rows increment. For example, if the chart counts 1, 2, 3 (count by is 1). If the chart counts 1, 3, 5 (count by is 2).
Step 5: Check the Grid
You can check the results of your work using Check Grid. This will overlay a colored grid-line on your chart. The grid lines should match your chart’s grid lines (zoom in for a good look!). If they don’t, be sure to recheck your edges and your Visible Rows and Stitches. Show Me
The default grid color is yellow. If you have a hard time seeing it, you can change the grid color in Settings. Show Me
** A note on arithmetic: If your bottom row is not 1 and you decide to subtract the top row from the bottom, BE SURE TO ADD 1. The count of rows is the difference between top and bottom row PLUS ONE. if you need to prove this to yourself, consider a chart with a bottom row of 1 and top row of 10. 10-1=9. So be sure to add one to the difference!
If you are making a project or cropping a piece and the app closes, the PDF pages are blank, or text is missing/funny looking after you make a project, you have hit a snag with the PDF system. The most important thing is to make sure you are updated to the OS and knitCompanion. If you still experience an issue after creating a new project after making sure both your device and knitCompanion are the latest version, there is an easy fix.
On a PC, use Adobe Reader and a free PDF print driver such as PrimoPDF or CutePDF Writer.
From your PC, open the PDF in question in Adobe or Primo.
Tap Print, under Advanced select Print as Image.
Select Primo or Cute as your print driver. This will produce a new PDF file instead of printing to paper.
Select On Screen or eBook viewing as your desired target (if you are using a different system and need to set a customized resolution, use ~150 DPI as a target).
Use the new PDF you've created with kC and your problem will be solved!
Follow the steps below to resolve any issues or quirks on your iOS or Mac device, including issues with the app store or in-app purchases, app downloads, etc. Note these are not your normal "power off" steps. Be sure to read each instruction closely.
Make sure your computer/device OS version is up to date.
Ensure your computer/device has at least 5G of local storage space. If you use iCloud, ensure sufficient storage there as well (iCloud requires both local and iCloud storage).
Full shutdown the device/computer.
Mac: Select the Apple upper left then select Shutdown.
Tap the Menu button at the bottom of your device to view all running apps.
Tap the X to quit an app.
Use the Settings app
Open the Settings app for your device.
Select Apps (or Application Manager, the name is different based on your device).
Tap the app.
Tap the Force Stop button (or the Force Quit button, the name is different based on your device).
If you continue to have issues:
Check to make sure you have at least 500M of available space:
Access your device's Settings app.
Tap Storage.
Power off and back on.
Press the Power button and then tap to Power Off.
Wait a minute.
Turn your device back on.
Do a hard reboot.
Press and hold the Power and Down Volume buttons until the device shuts down.
Then use the power button to turn it back on.
Some devices use other key combinations, be sure to google instructions for your specific device if needed. Note: A hard reboot will NOT delete any of your personal data. If you need to delete personal data use a factory restore in your device's settings app.
Please note all of the above steps may vary based on your device. If the above steps don't match your device, be sure to google instructions for your specific device.
When you setup your chart, it is important to ensure the grid from your setup matches the grid of the chart. The purpose is to ensure all chart tools (one tap marker, magic markers, voice control, reminders, etc) are optimal.
Bad Grid CheckThe grid lines do NOT match the chart.
Good Grid CheckThe grid lines match the chart.
Manual Setup
If the wand is unable to detect your chart, you can do the setup manually. In this case the wand isn’t used. The following steps walk you through this process.
Step1: Cropping to the edge
Crop all the way to the edges of the chart at its widest/tallest part. Be sure to remove any row and stitch numbers the designer may have put in. Show Me
Step 2: Visible rows
How many rows are VISIBLE on the chart? Charts are really graph paper. Count the boxes vertically up the chart, each box is a row. Show Me
Remember, if wrong side rows are not charted, they are not visible. Only count the rows you can see. For example, if the chart counts 1, 3, 5…15, it has 8 visible rows.
Still having issues? Check the bottom row number. Some charts do not begin with row 1. If the chart does not begin on row 1, adjust your visible row count accordingly. When in doubt, manually count boxes, sometimes the numbers are wrong. **
Step 3: Stitches
How many stitches are there from the right to left edges of the crop? Charts are really graph paper. Count the boxes horizontally across the width of the chart. If there are “no stitch here” spots, count those as stitches since even though you do not have a stitch on your needle, it is taking up an actual spot in the width of your chart. In the same vein, if your chart has repeat sections, they only count once even if you have more stitches on your needles. Show Me
Step 4: First Row and Count By
You can enter the row number that the chart starts on and what it increments by. Enter the number shown as the starting row of the chart. Count By indicates how the rows increment. For example, if the chart counts 1, 2, 3 (count by is 1). If the chart counts 1, 3, 5 (count by is 2).
Step 5: Check the Grid
You can check the results of your work using Check Grid. This will overlay a colored grid-line on your chart. The grid lines should match your chart’s grid lines (zoom in for a good look!). If they don’t, be sure to recheck your edges and your Visible Rows and Stitches. Show Me
The default grid color is yellow. If you have a hard time seeing it, you can change the grid color in Settings. Show Me
** A note on arithmetic: If your bottom row is not 1 and you decide to subtract the top row from the bottom, BE SURE TO ADD 1. The count of rows is the difference between top and bottom row PLUS ONE. if you need to prove this to yourself, consider a chart with a bottom row of 1 and top row of 10. 10-1=9. So be sure to add one to the difference!
To download a pattern from Ravelry, it must be a Ravelry download. There are hundreds of thousands of patterns in the Ravelry database that are NOT Ravelry downloads. Show Me how to tell a pattern is a Ravelry download.
Almost all of knitCompanion’s battery usage is for the screen. There are settings both on your device as well as in the app that you can use to reduce the amount of energy your device screen requires, thereby extending your device’s battery life while knitting.
Reduce the brightness of your screen. Even a small reduction in brightness can make a big difference.
On iOS and iPhone OS, reduce the White Point. Even a small reduction in White Point can make a big difference. (please take note that this is an accessibility feature unique to Apple, it is not currently available on Android).
Use the knitCompanion Inverted Marker with a grey/darker color. This will diminish the light the screen needs to produce for all but the current row you are working on. Learn More
Enable Dark Mode. On Apple this will reduce the brightness of the overall app display.
You can reset any of the built-in content included in the app (such as the sample projects). You may also need to reset the content after updating your device OS or if space runs low on your device.
With knitCompanion you can use any pattern with the app. knitCompanion links with Ravelry and supports share/open from other pattern sources, apps, clouds, and websites.
We also offer over 1400 kCDesigns in our shop. With kCDesigns, you pick your size and options and knitCompanion creates a custom project just for you.
kCDesign projects have one tap markers, reminders and shaping, keys, Magic Markers, and more. All with no setup!
One of the questions we hear time and again from crafters is, “What’s the difference between knitCompanion and a PDF reader?” Or, a similar variant: “Why can’t I just use a PDF reader instead of knitCompanion?” While there is nothing …Continue reading →
Often, designers that feature large charts in their patterns will split the chart into pieces to fit the instructions neatly on the page. This post details how to rejoin a chart so that you can work through the stitches in …Continue reading →
In our previous posts on Magic Markers, we reviewed how to use magic markers to highlight and count stitches. In today’s post, we’ll review how to recolor color work charts to reflect your own personal color choices. With Magic Markers …Continue reading →


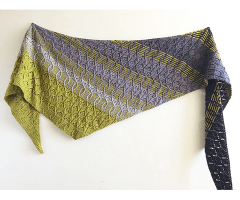

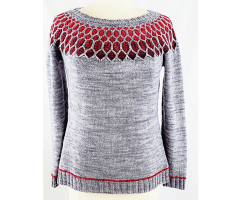

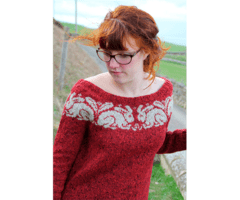
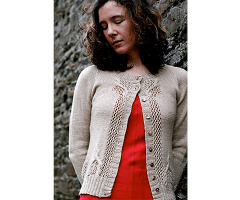
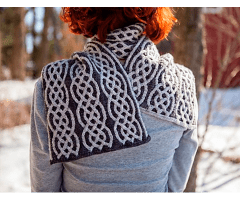
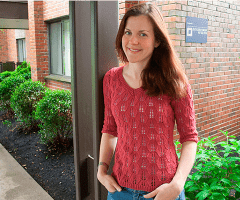

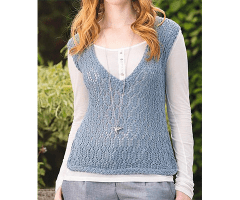
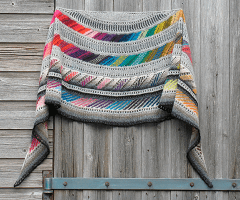
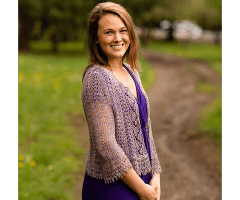
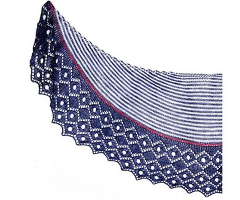
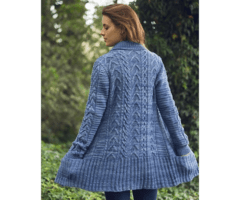
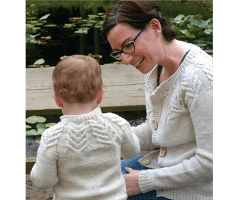
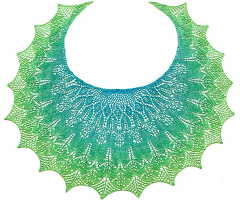


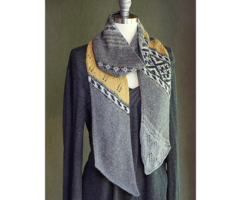
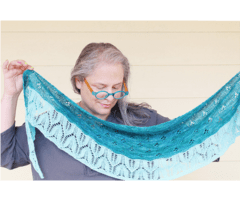
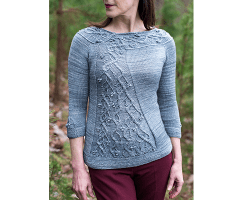
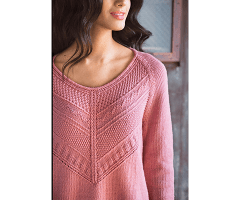

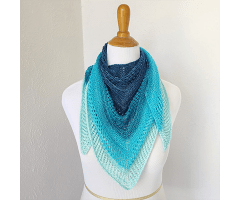
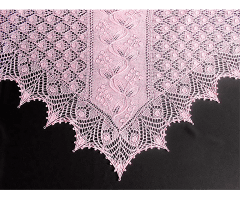
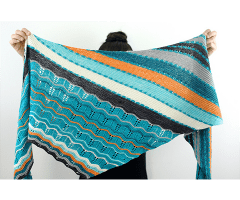

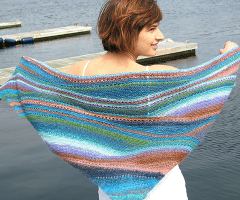
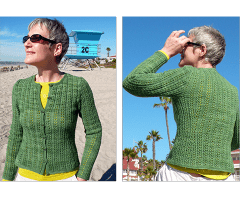
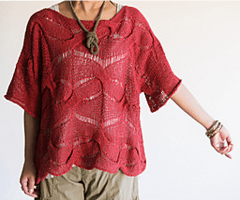
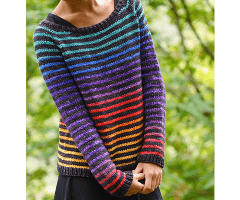
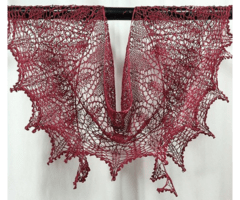
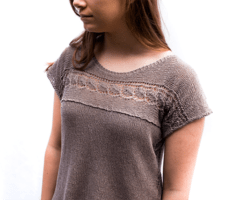
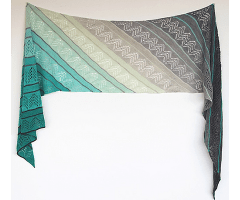

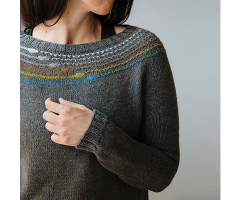
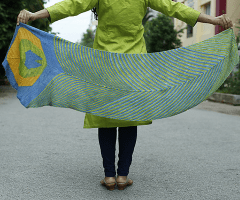
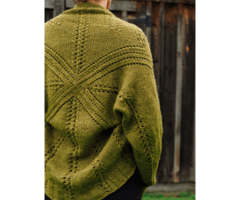
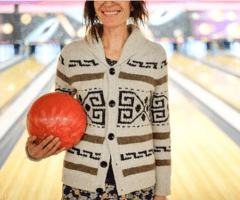
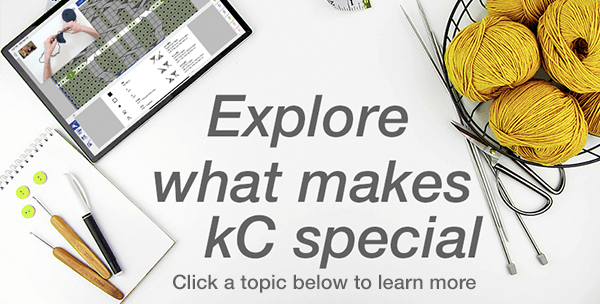
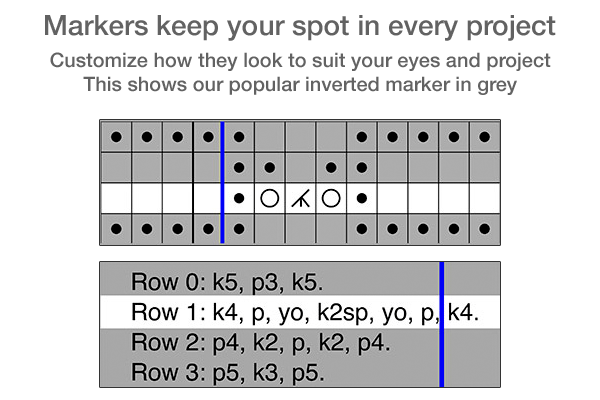
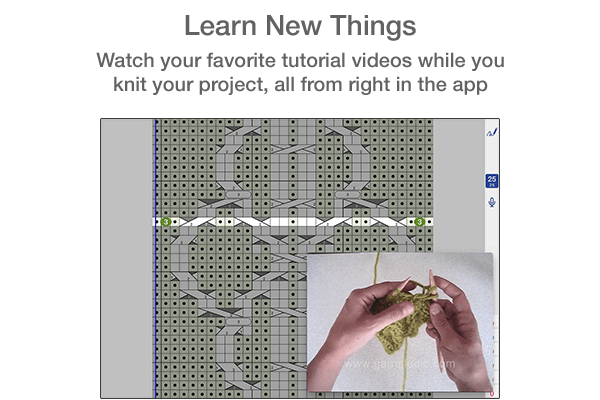
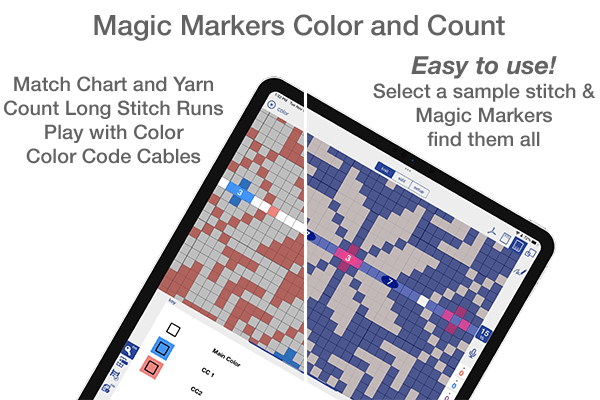
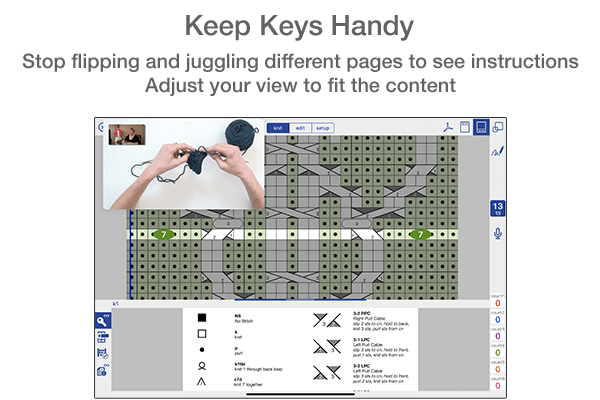
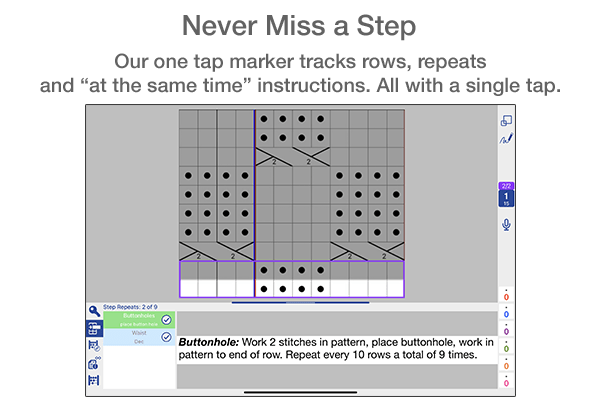
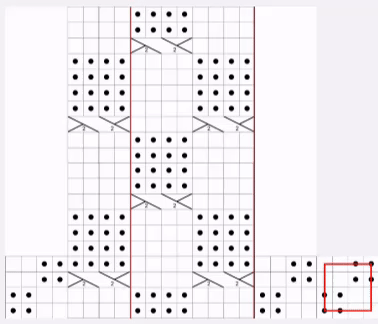
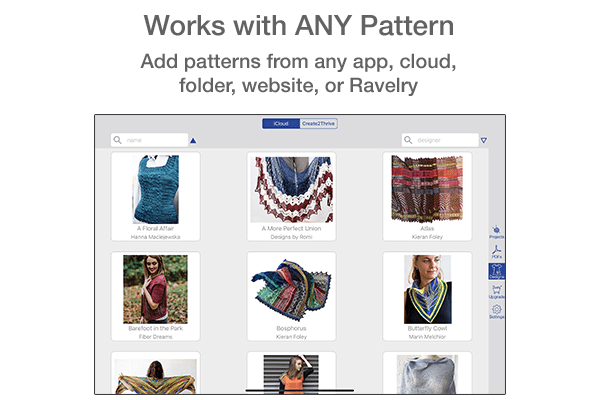
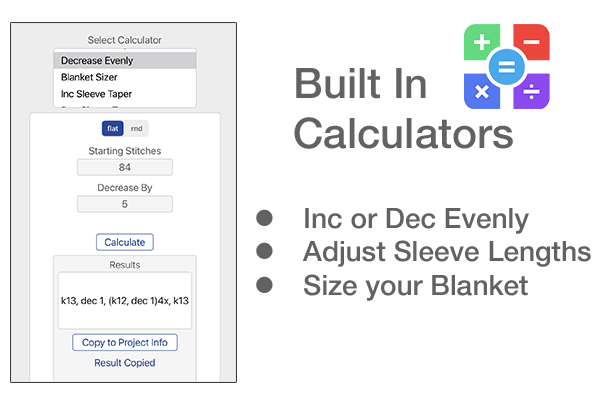
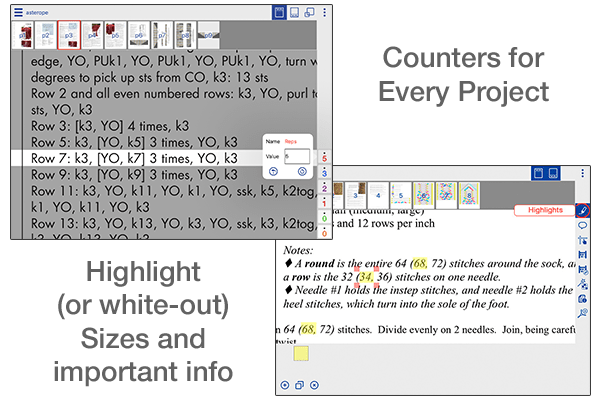
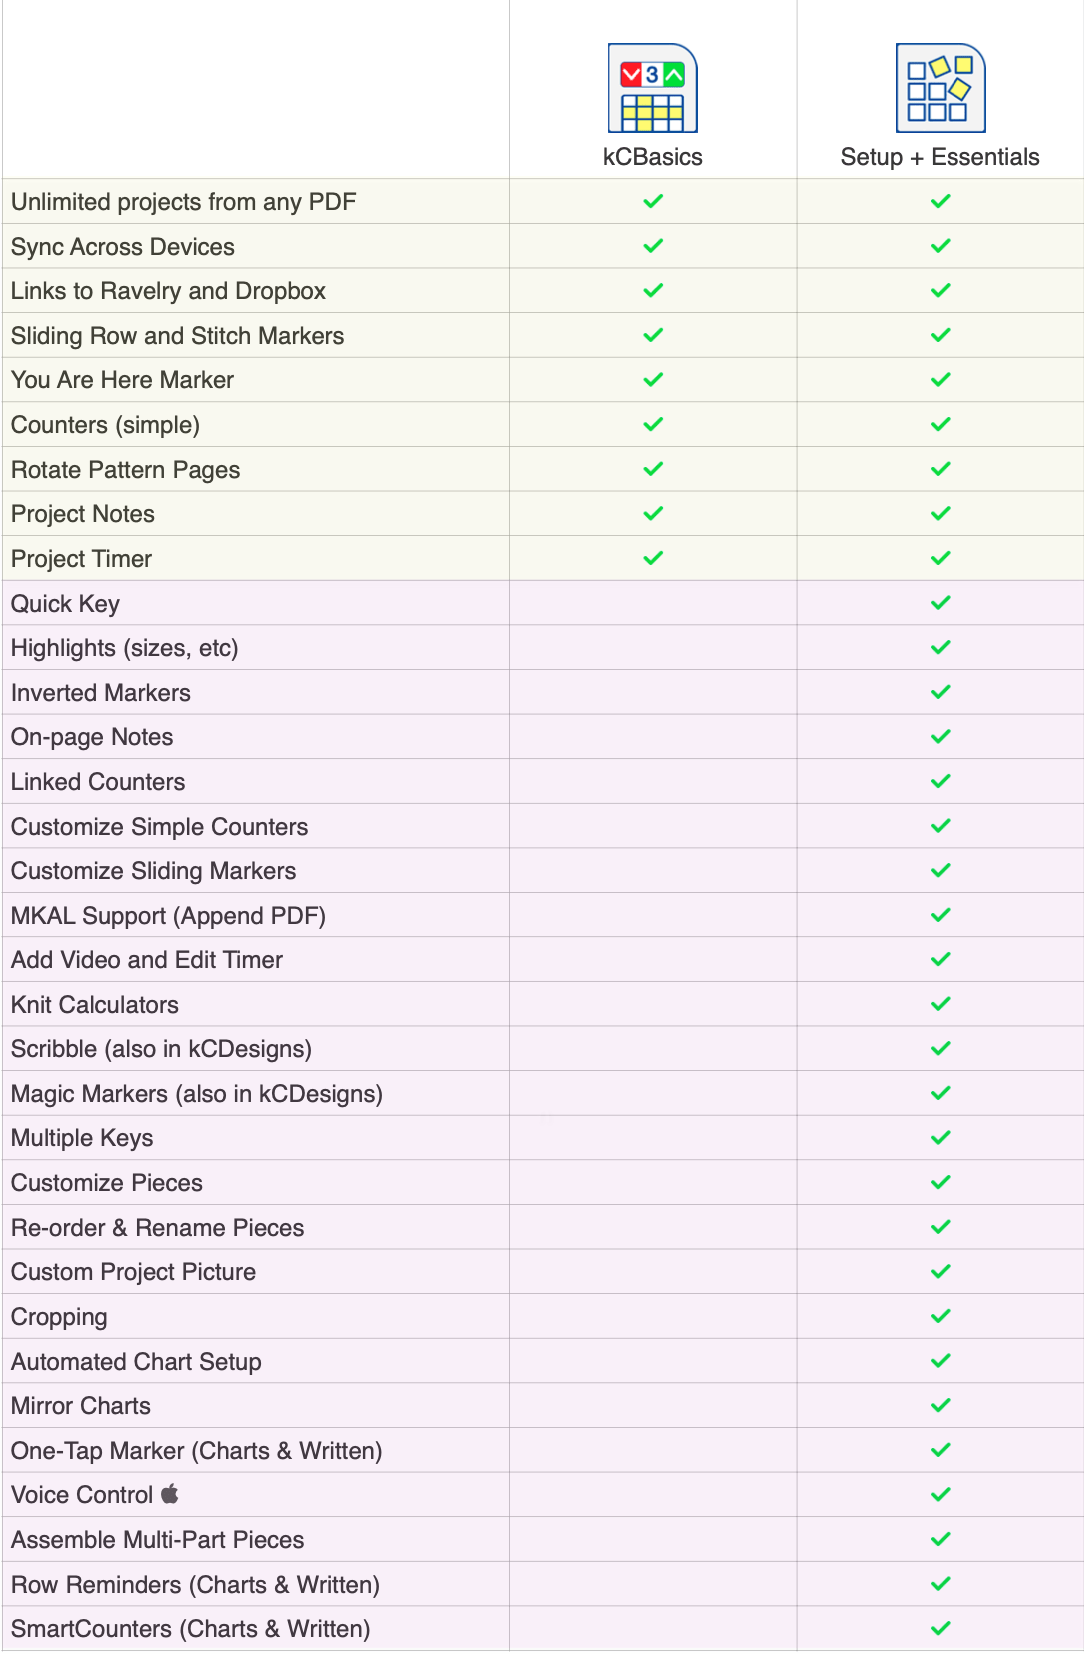
 Intro Tour


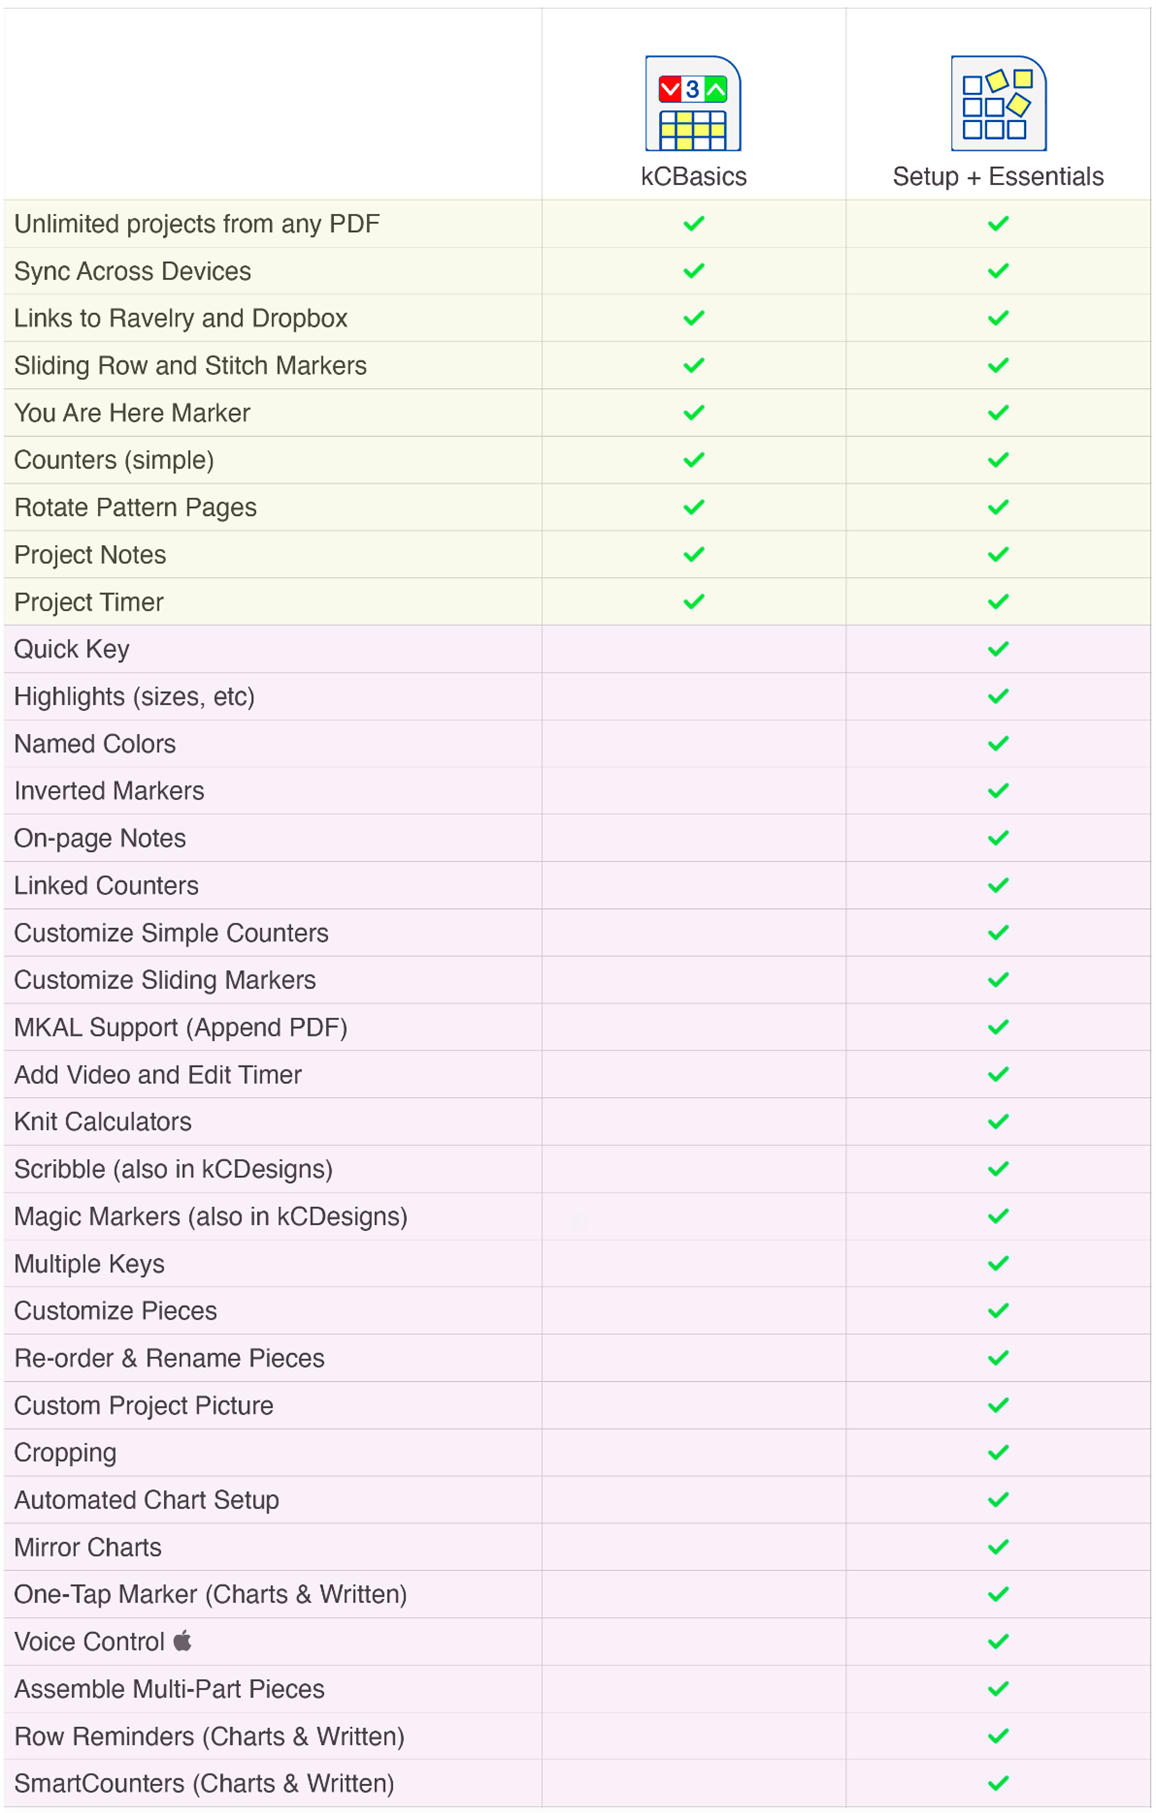


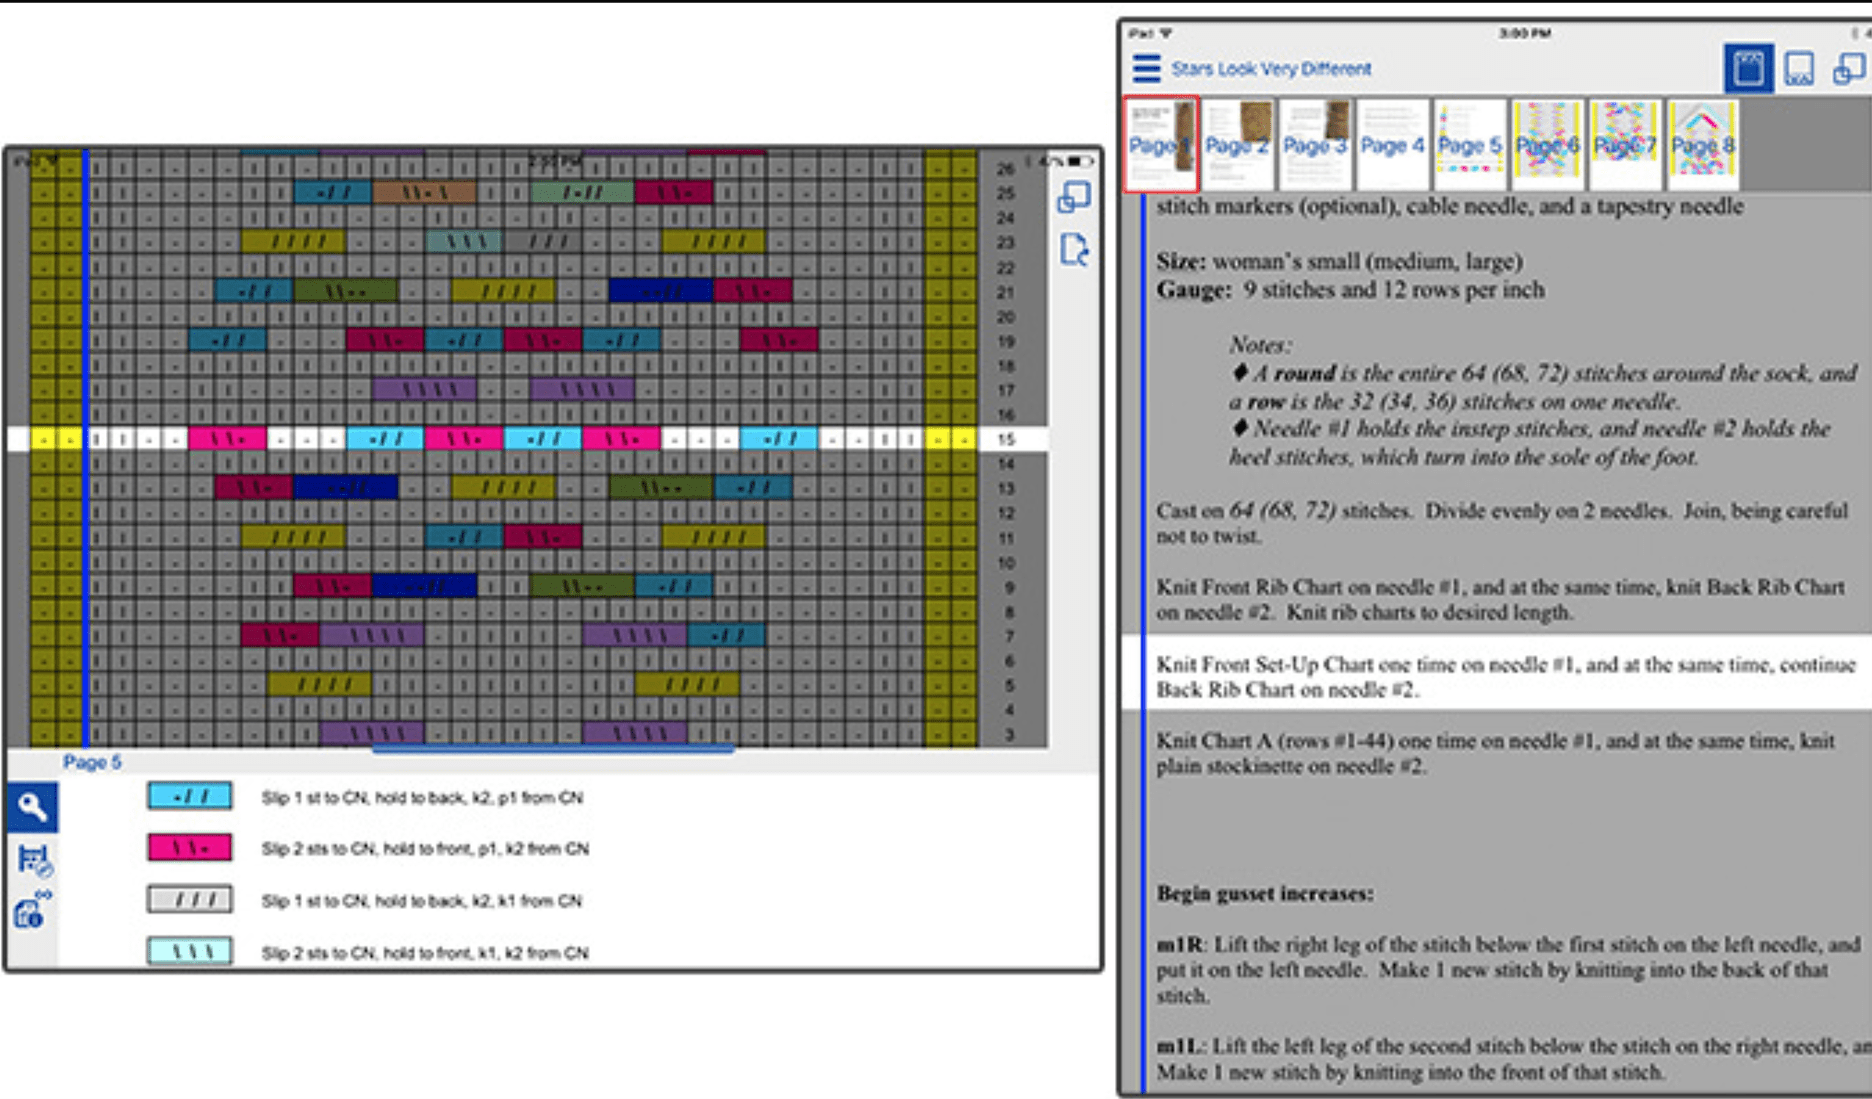
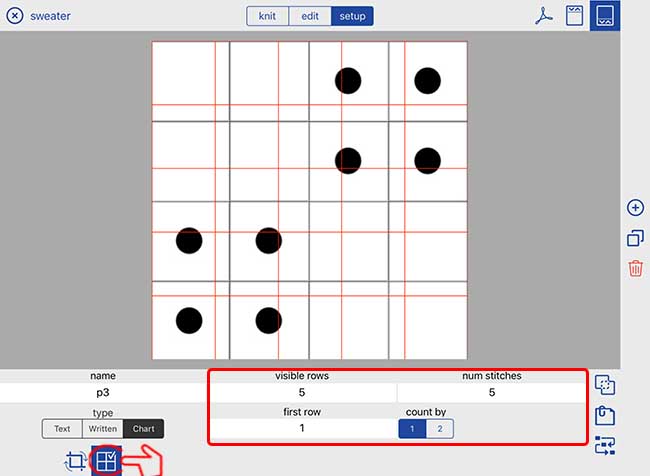

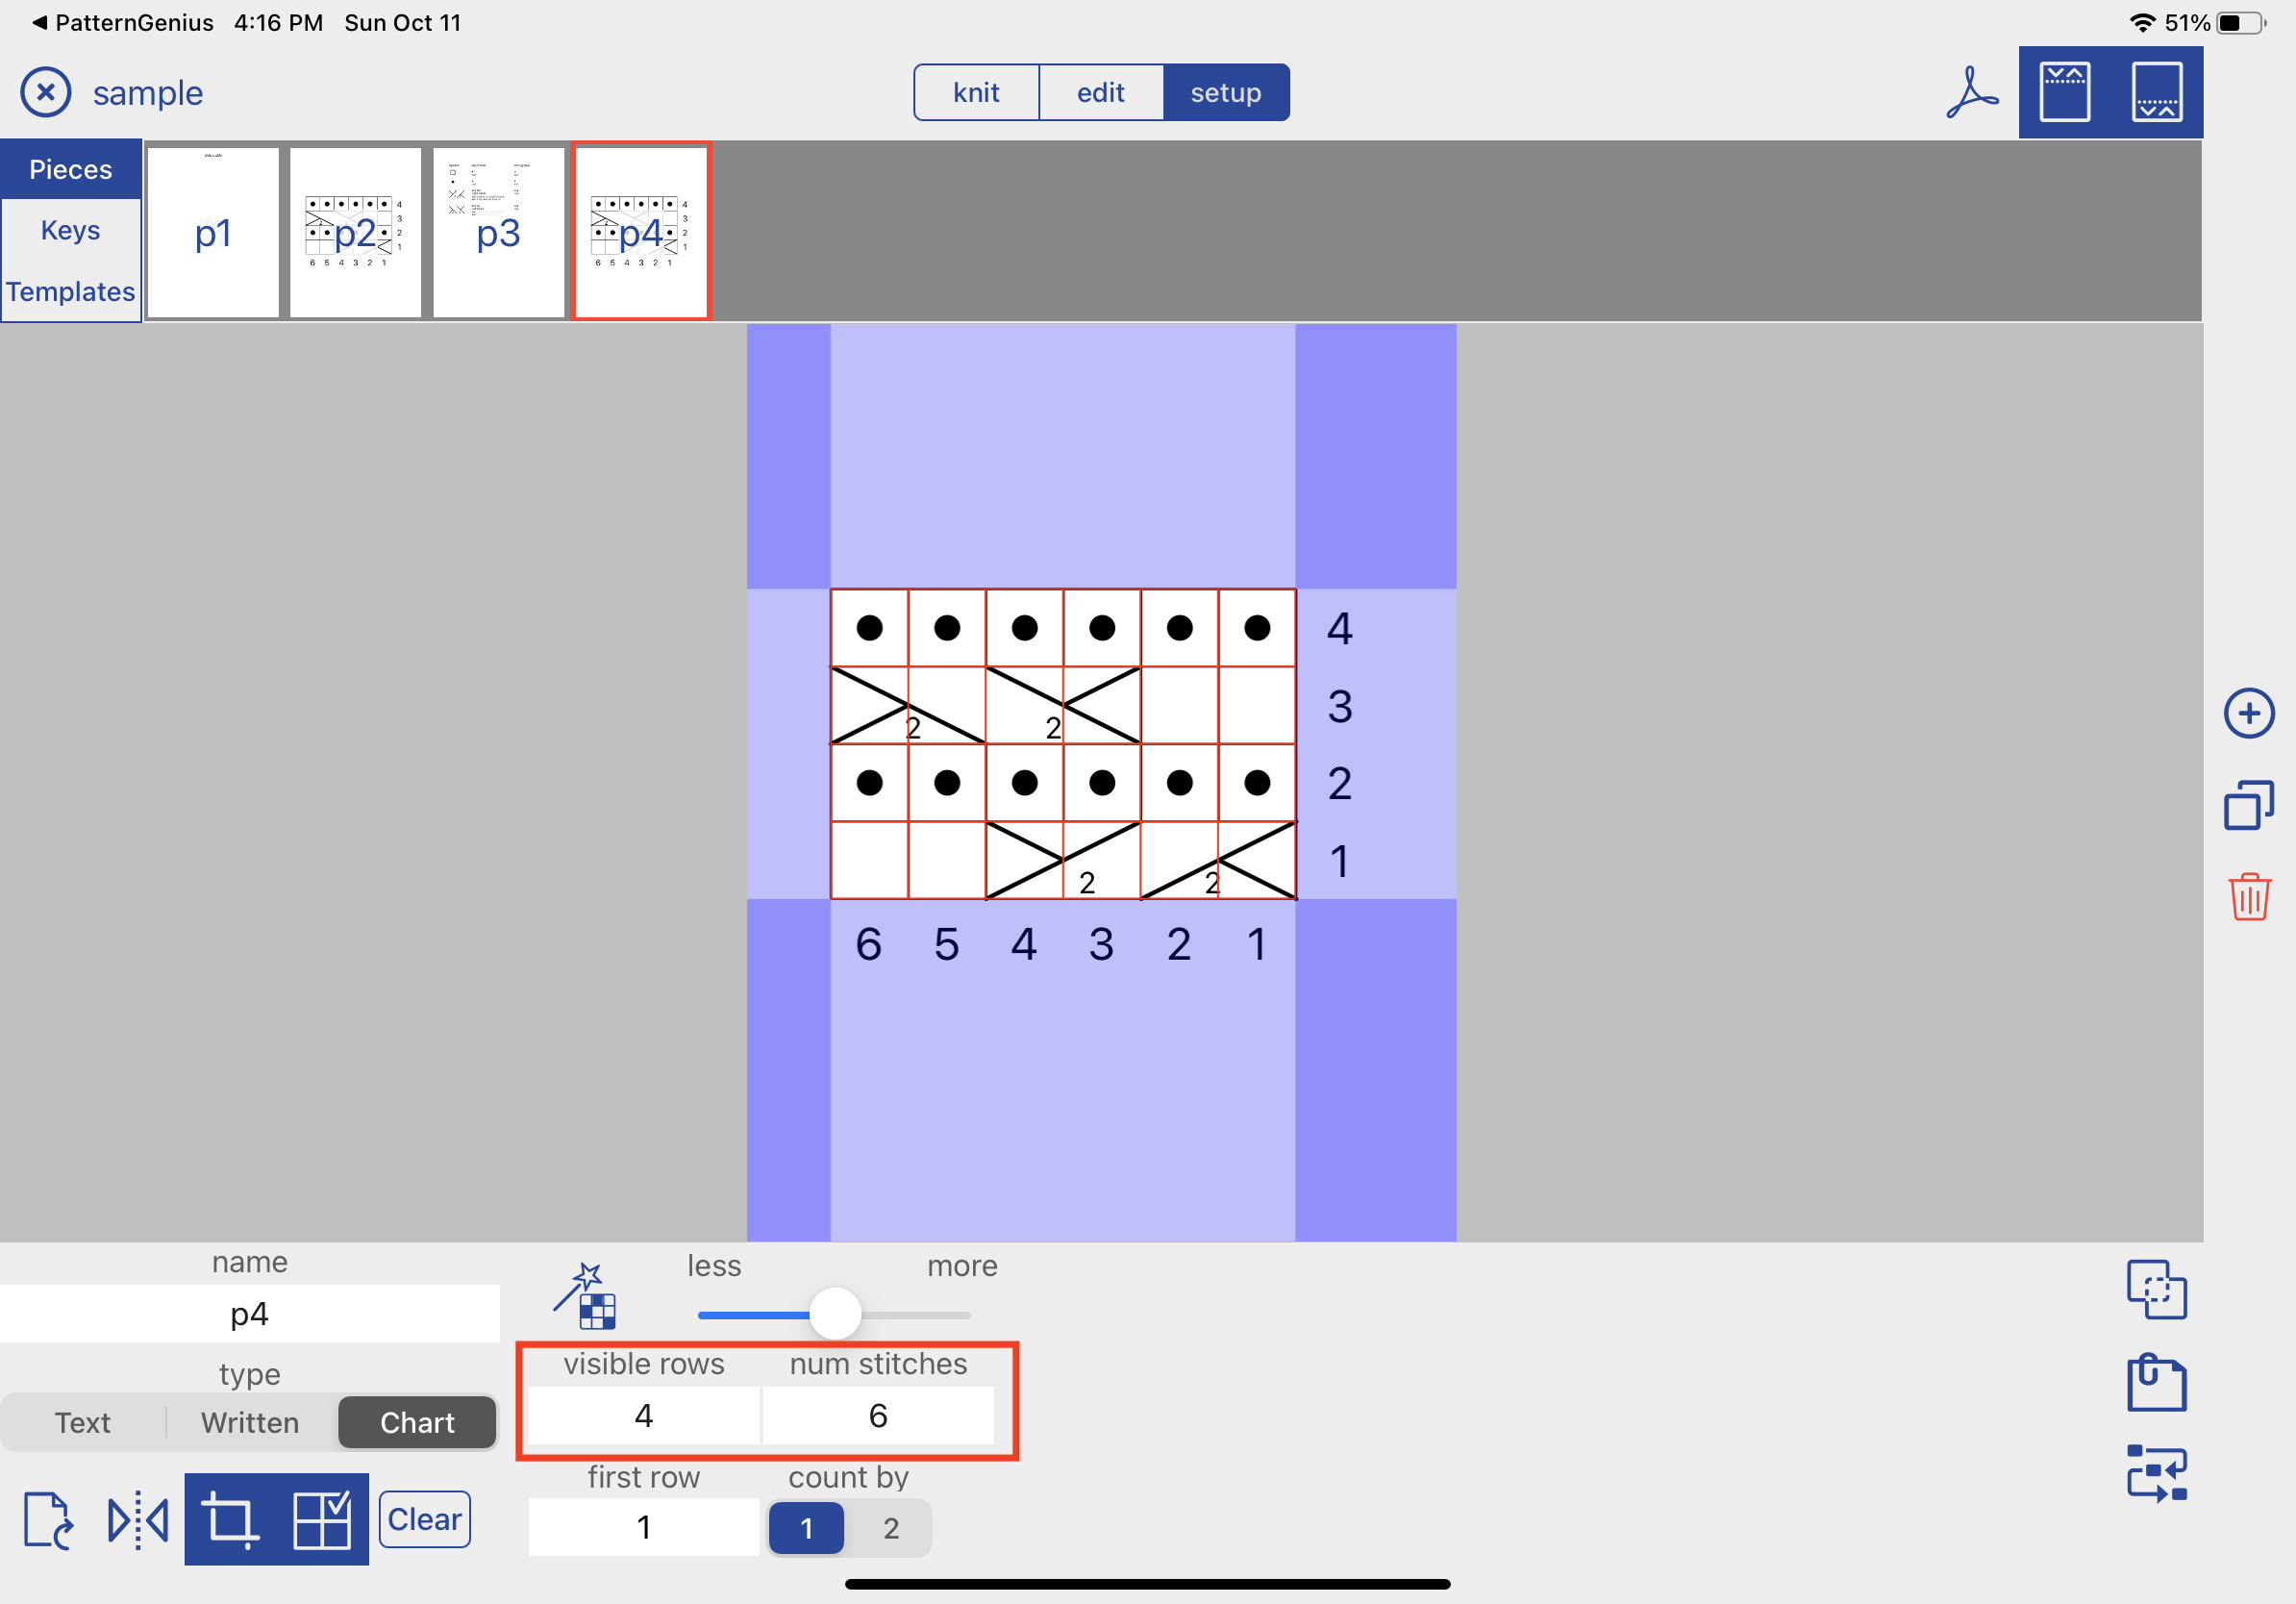
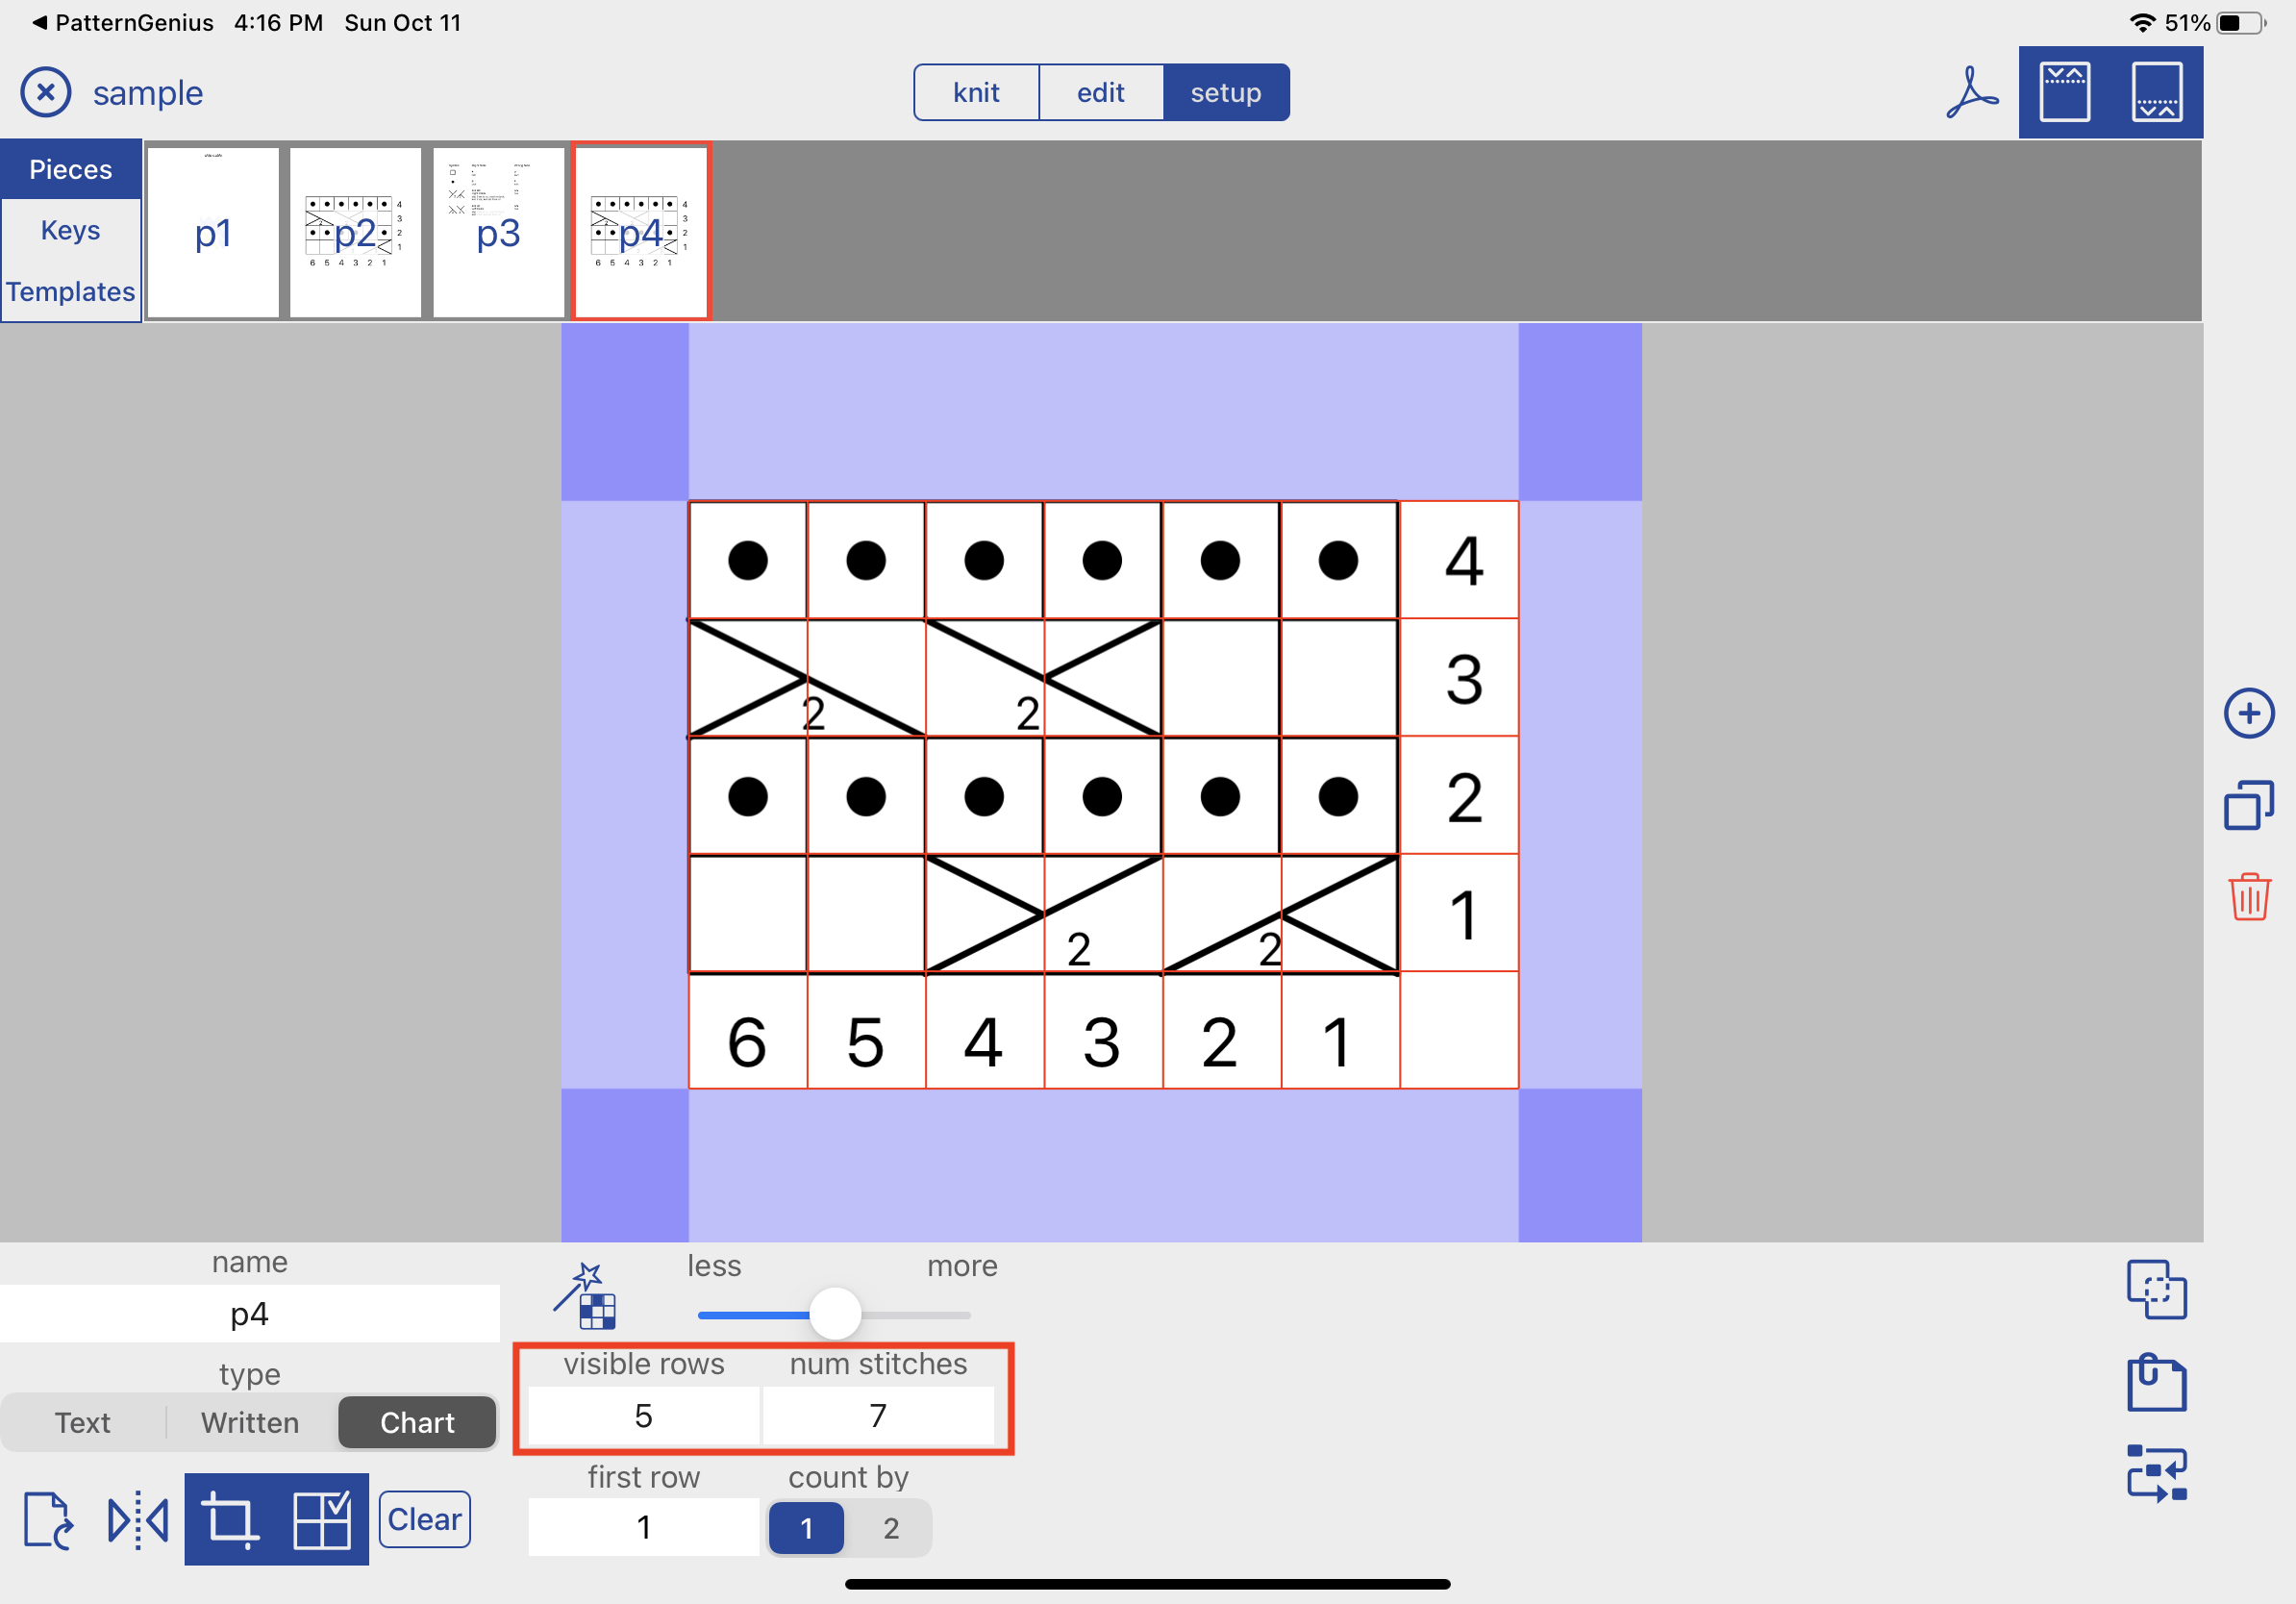


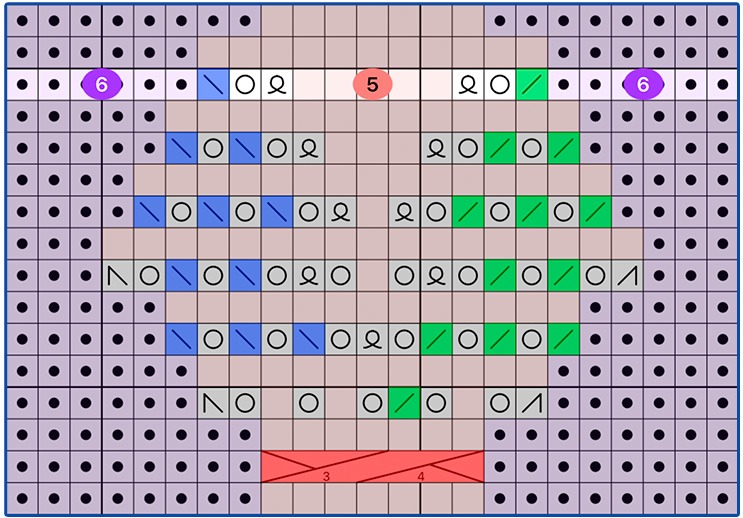
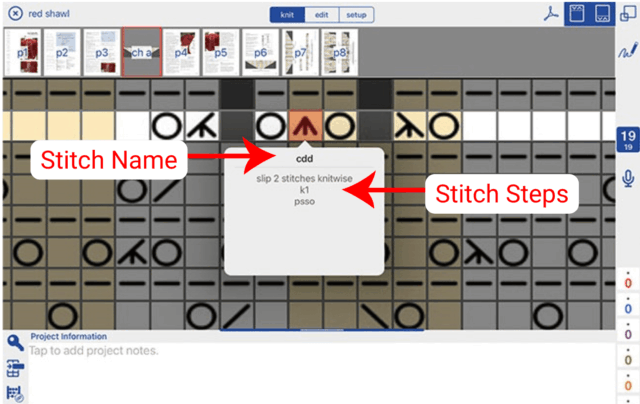
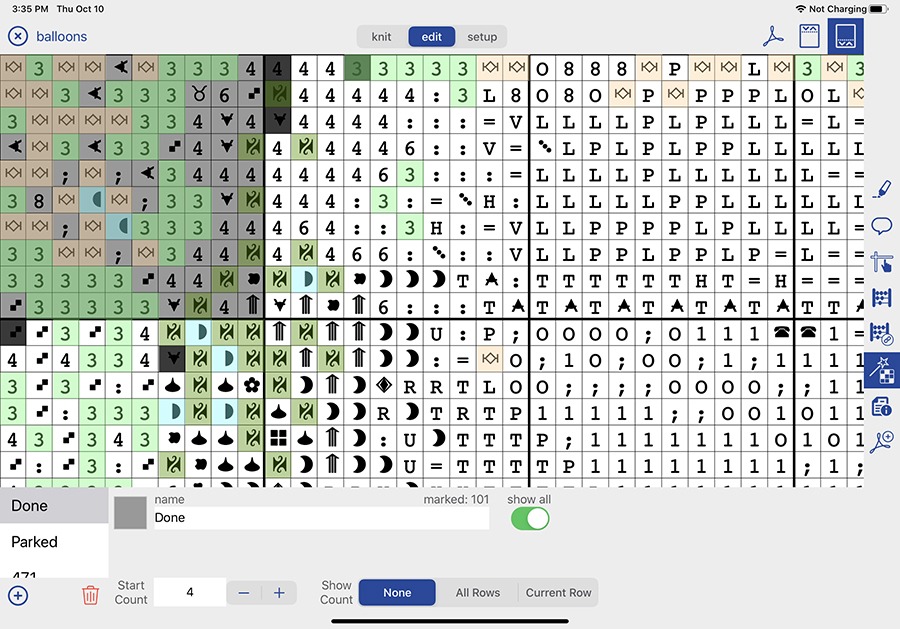
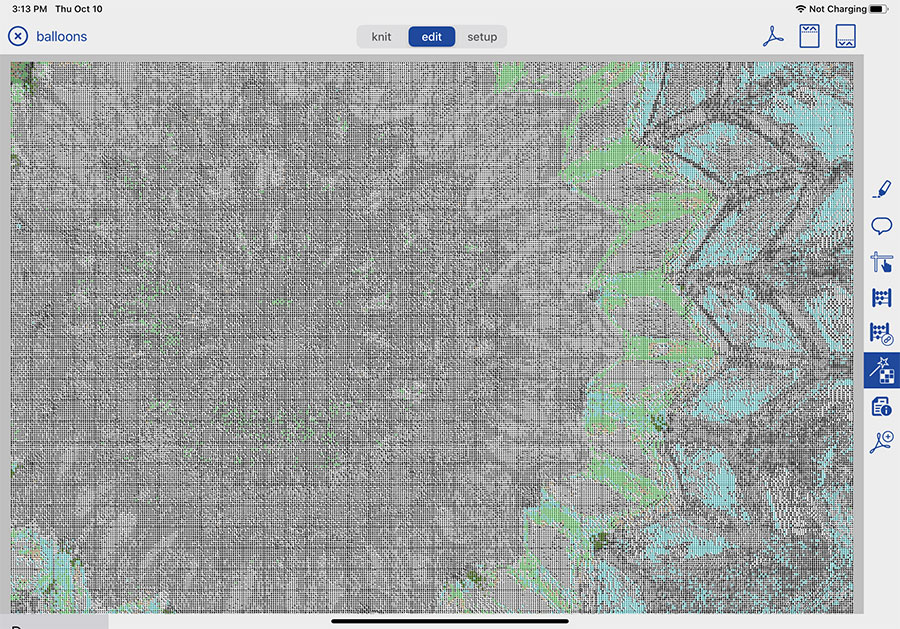


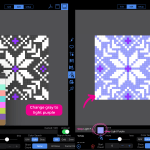
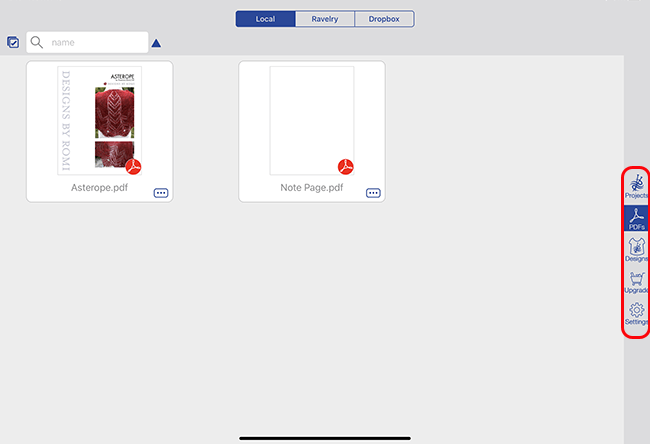
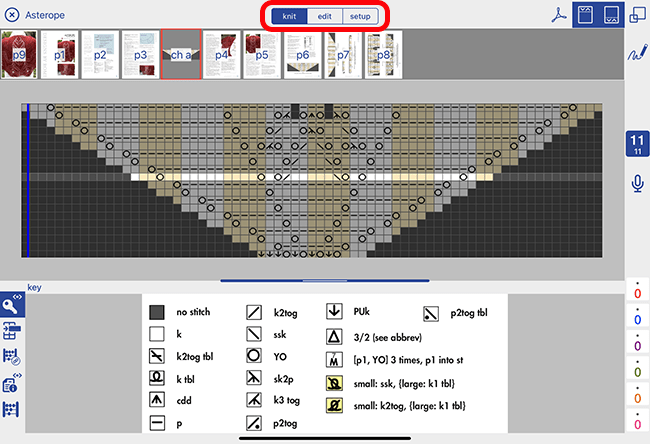
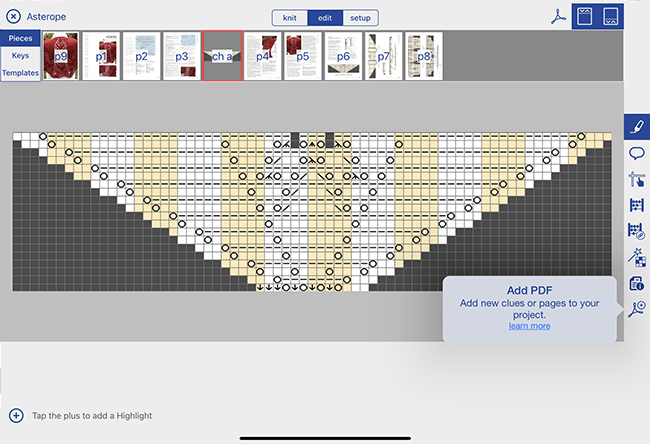
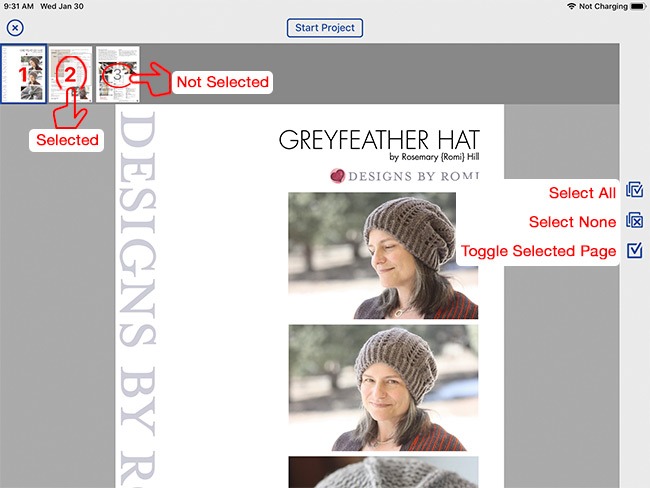
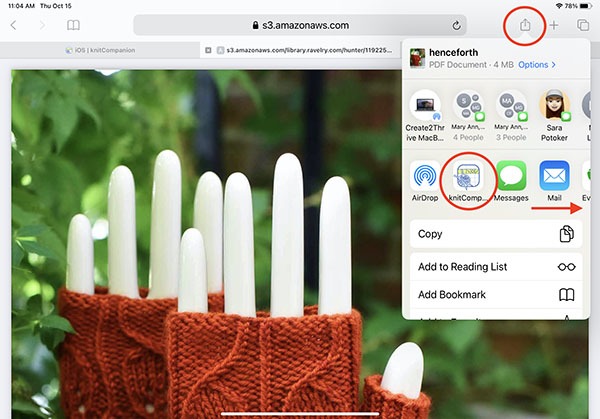
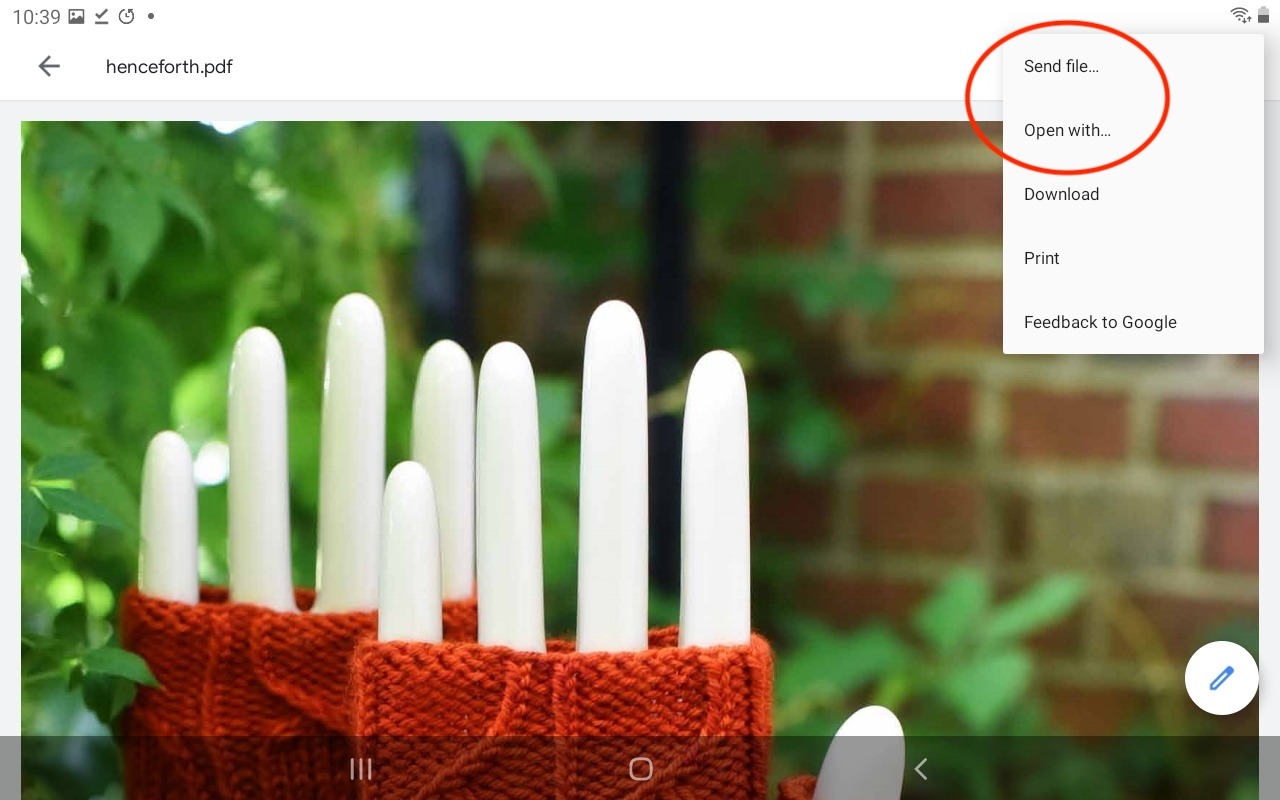
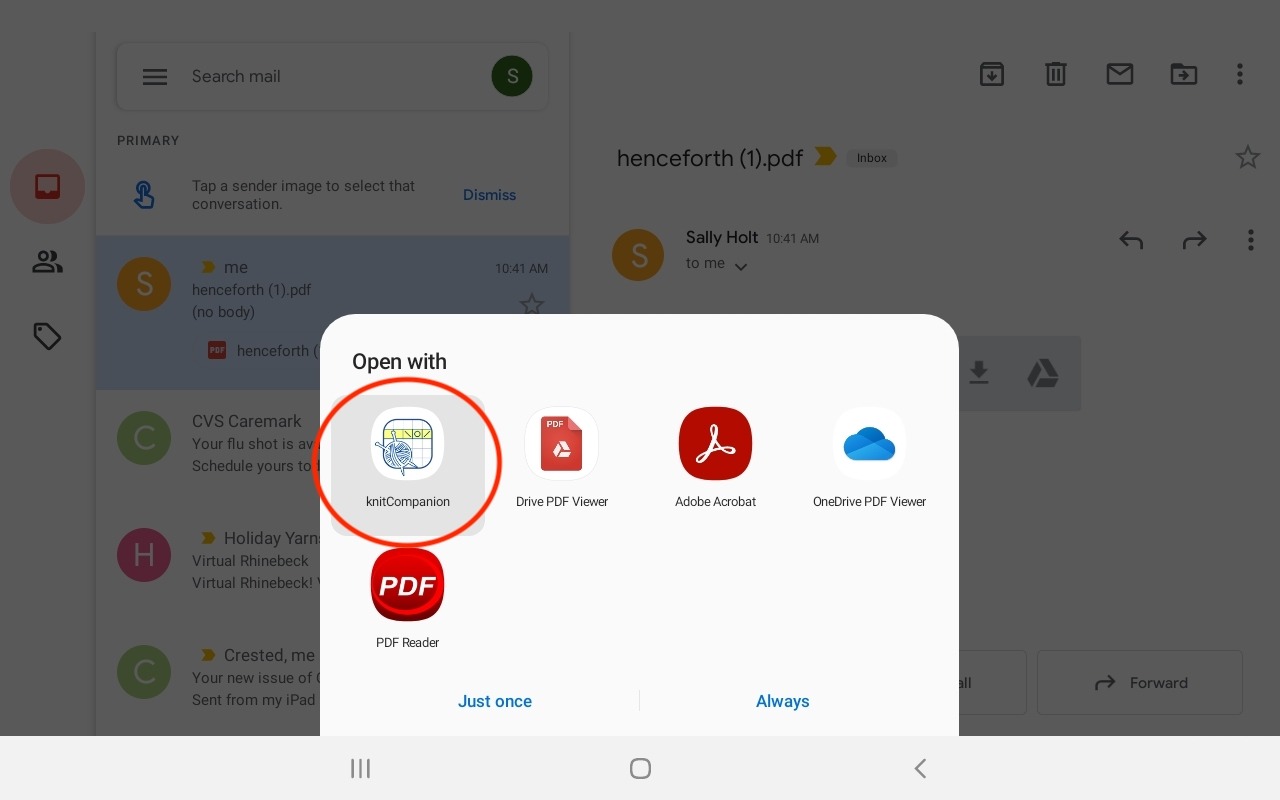
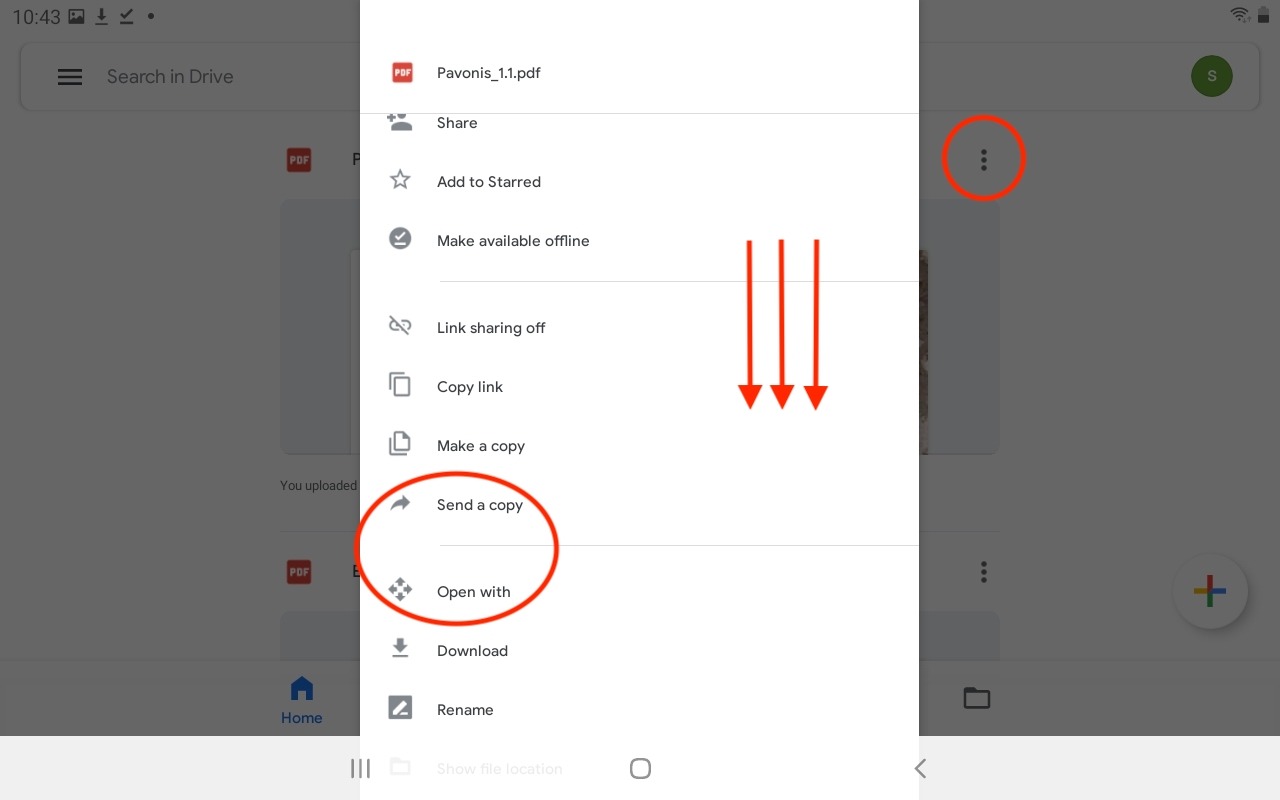
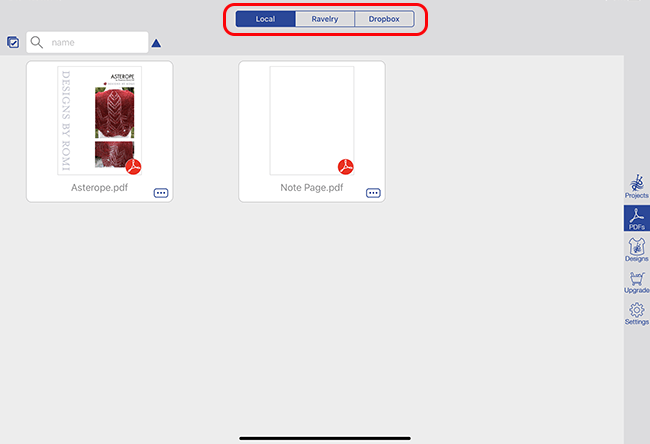
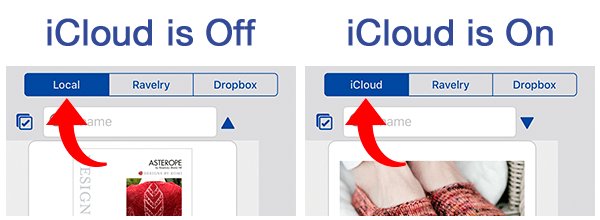
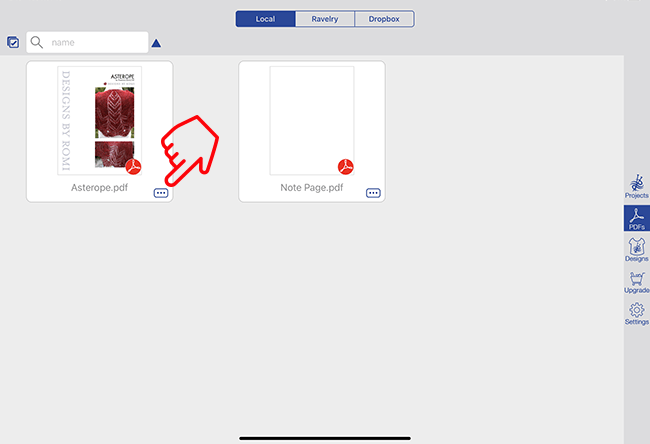
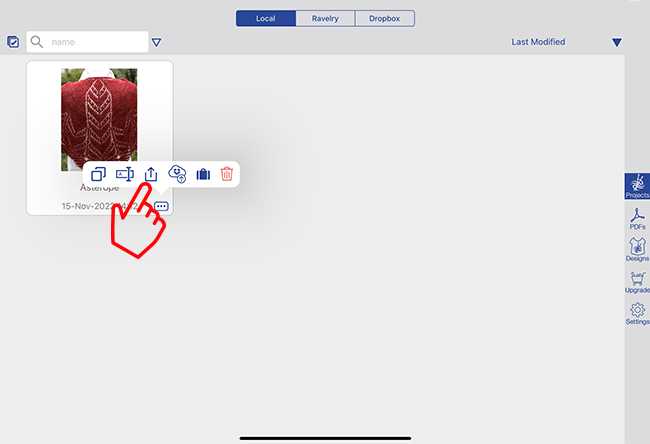
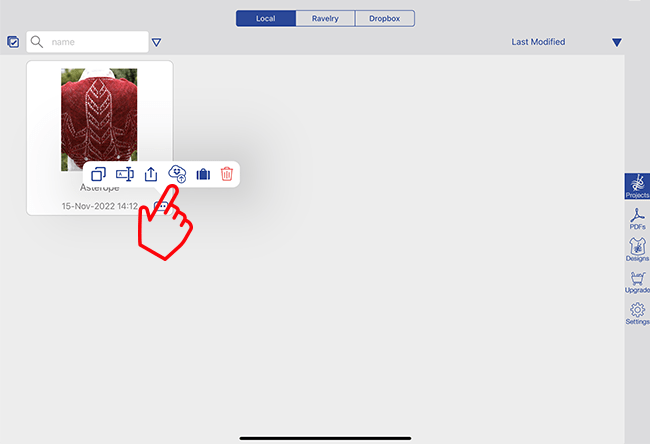
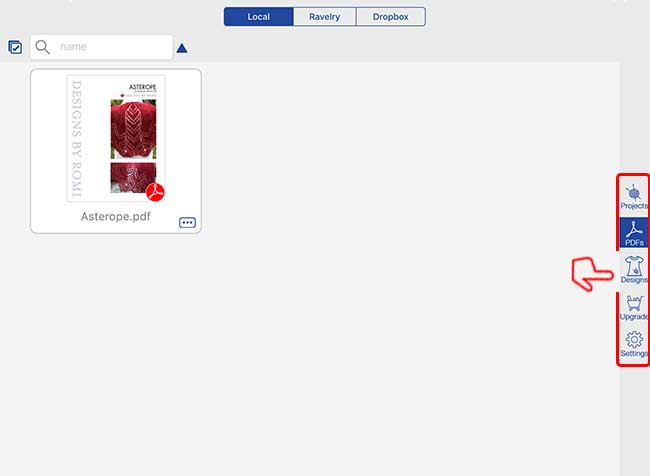
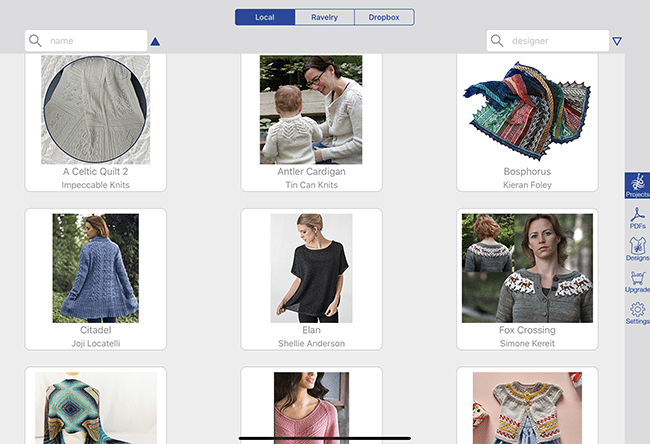
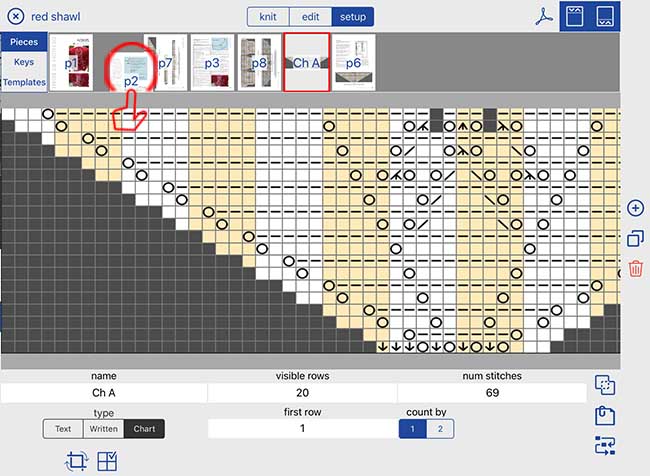
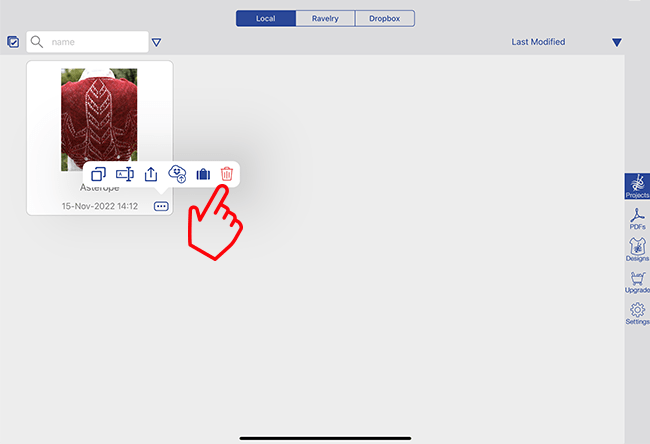
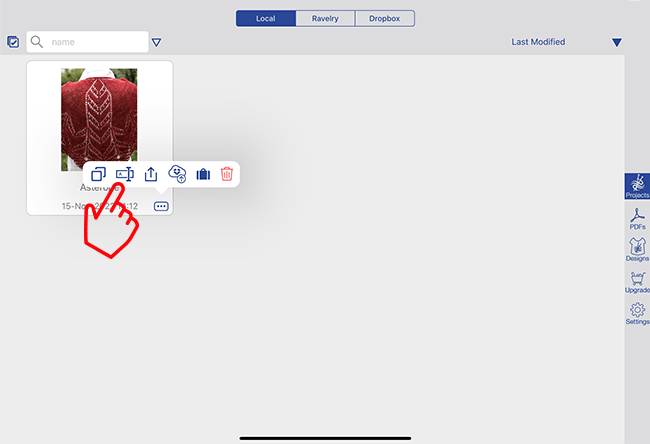
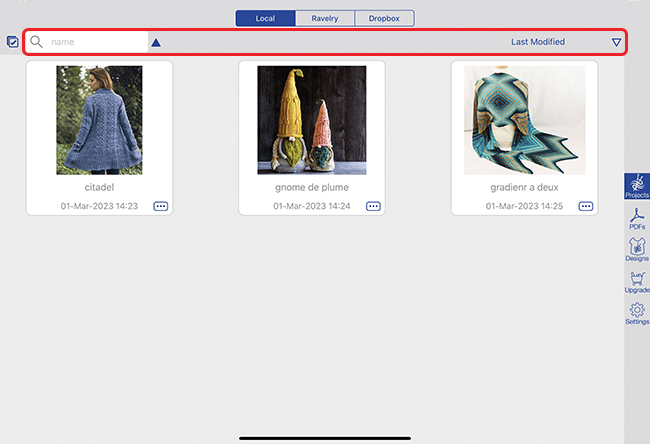
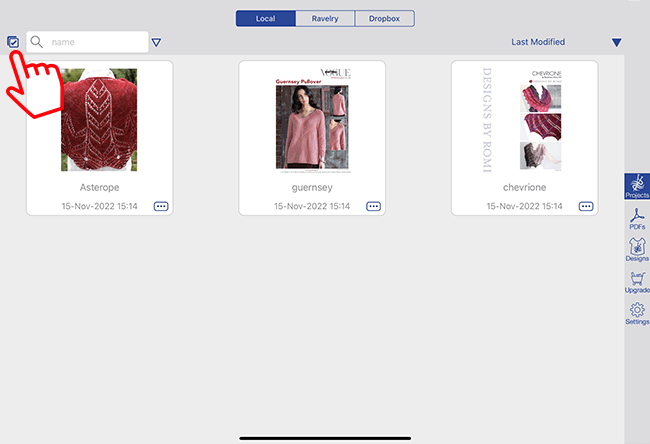
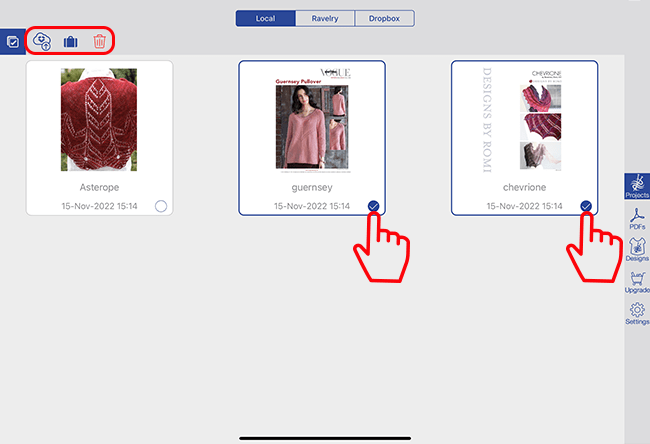
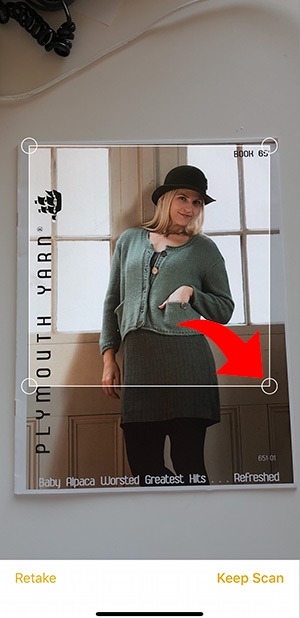
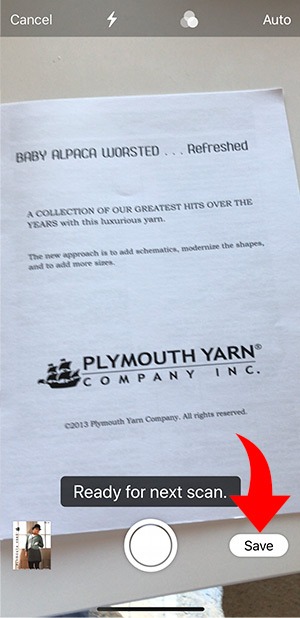
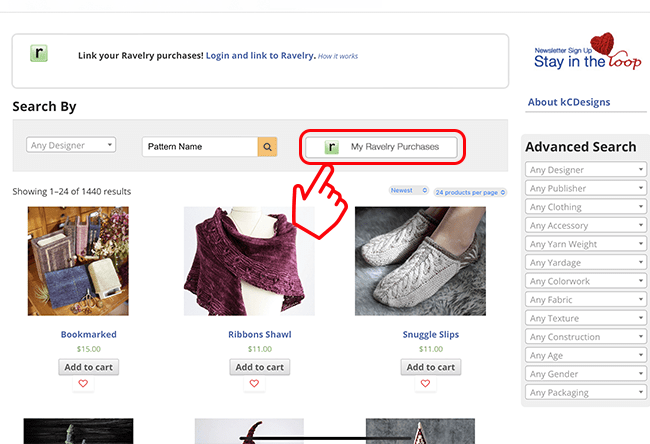
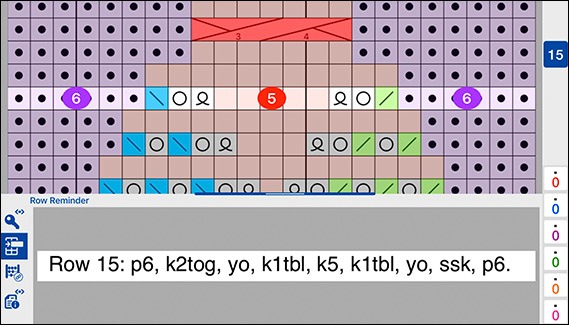
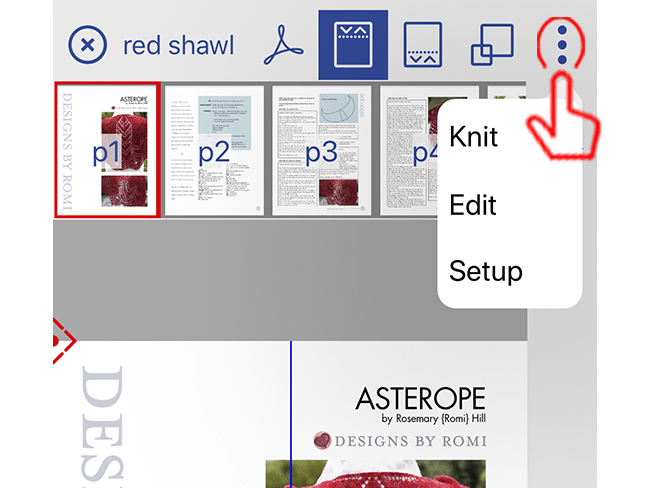
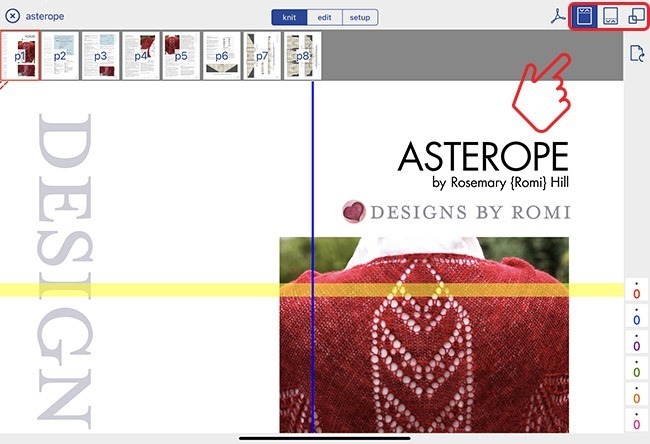
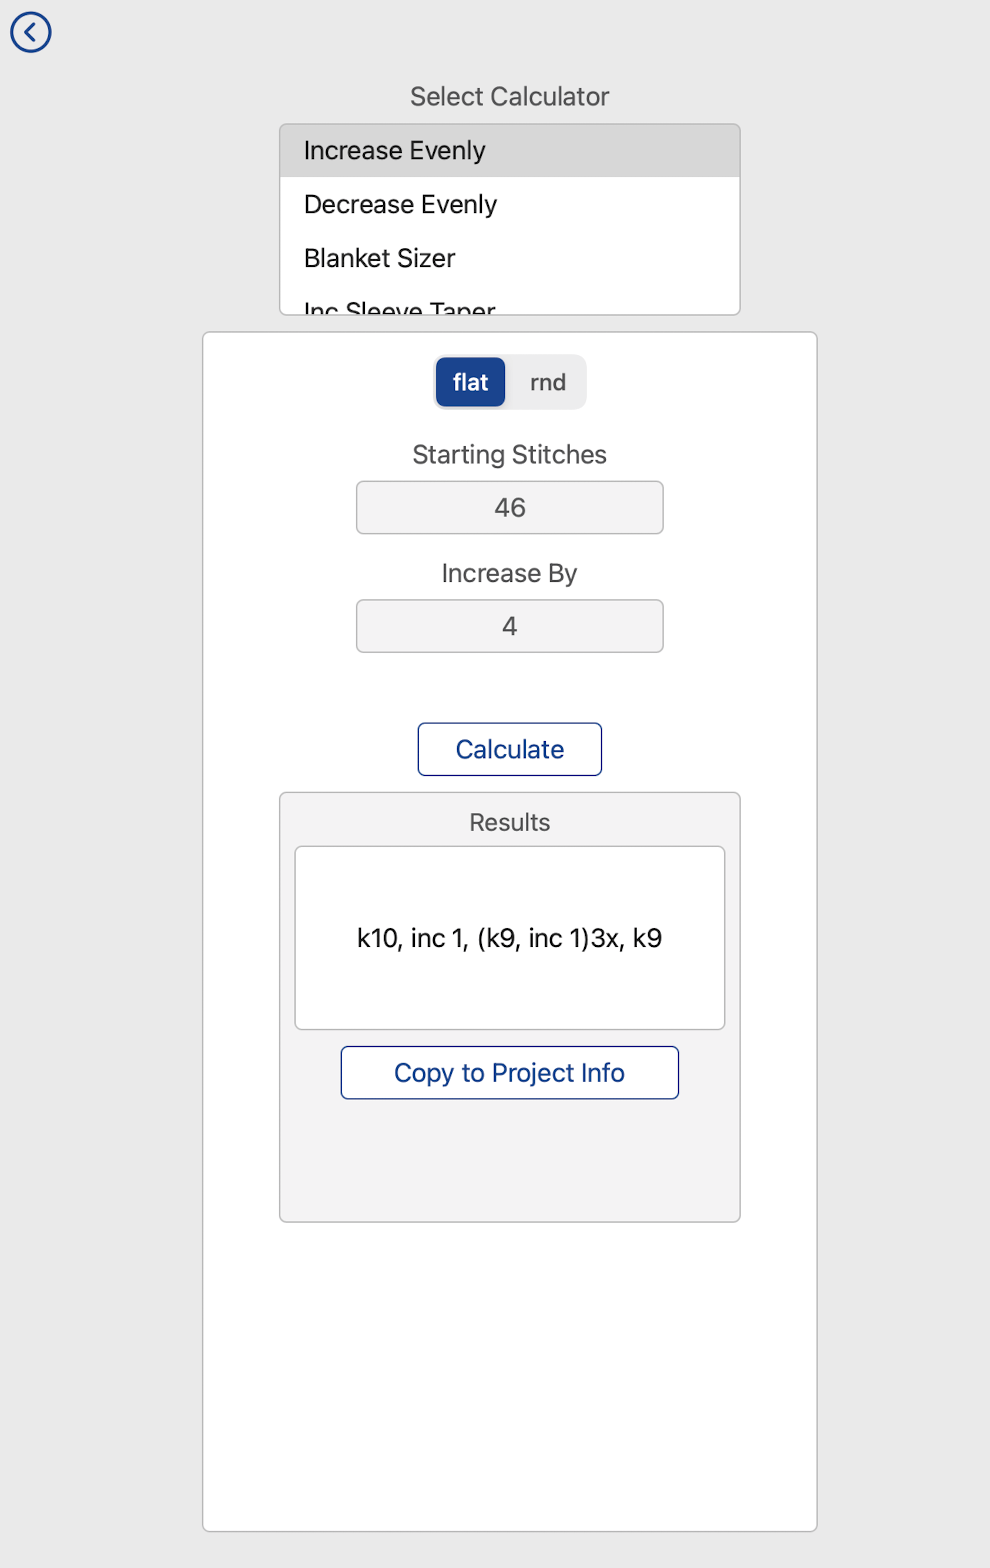
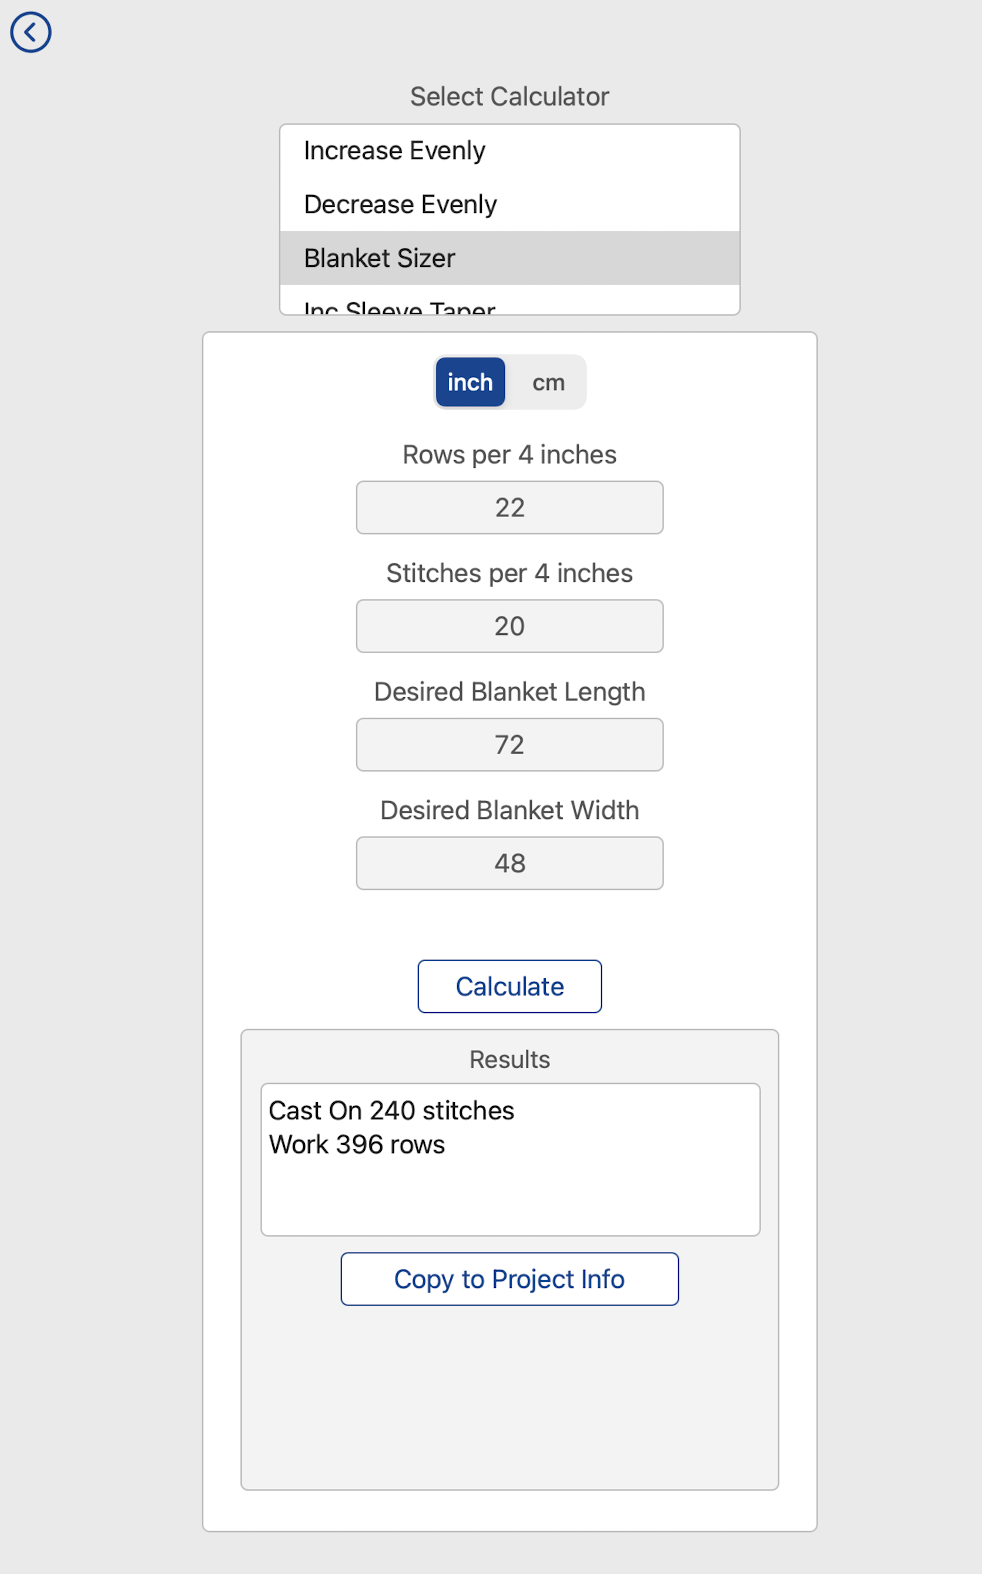
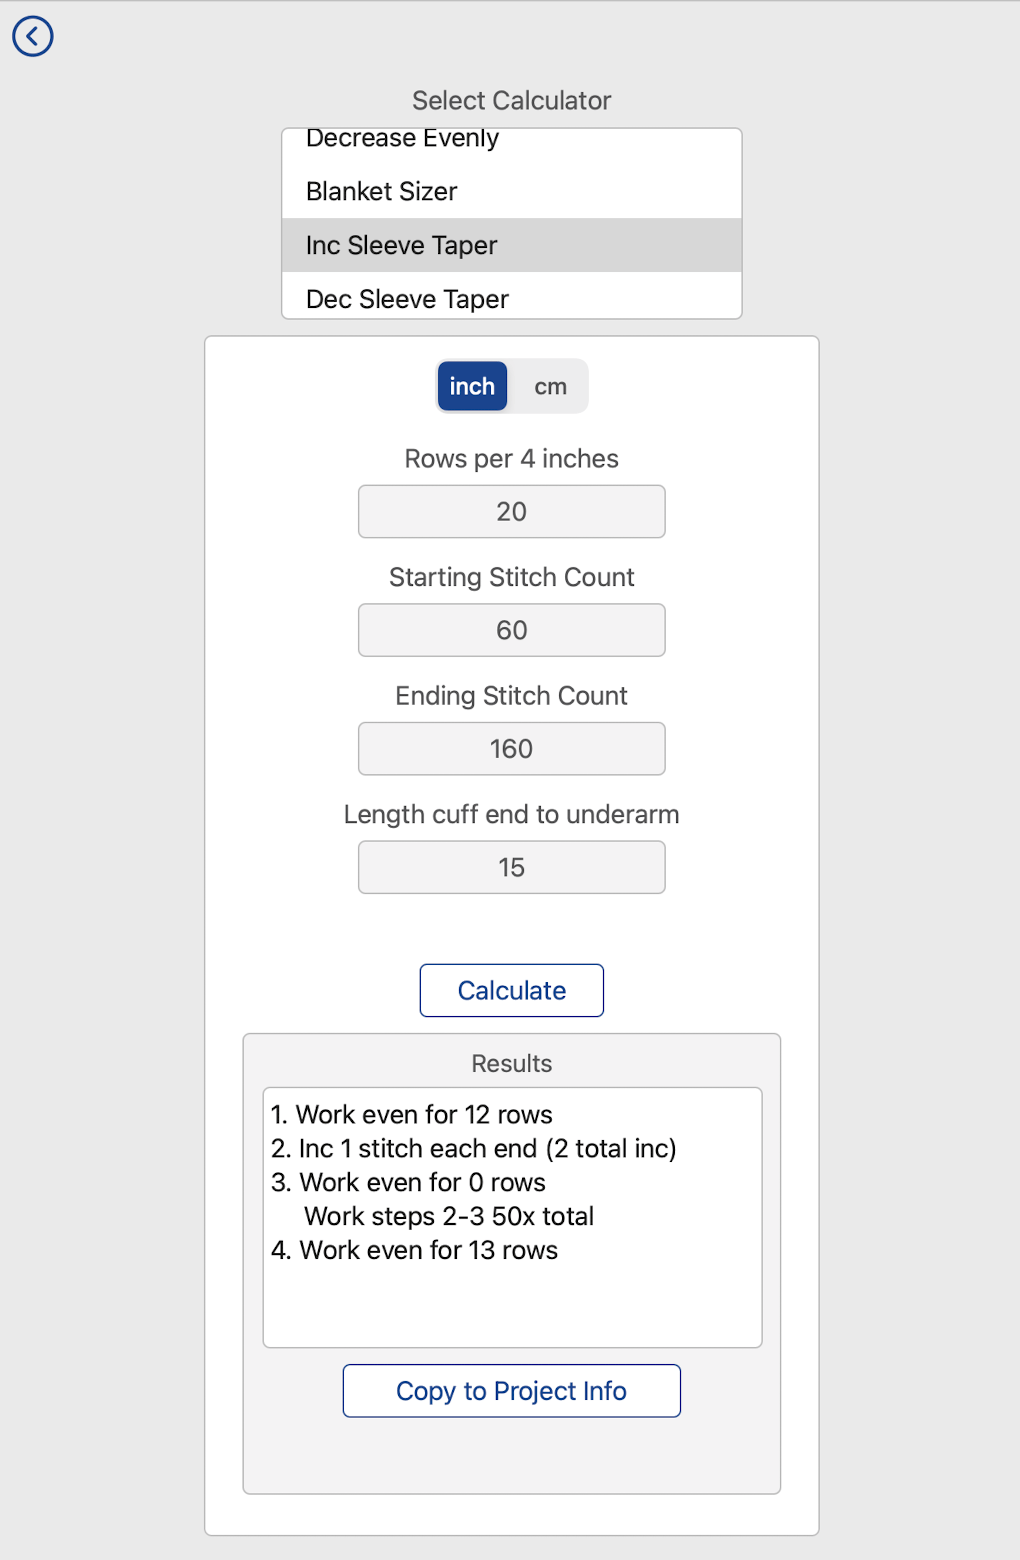
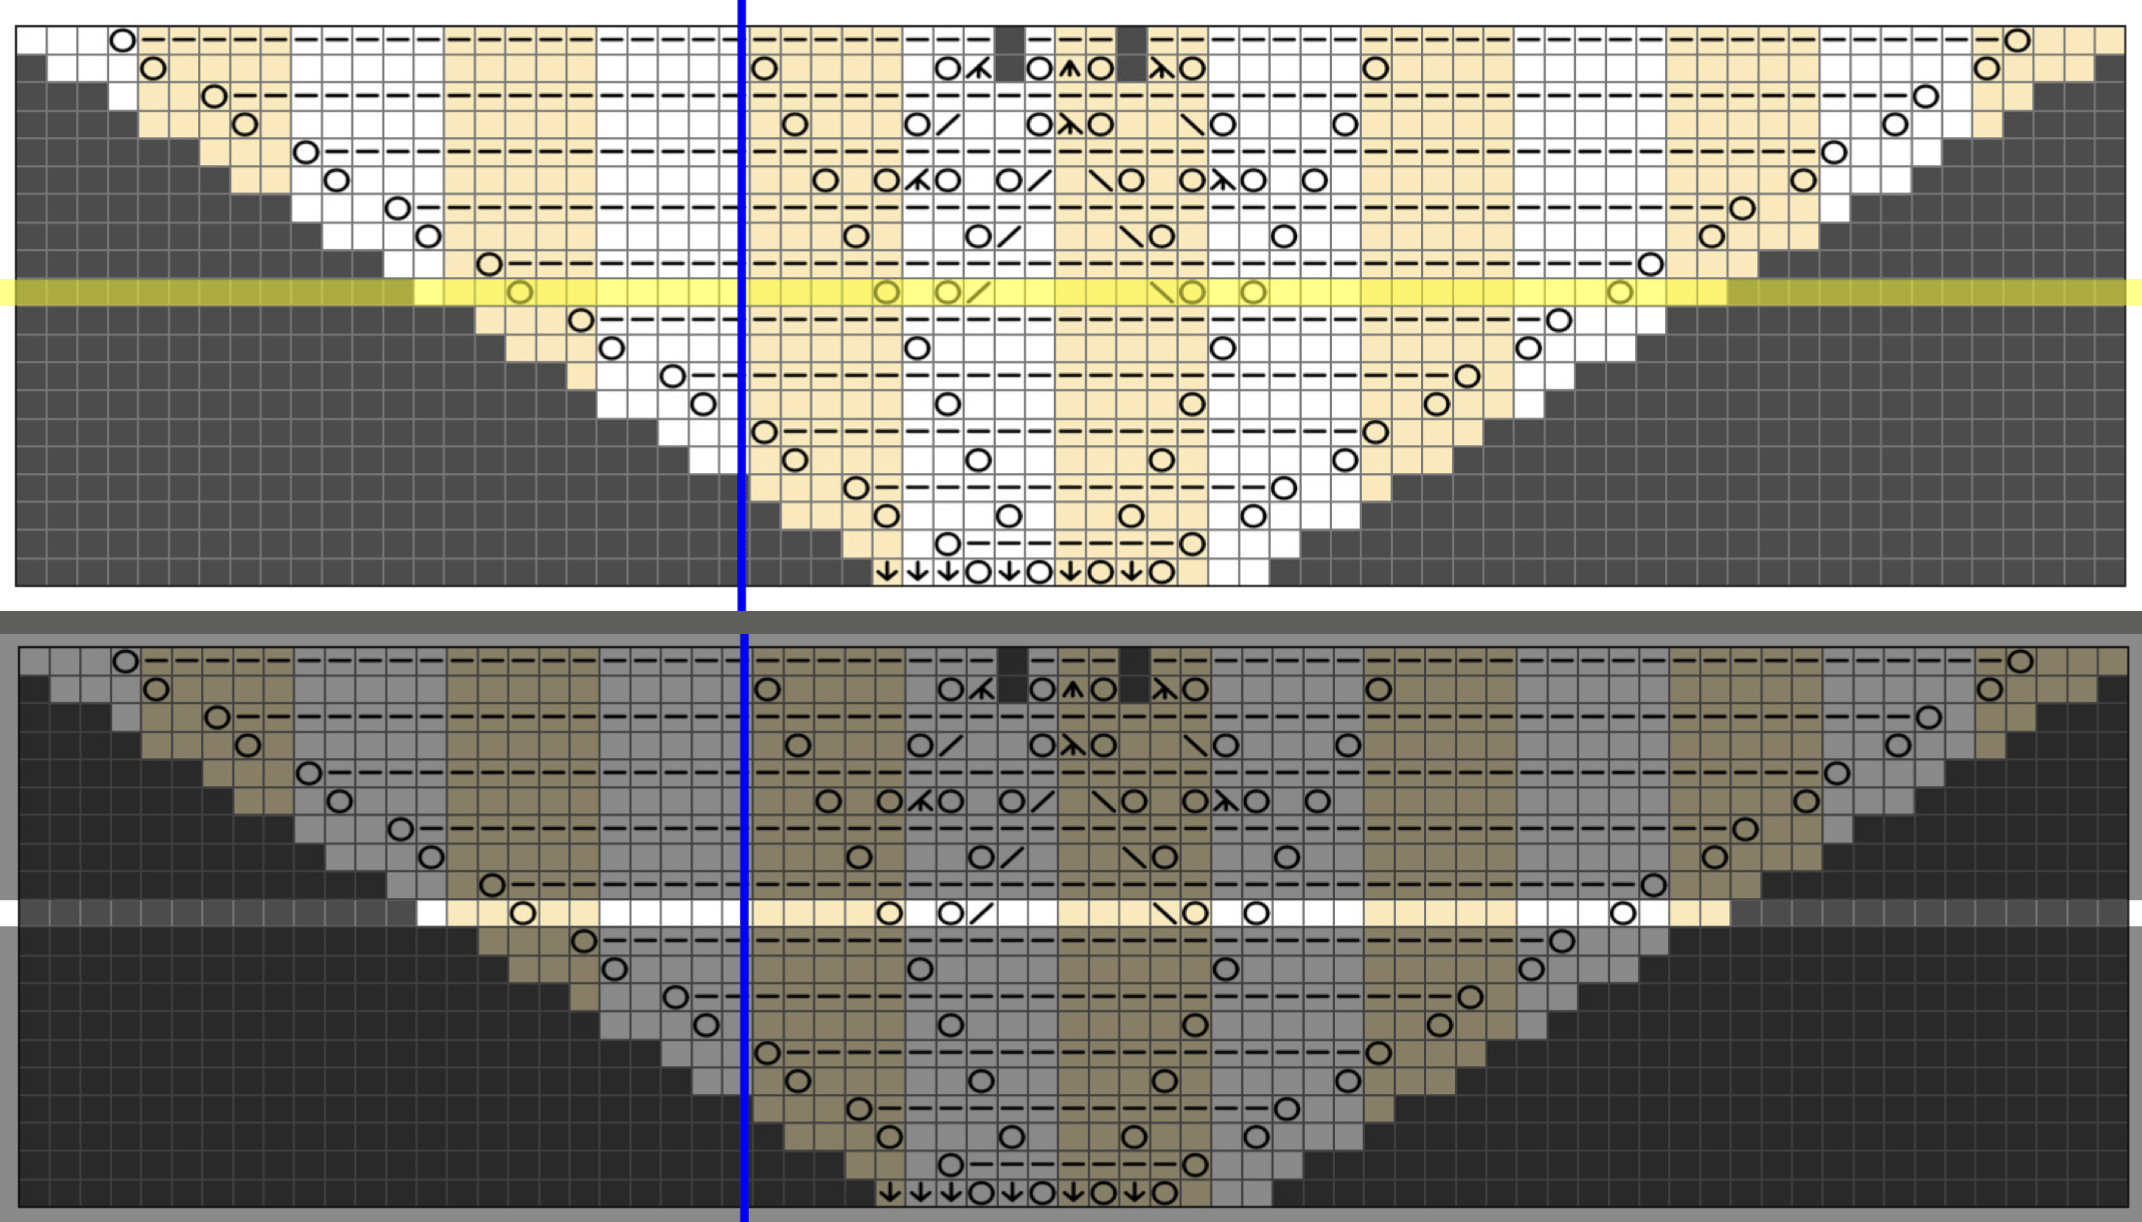
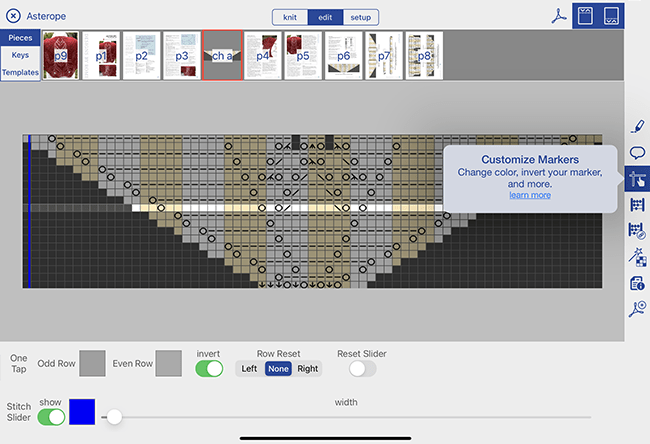
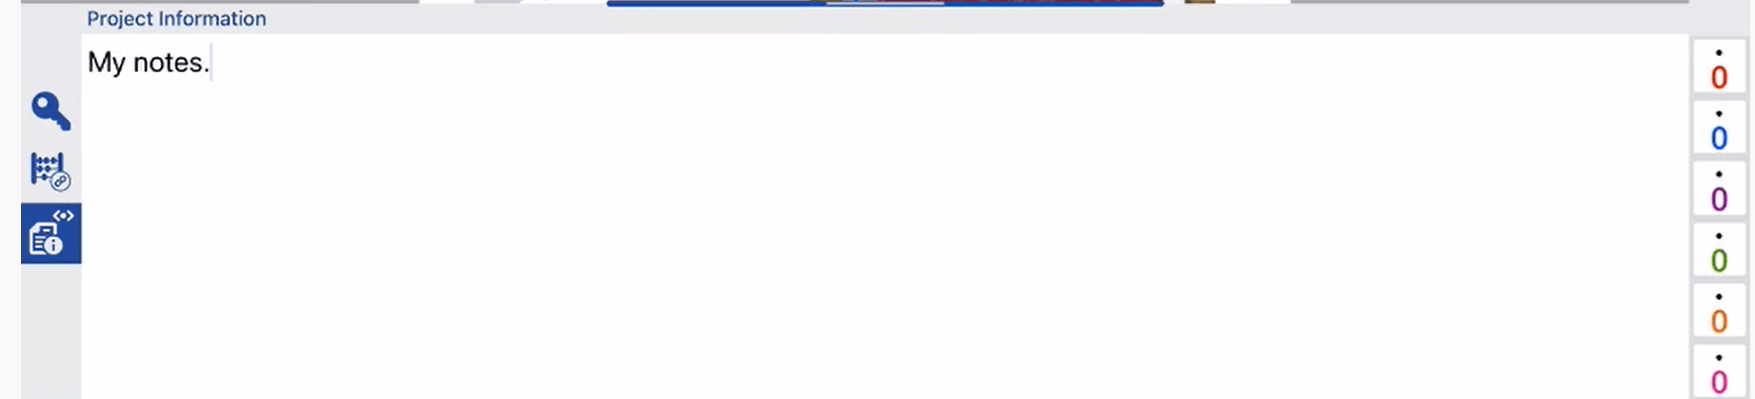
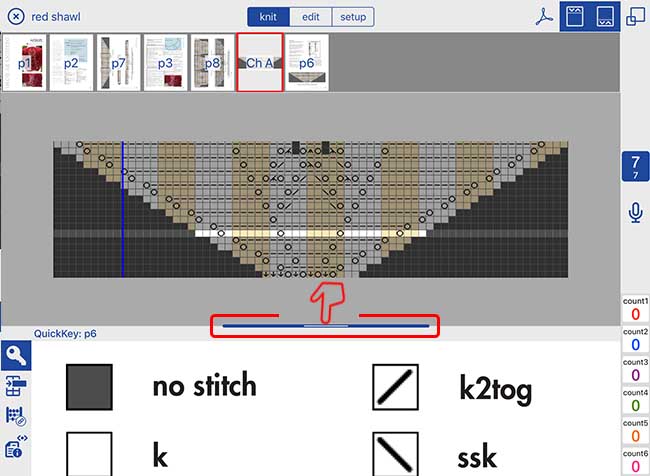
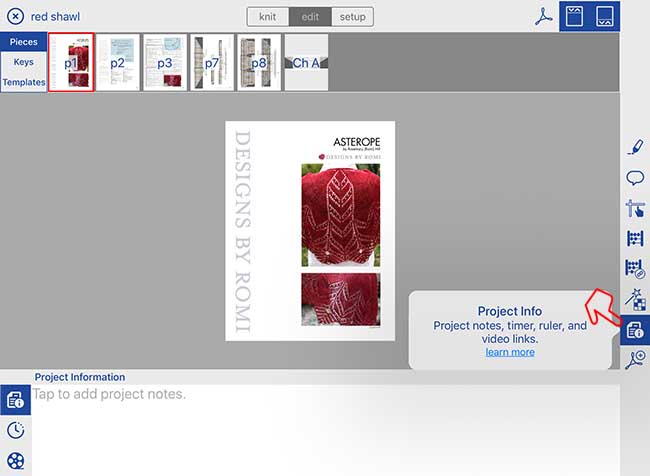
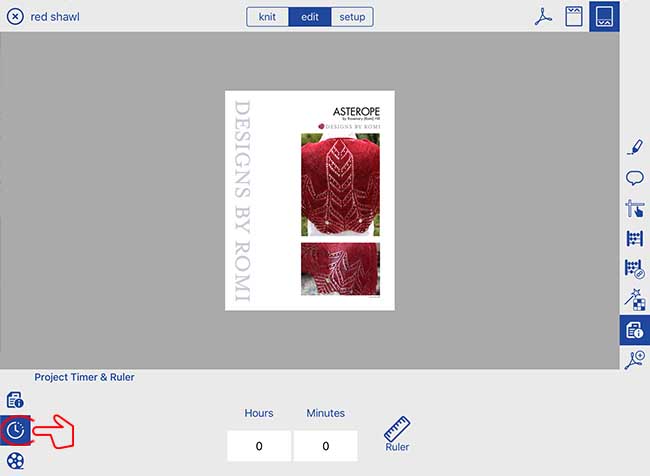
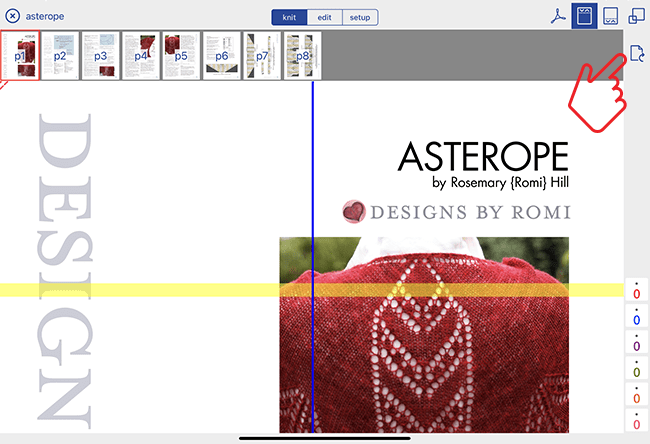
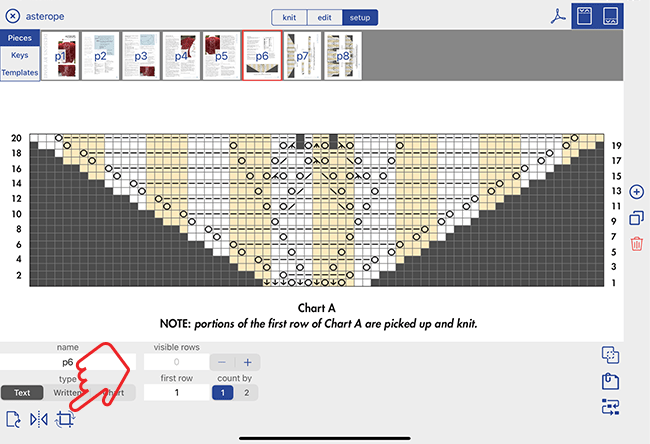
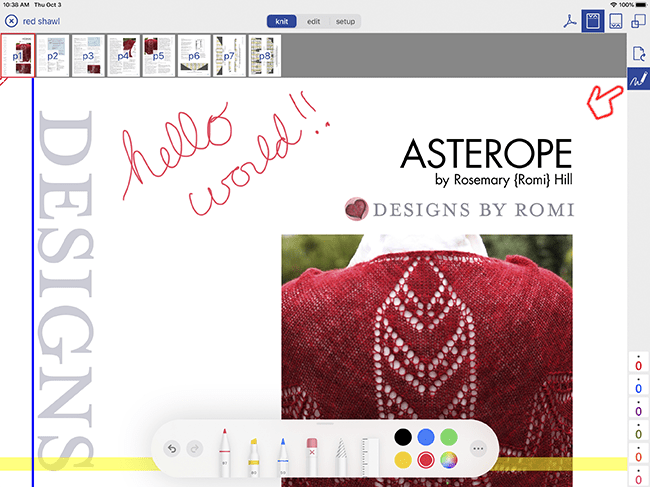
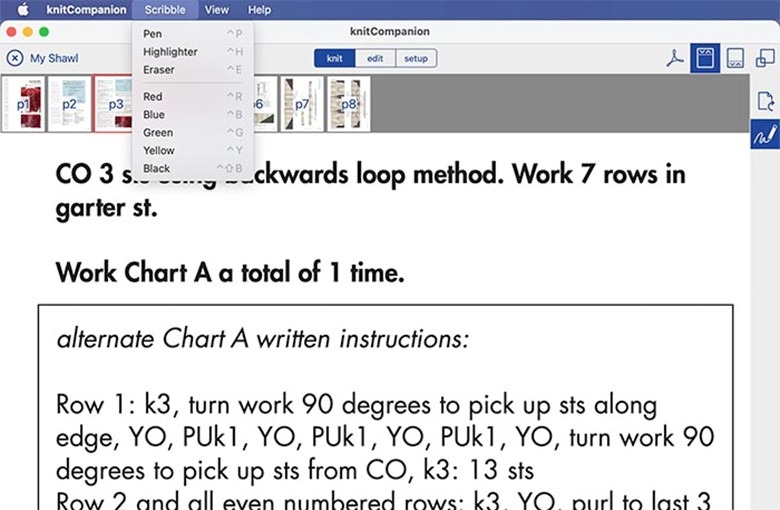
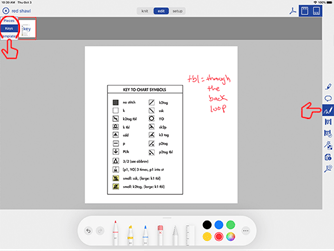
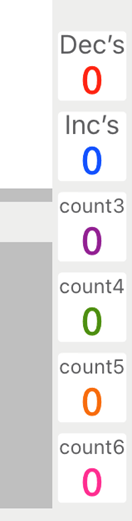
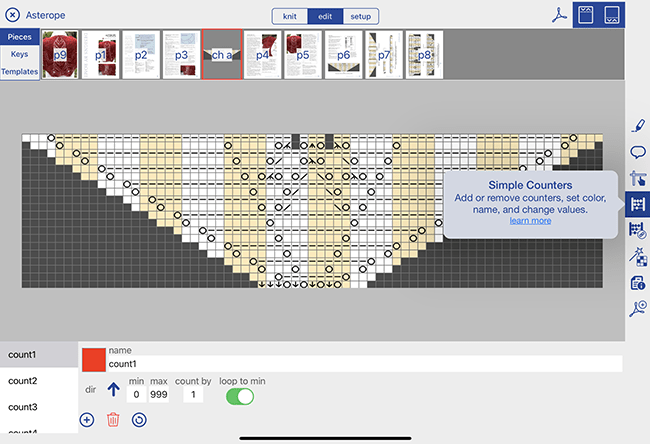
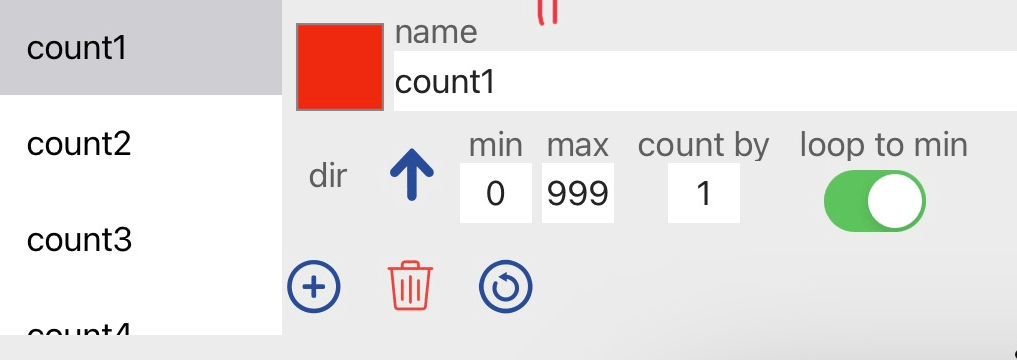
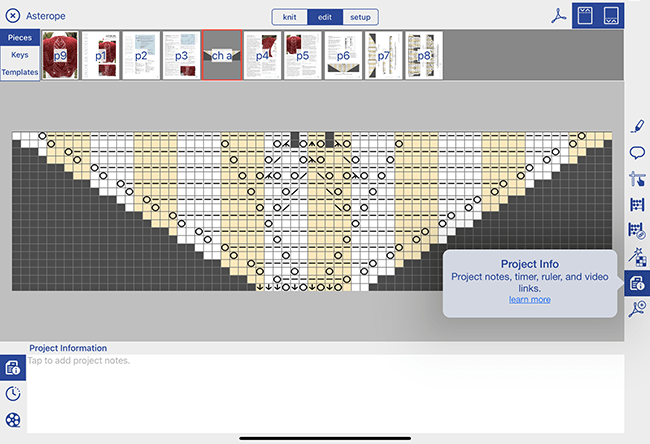
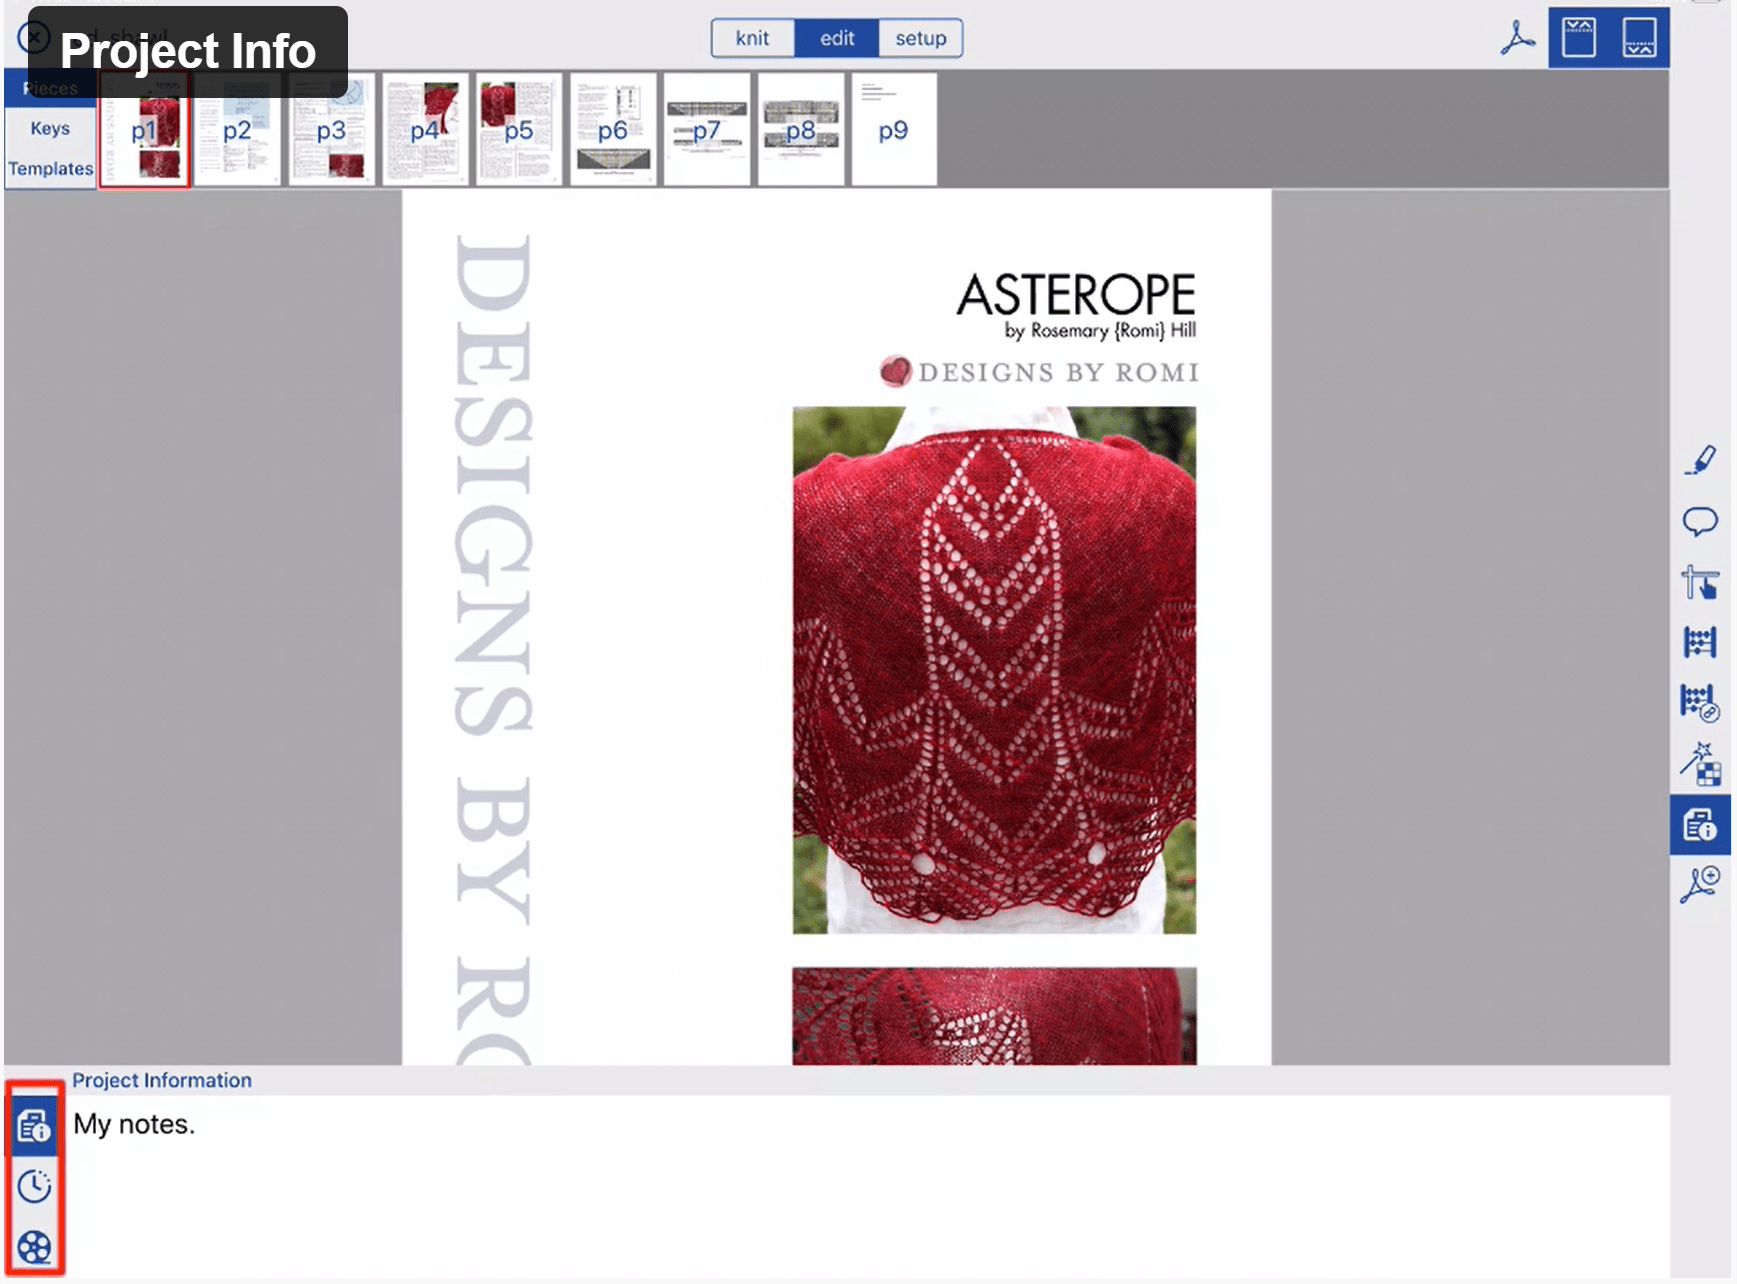
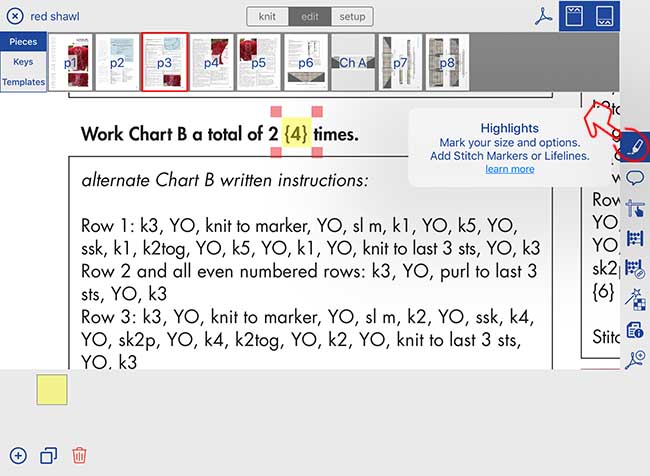
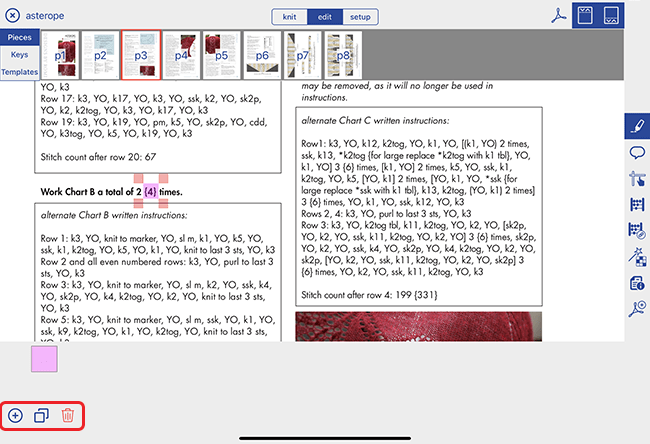
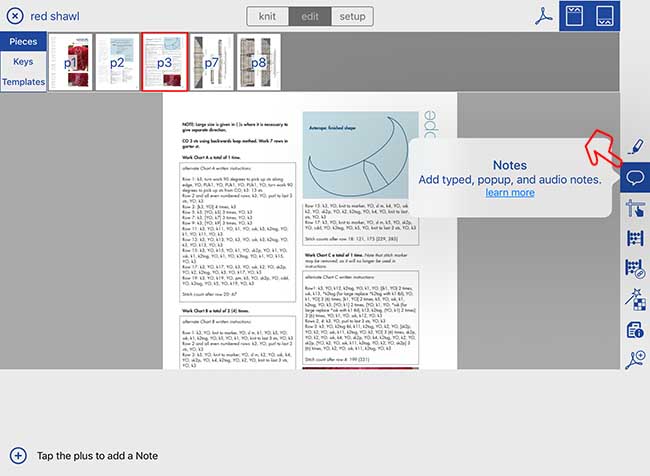
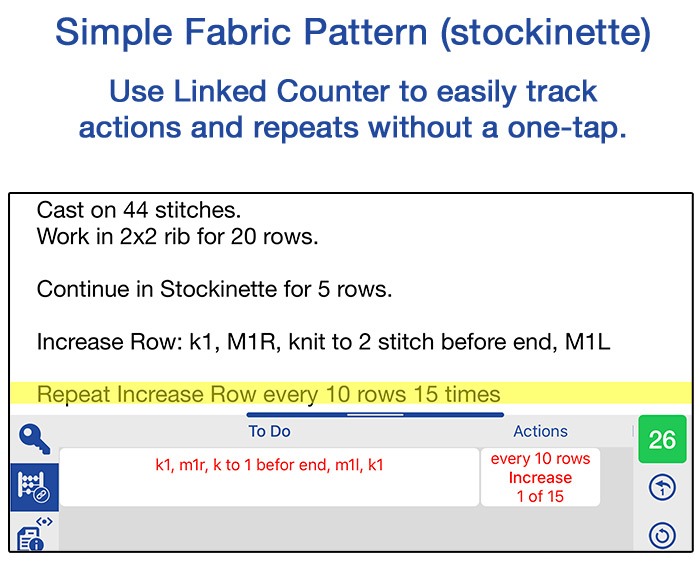
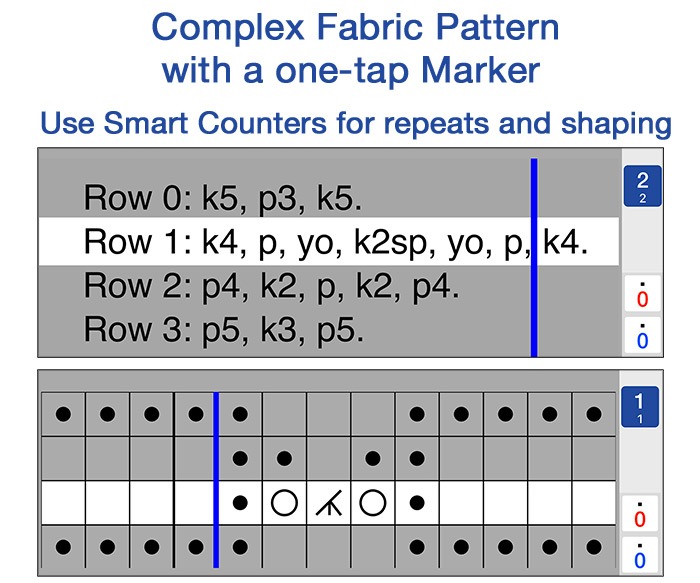
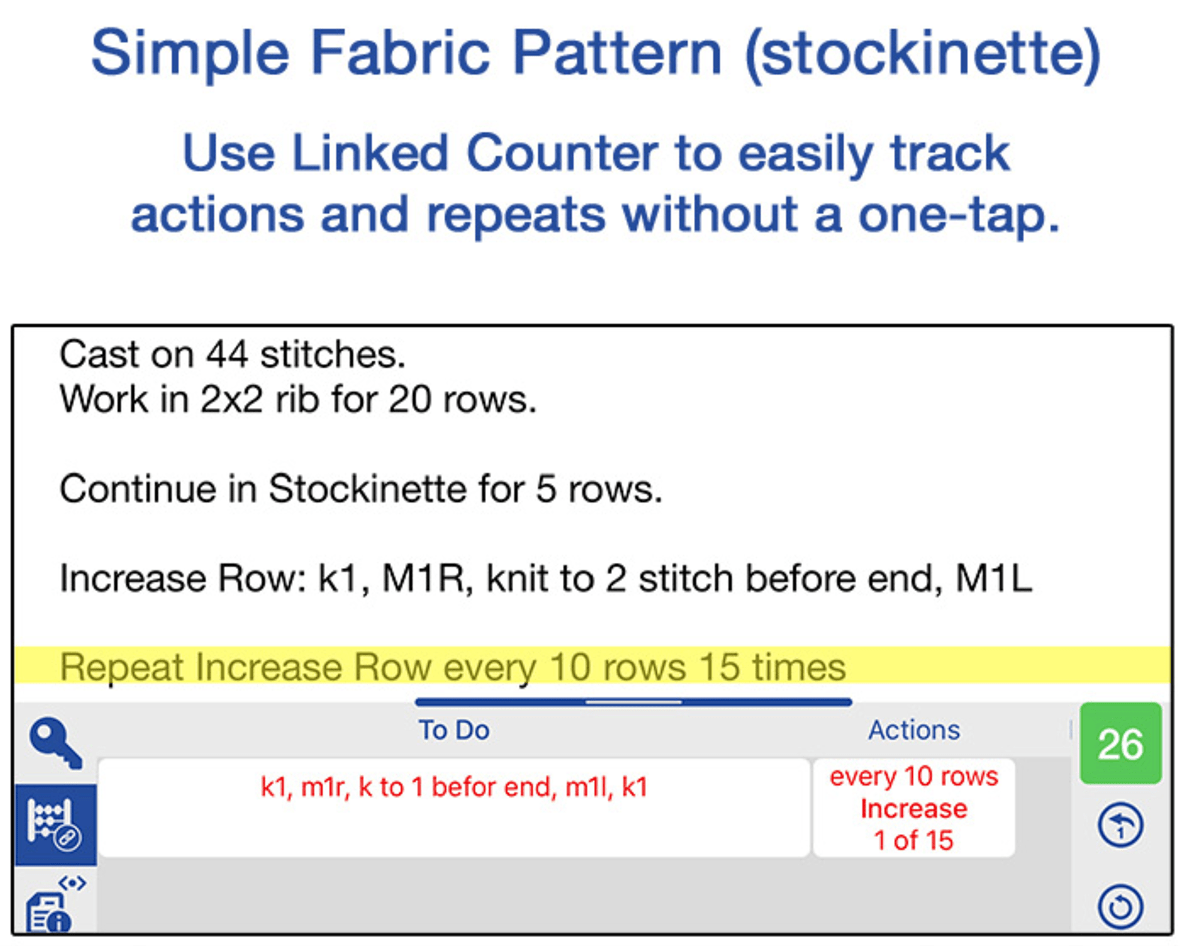
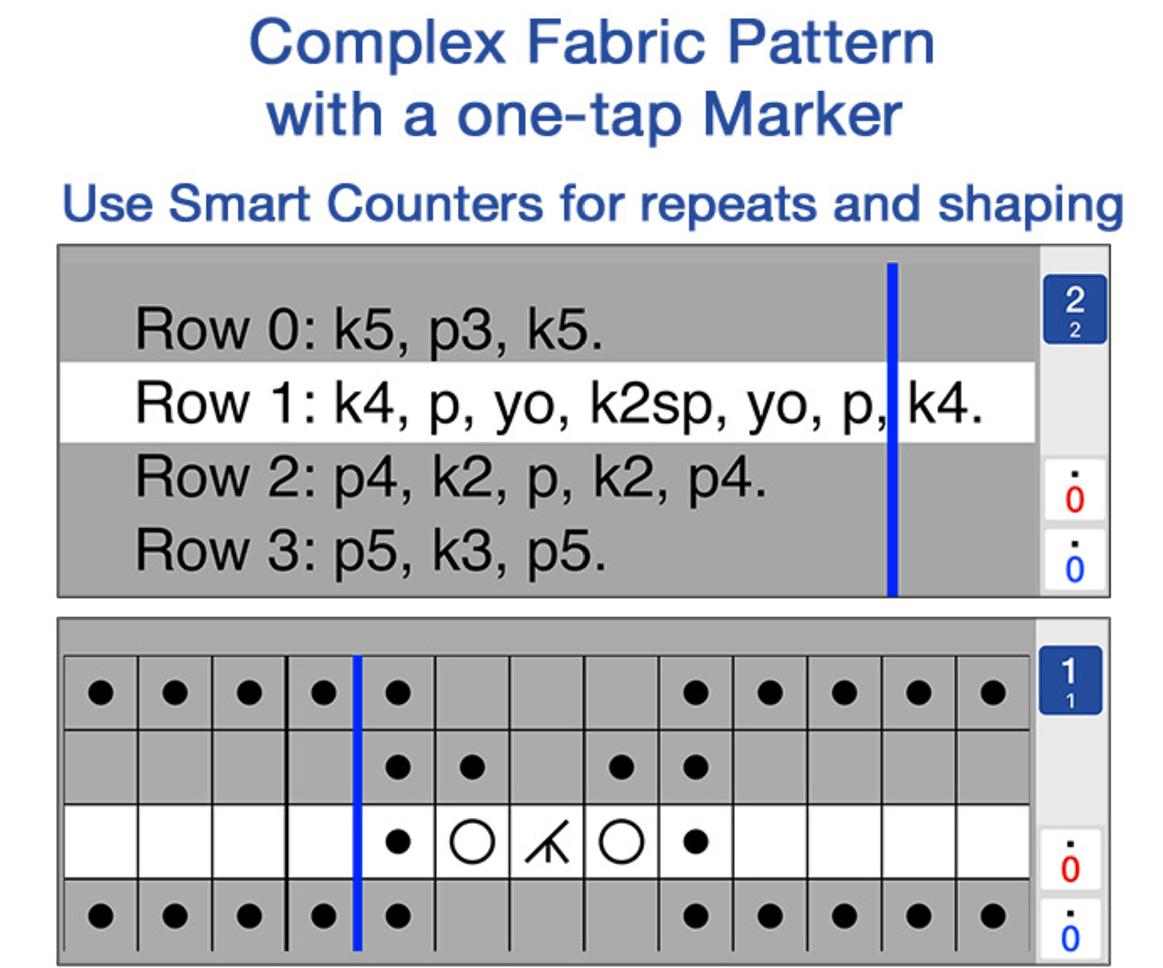
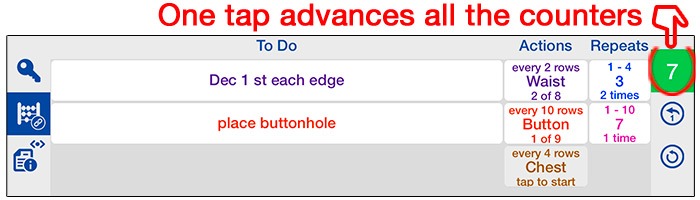
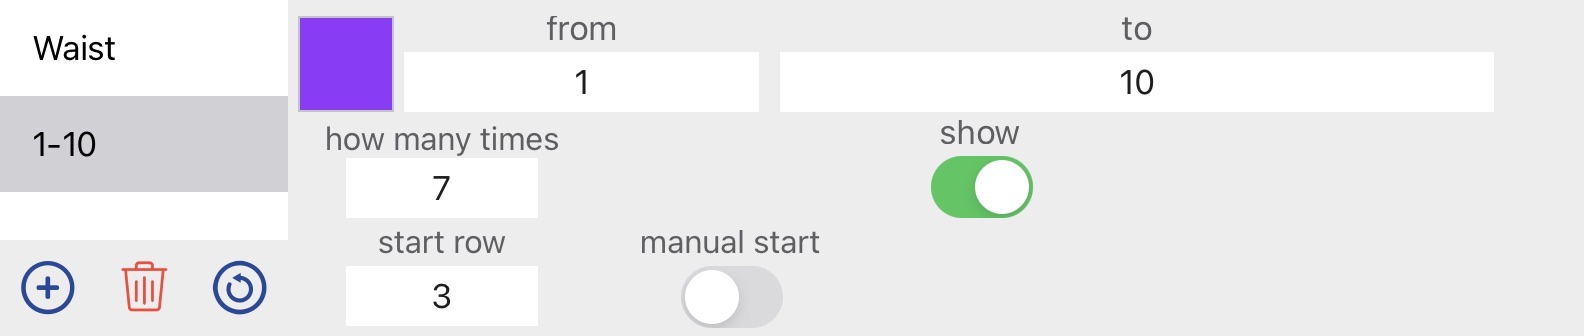
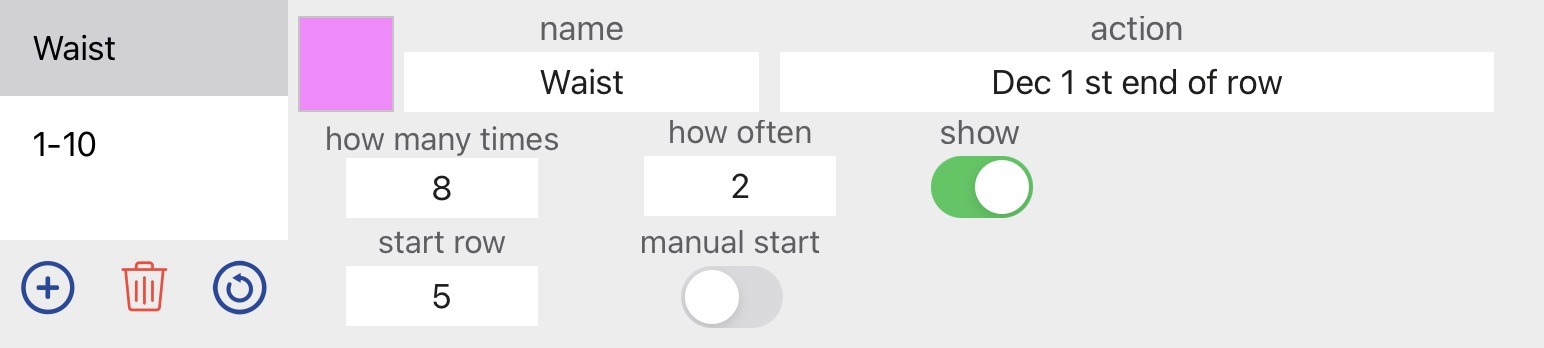
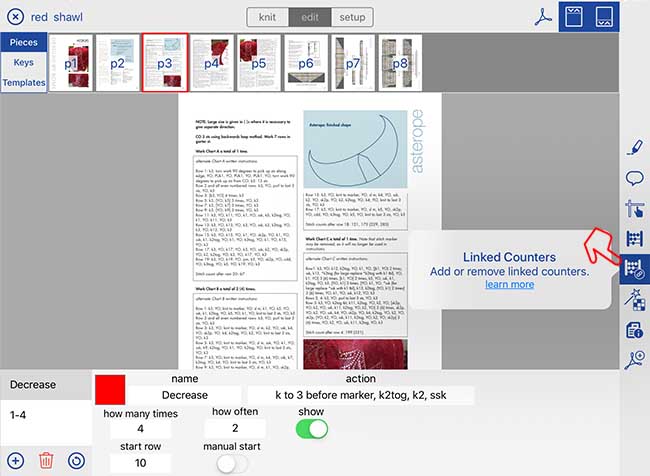
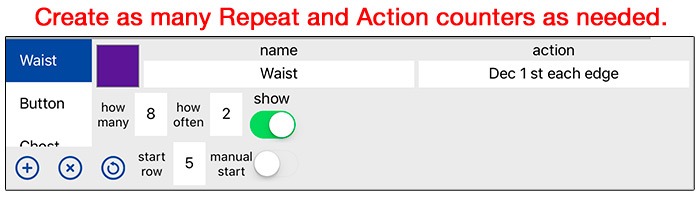
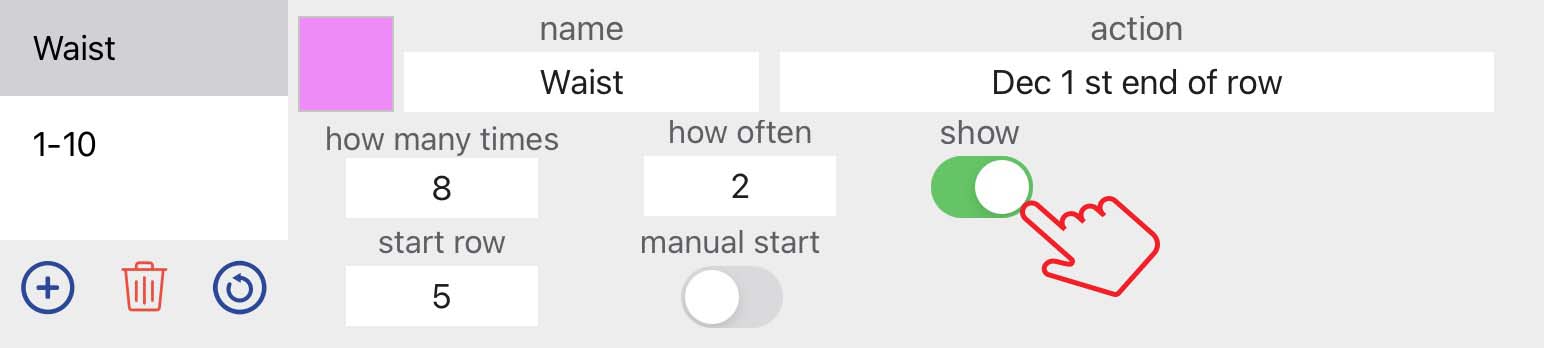
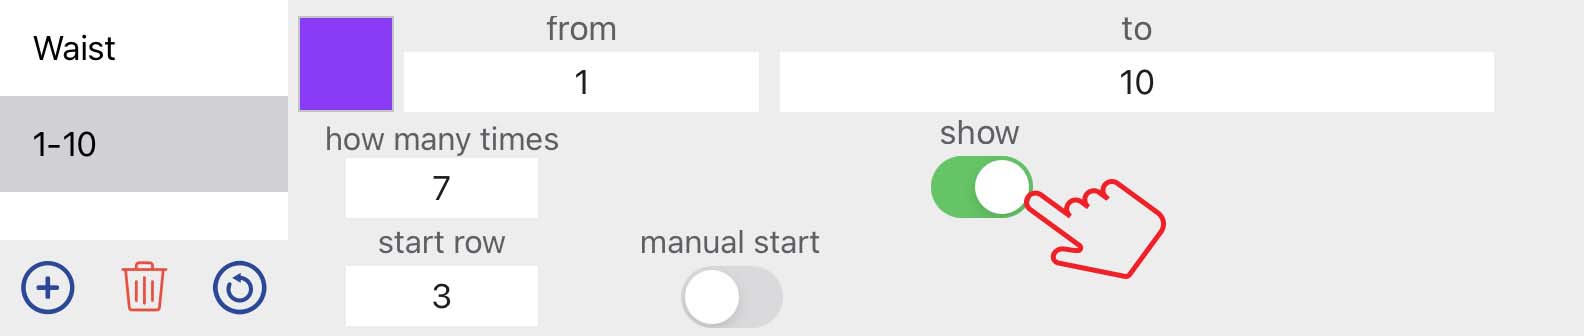
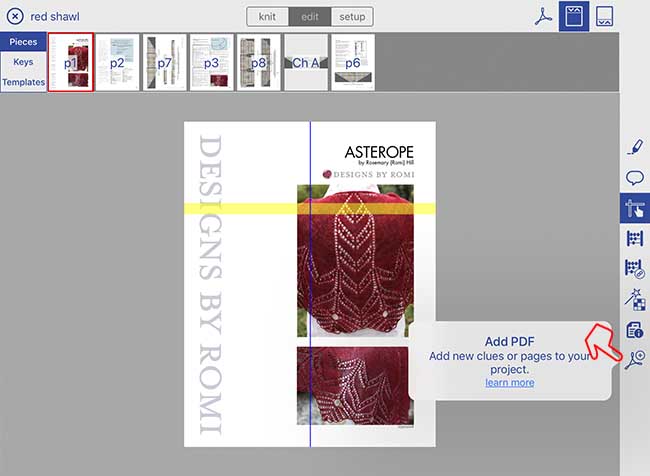
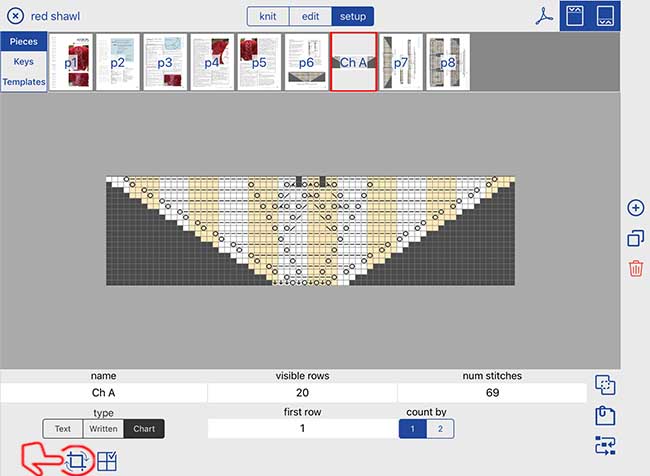
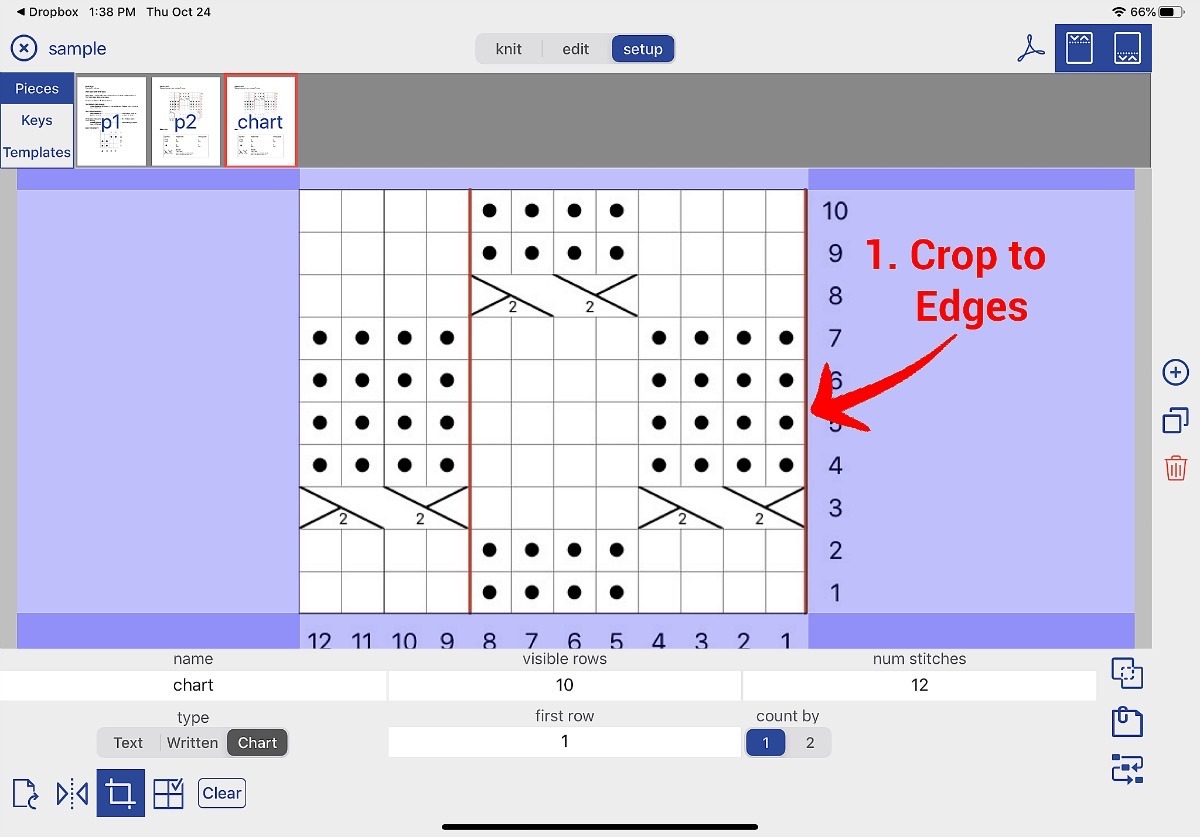
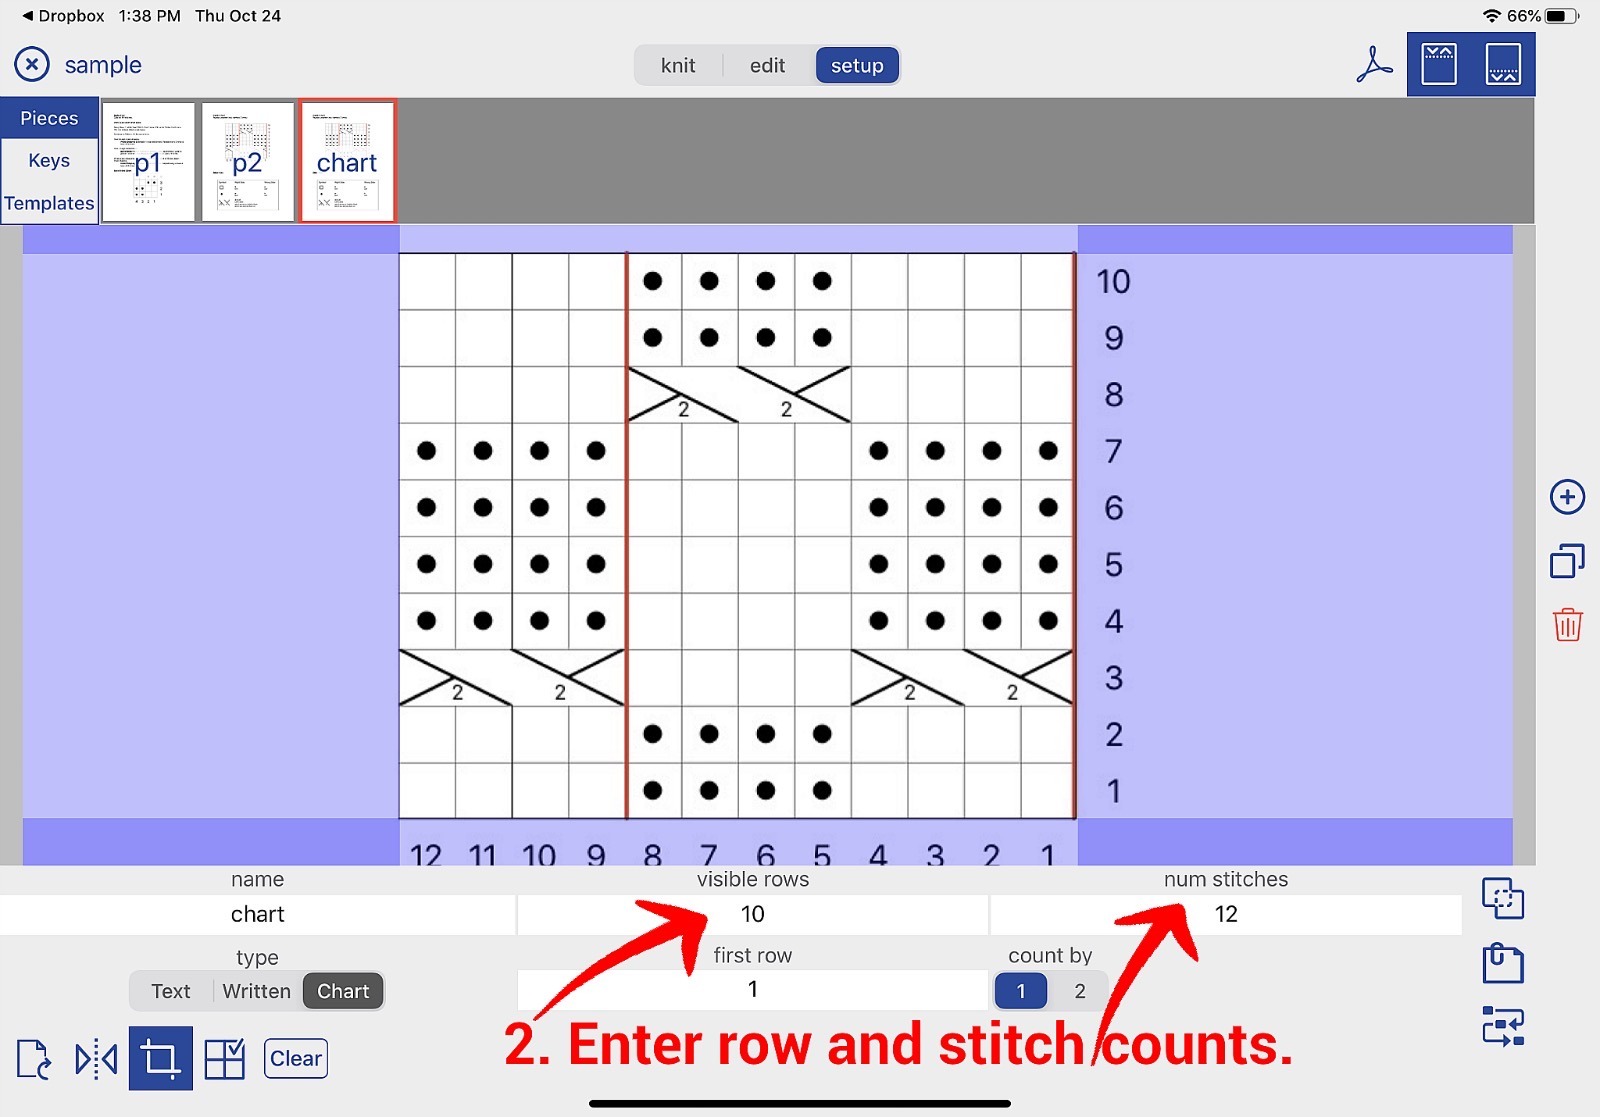
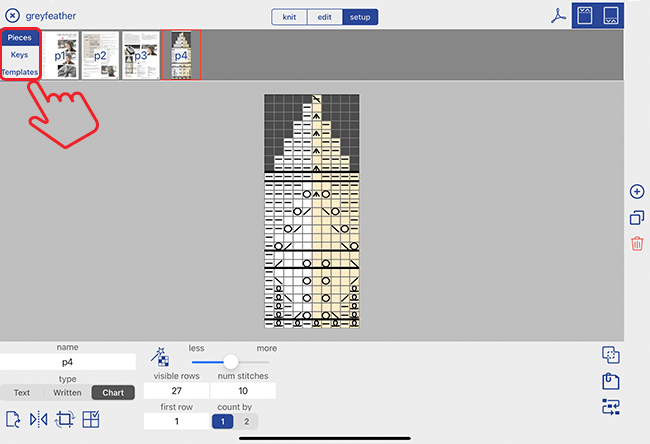
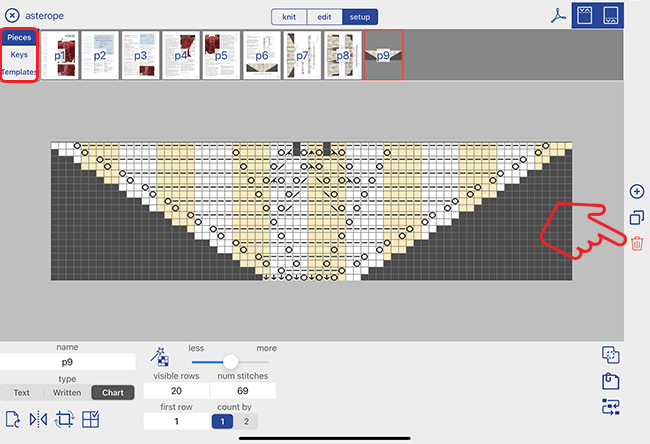
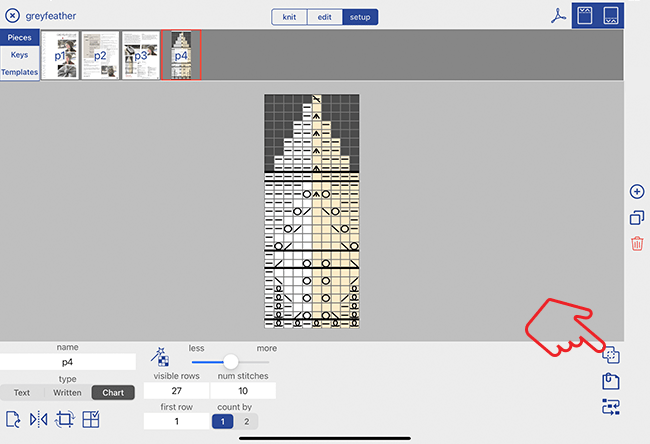
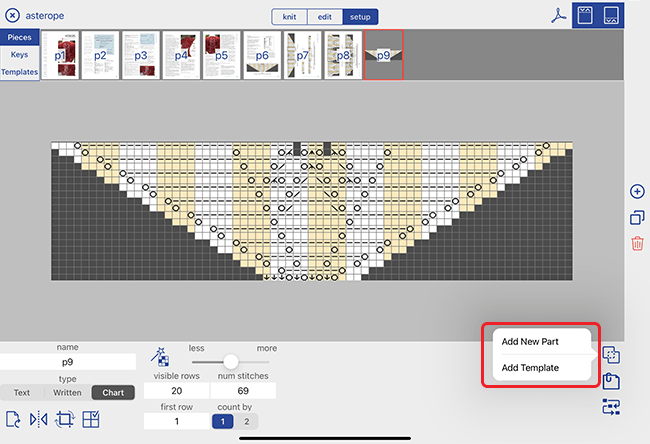
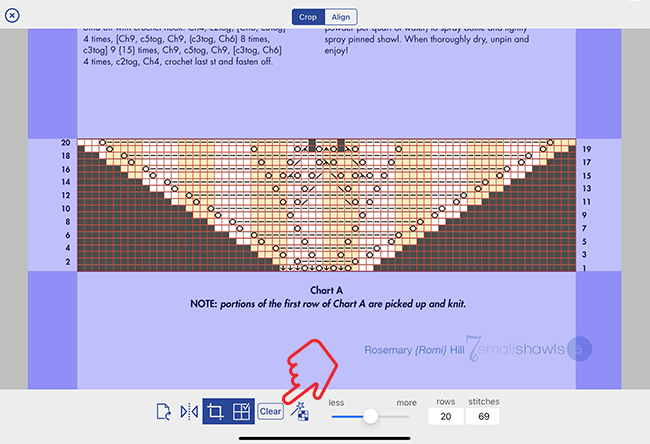
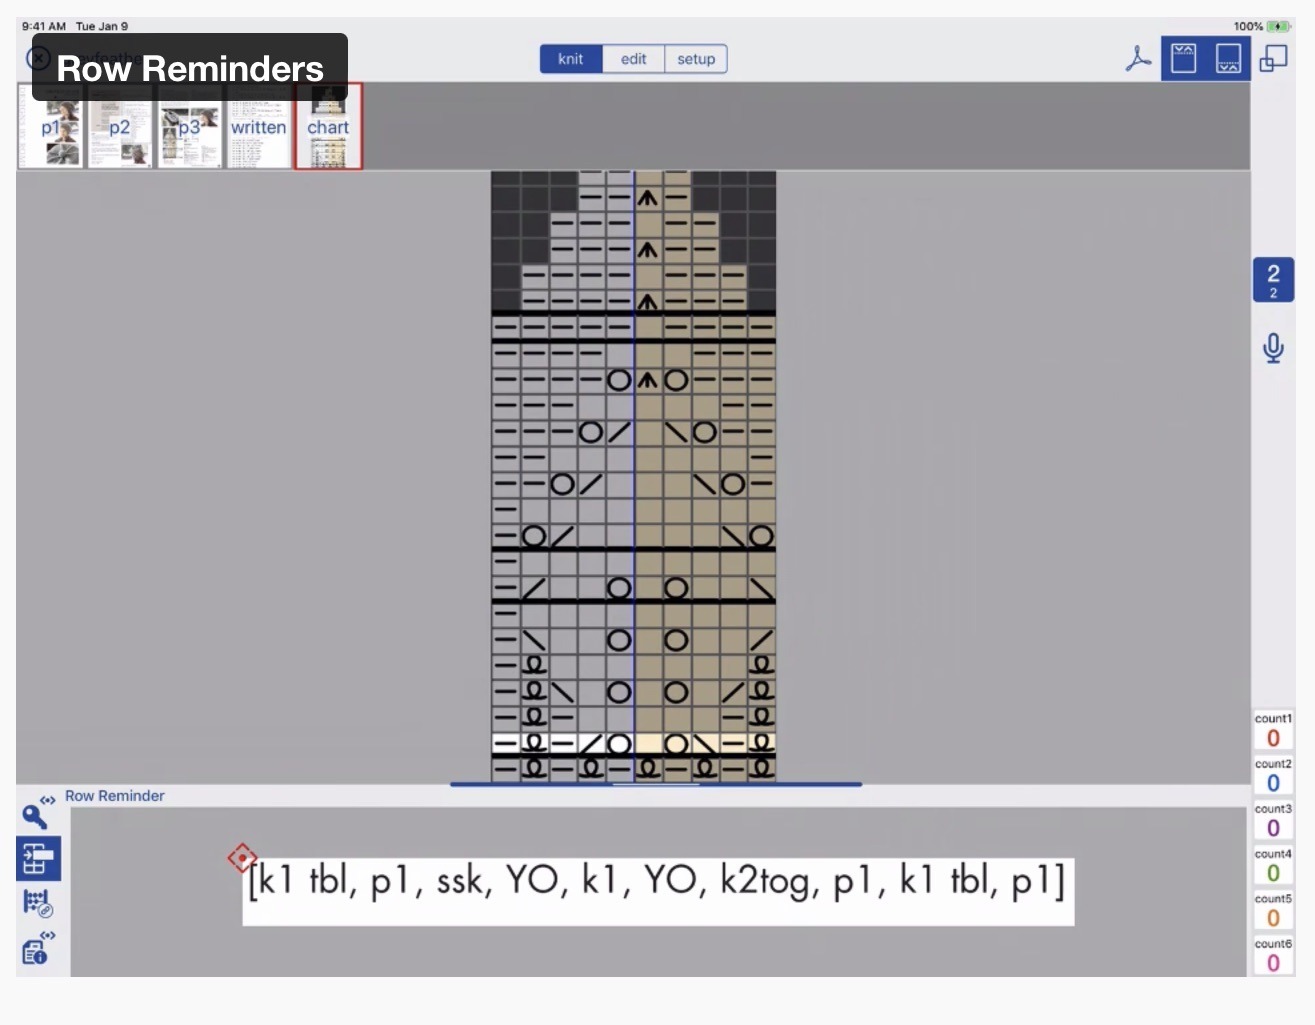
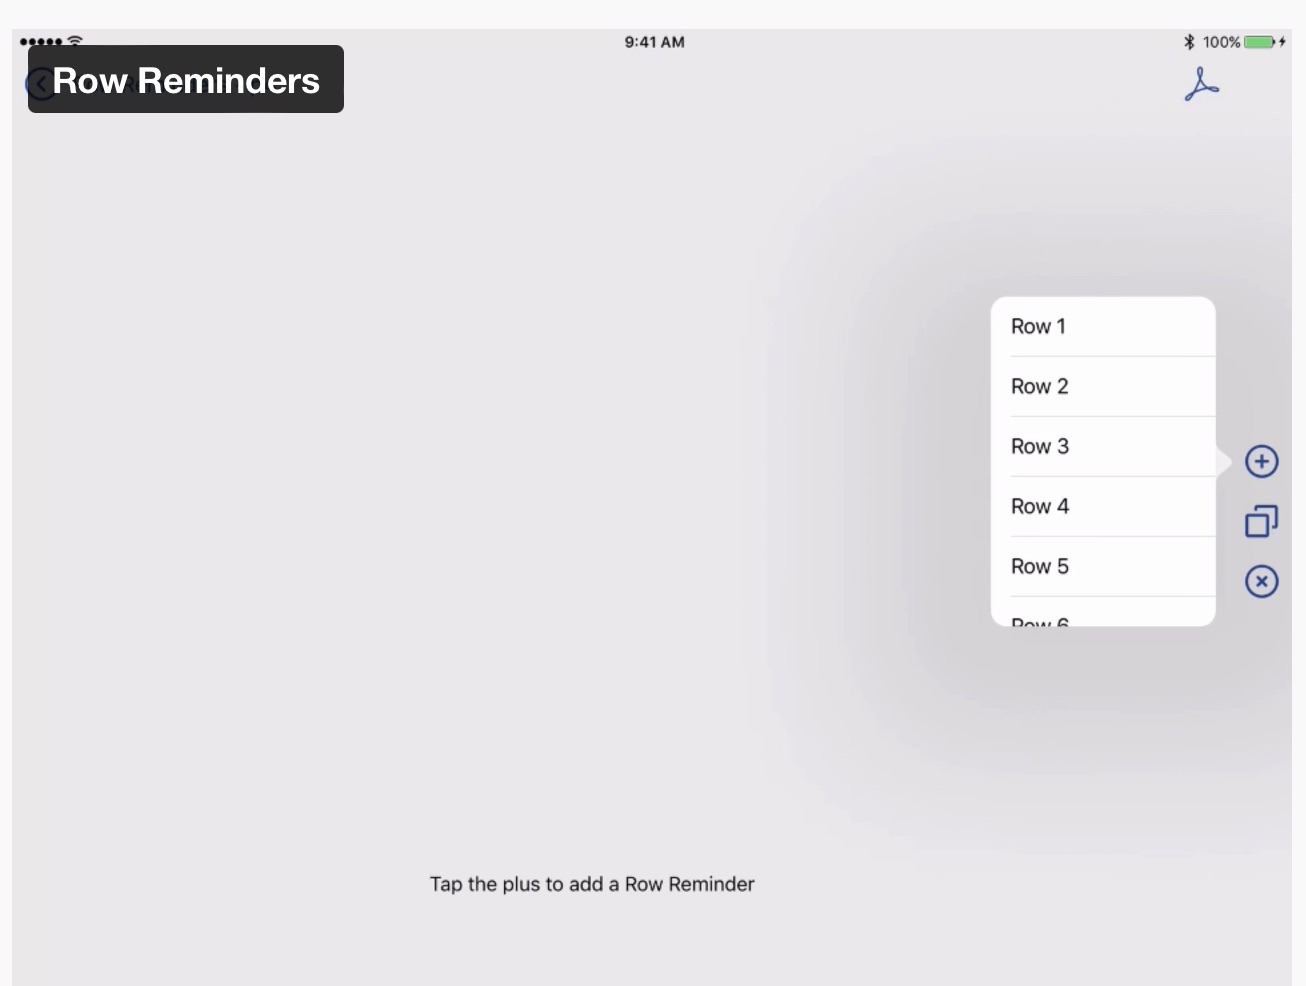
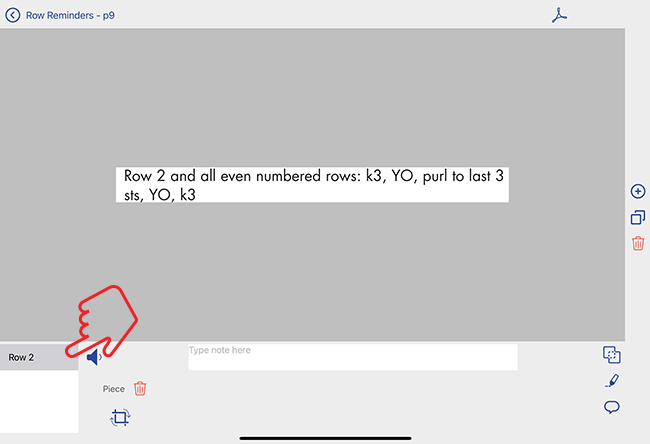
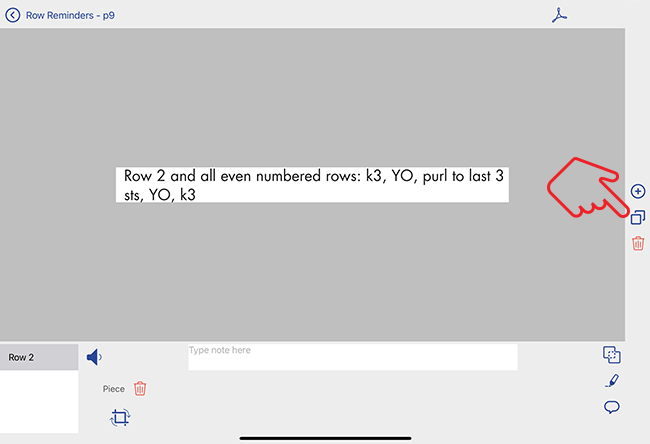
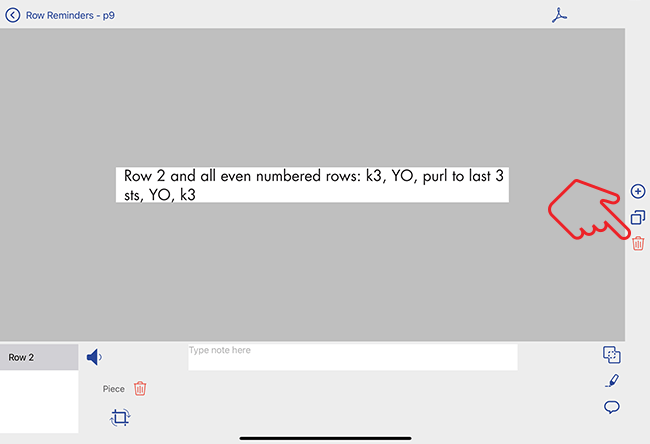
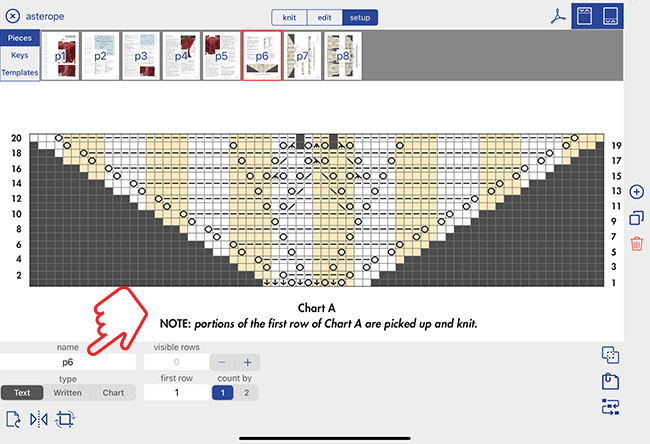
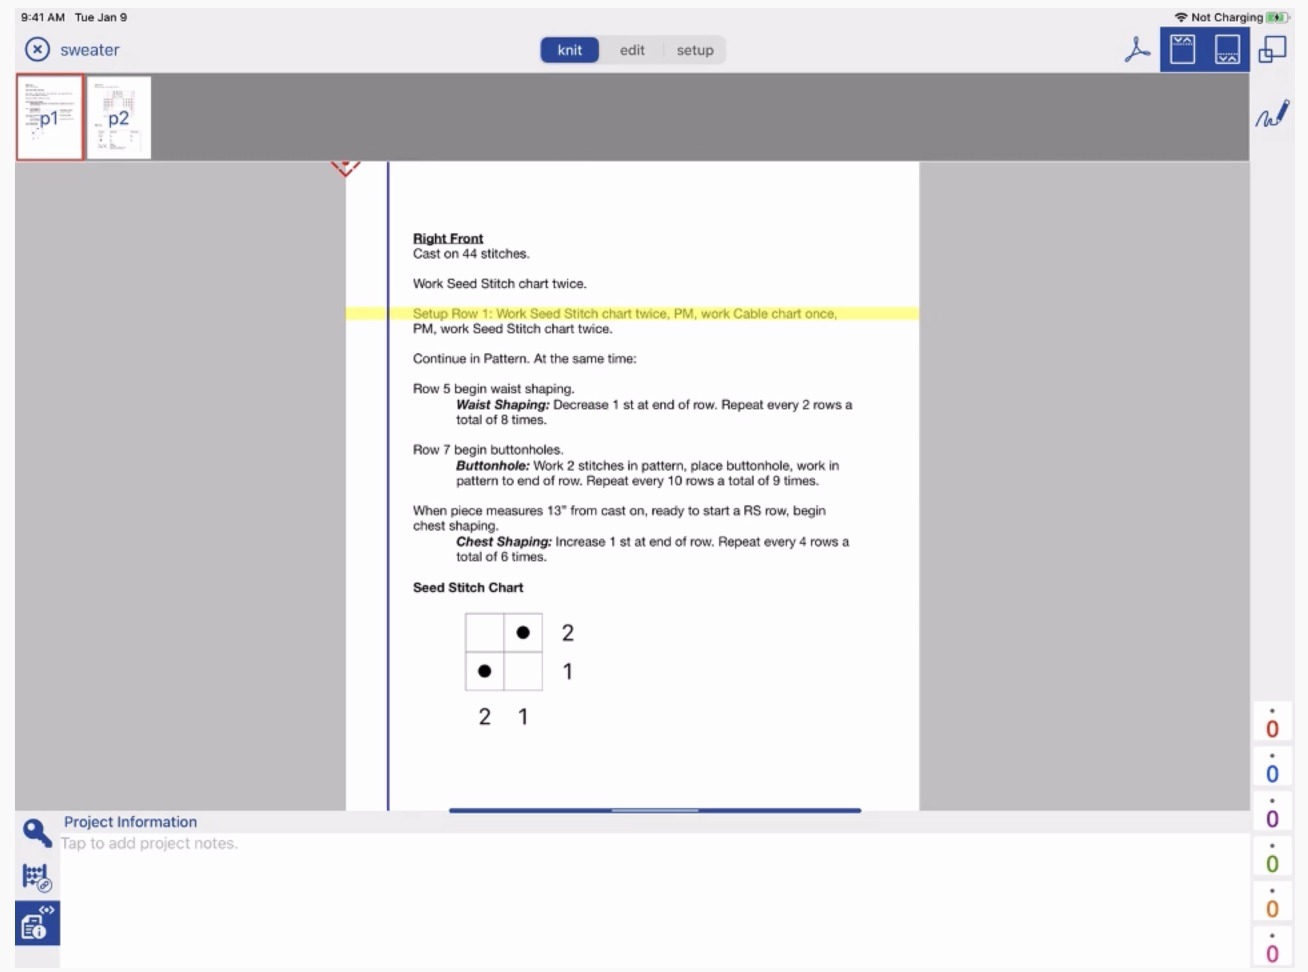
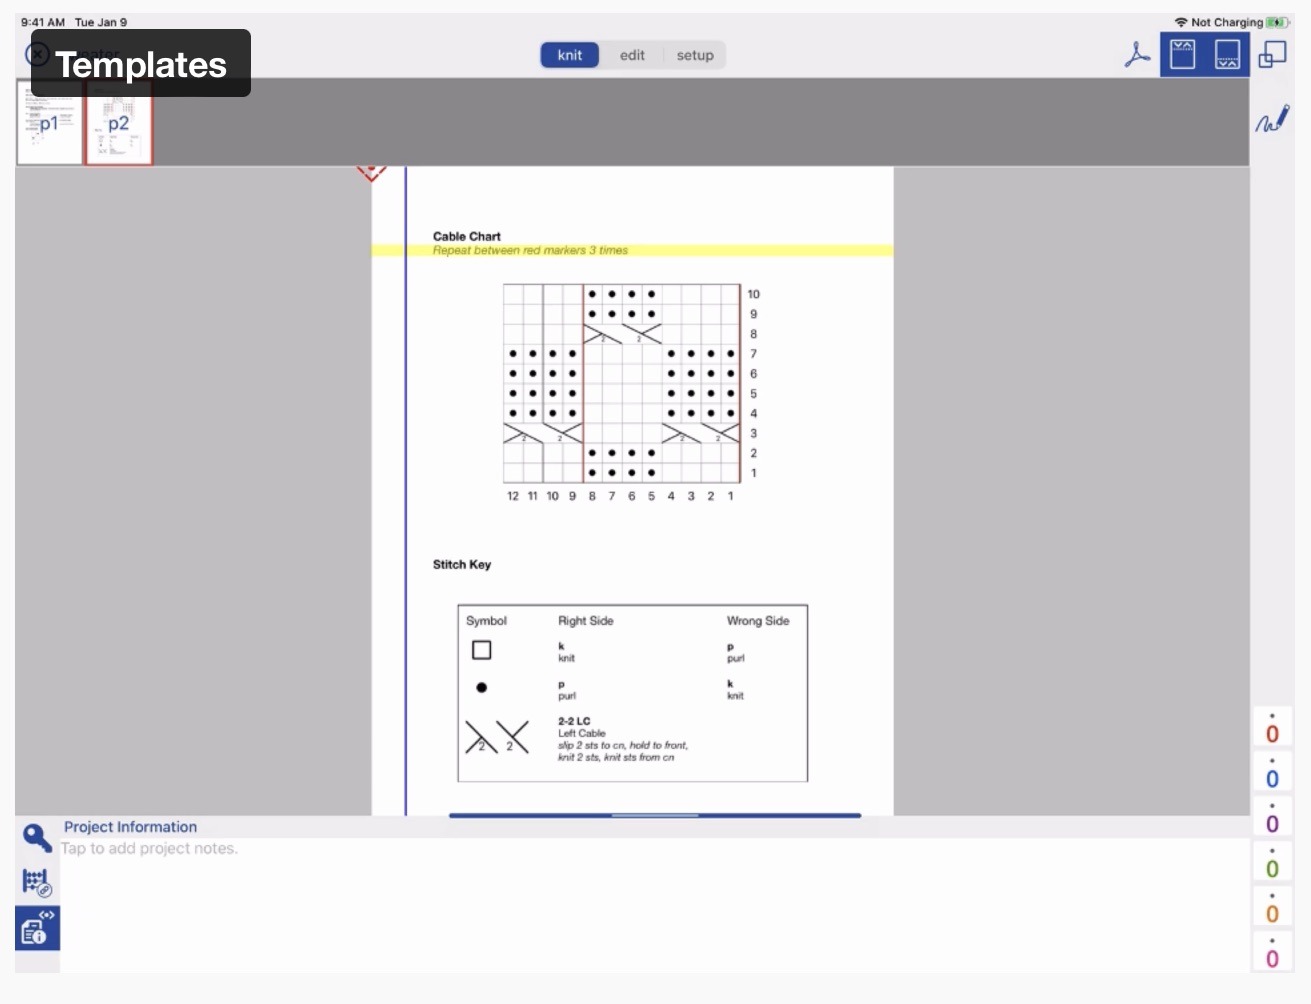
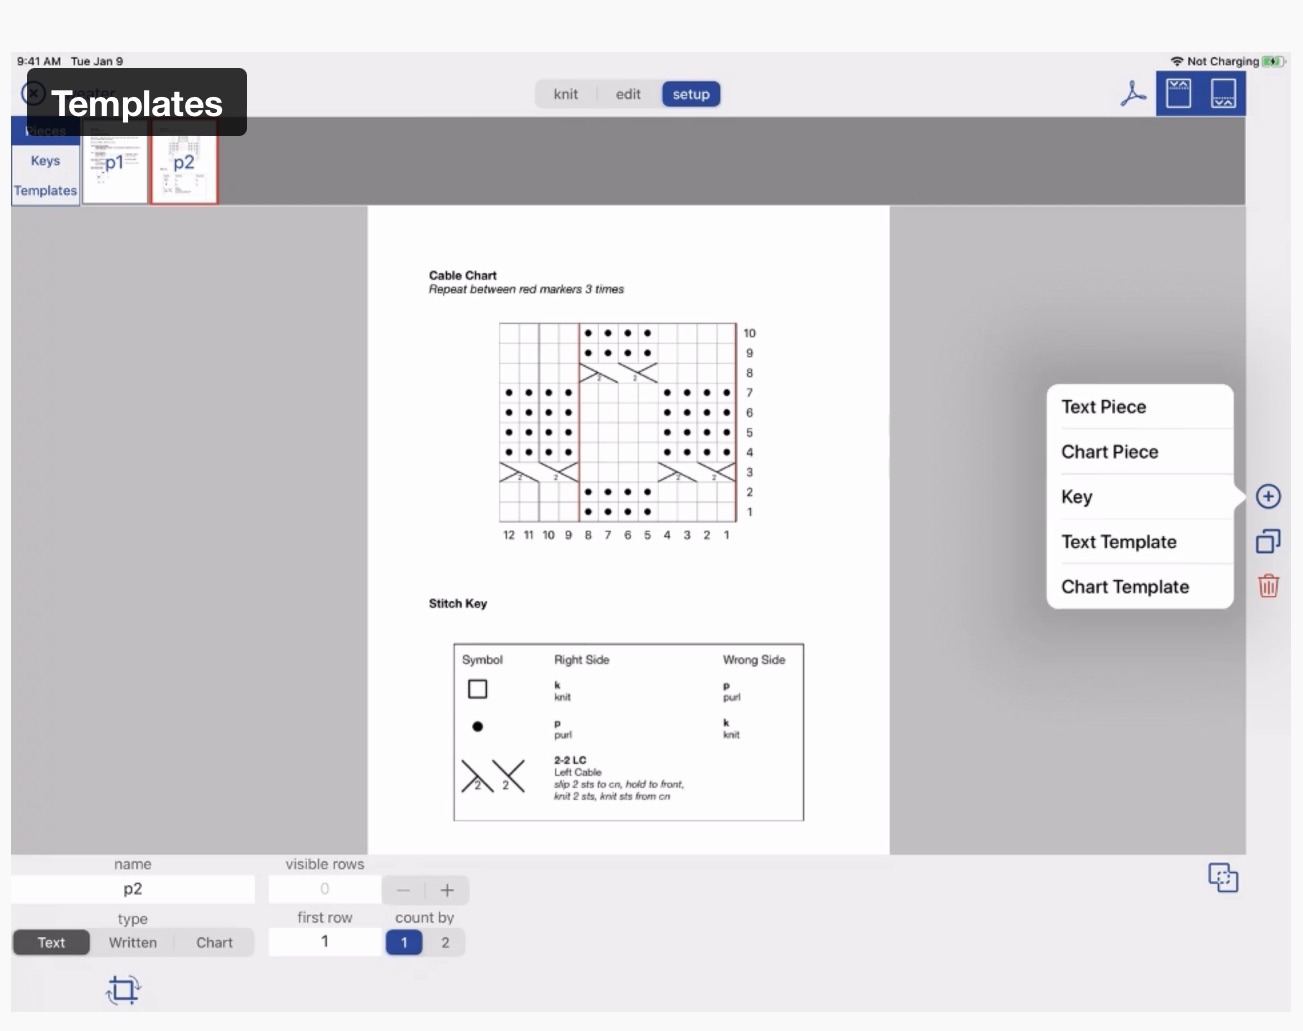
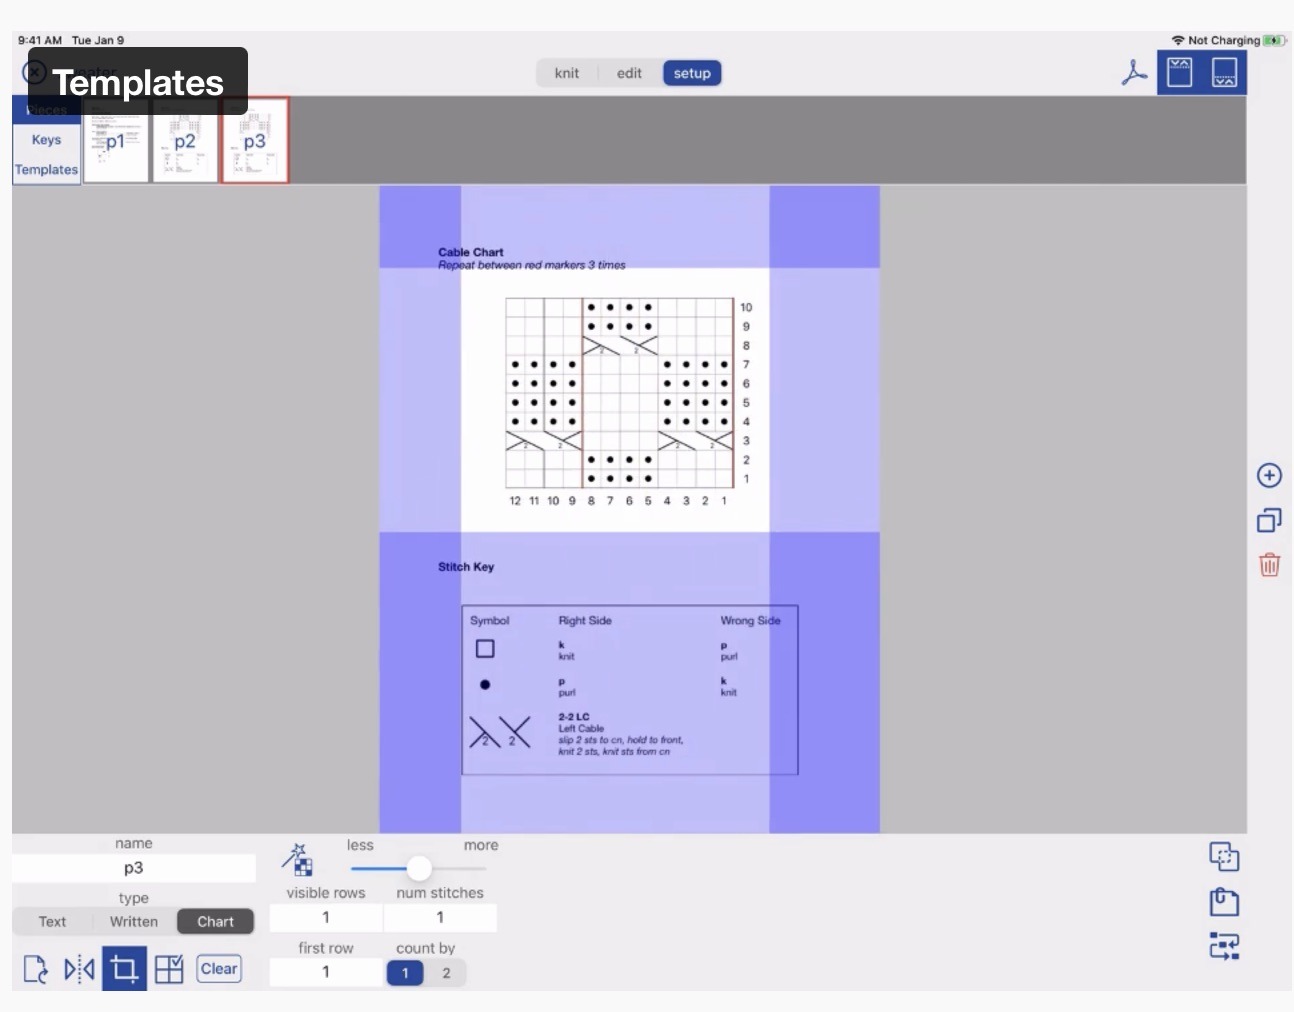
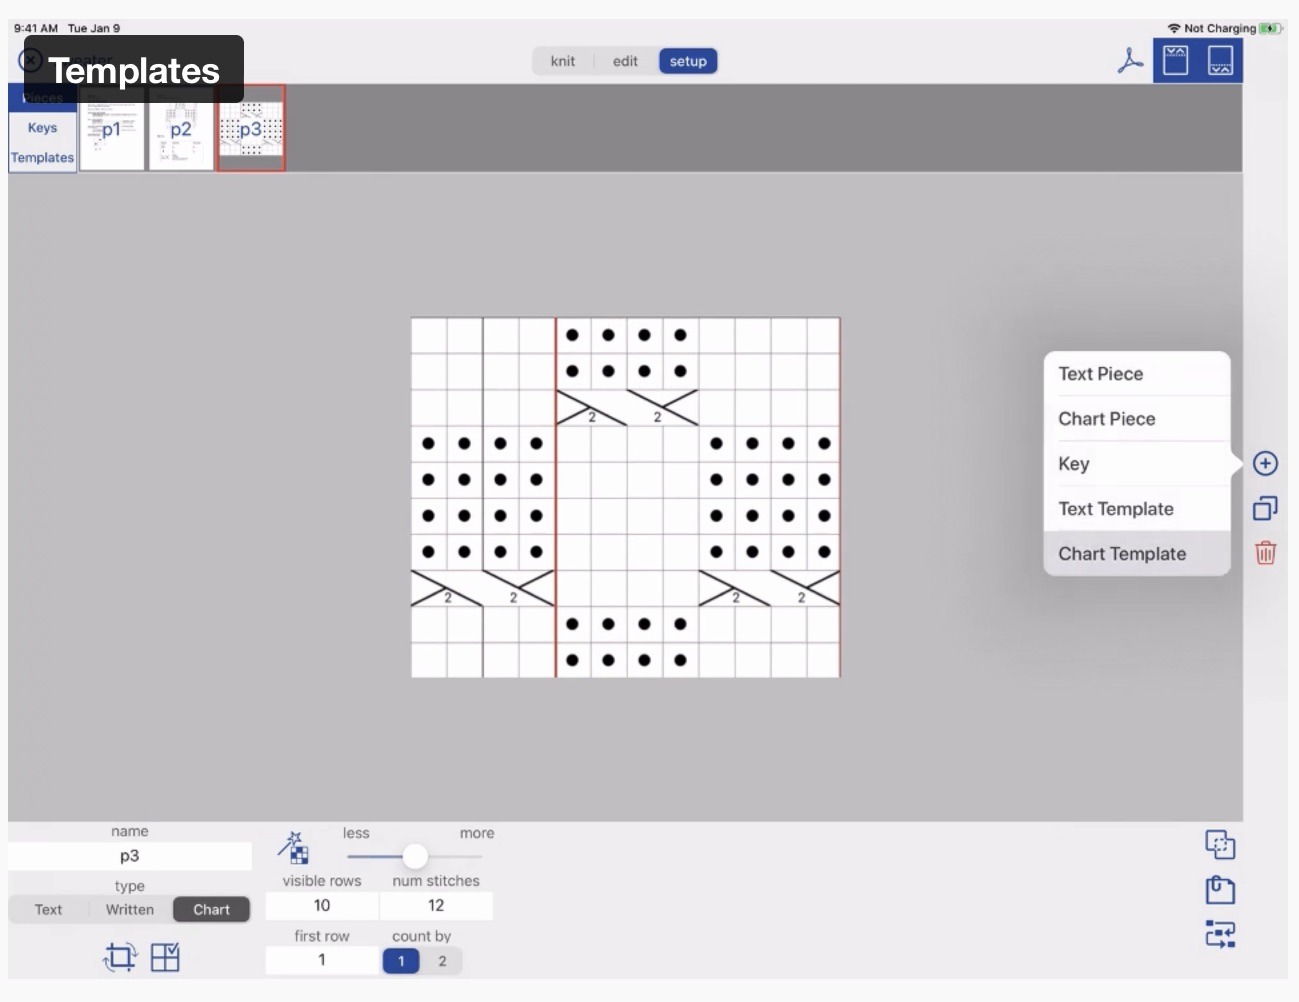
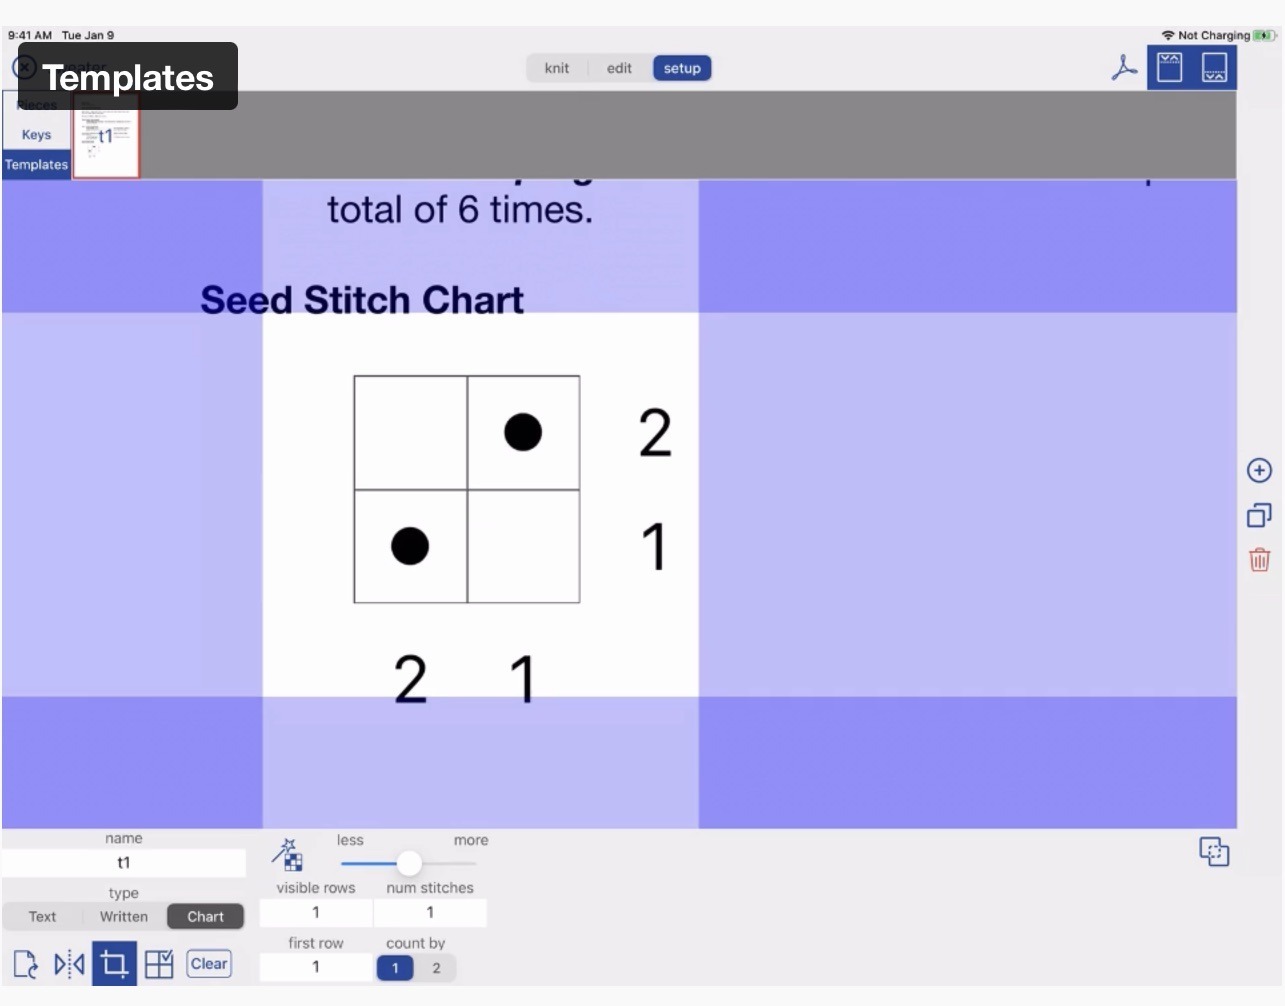
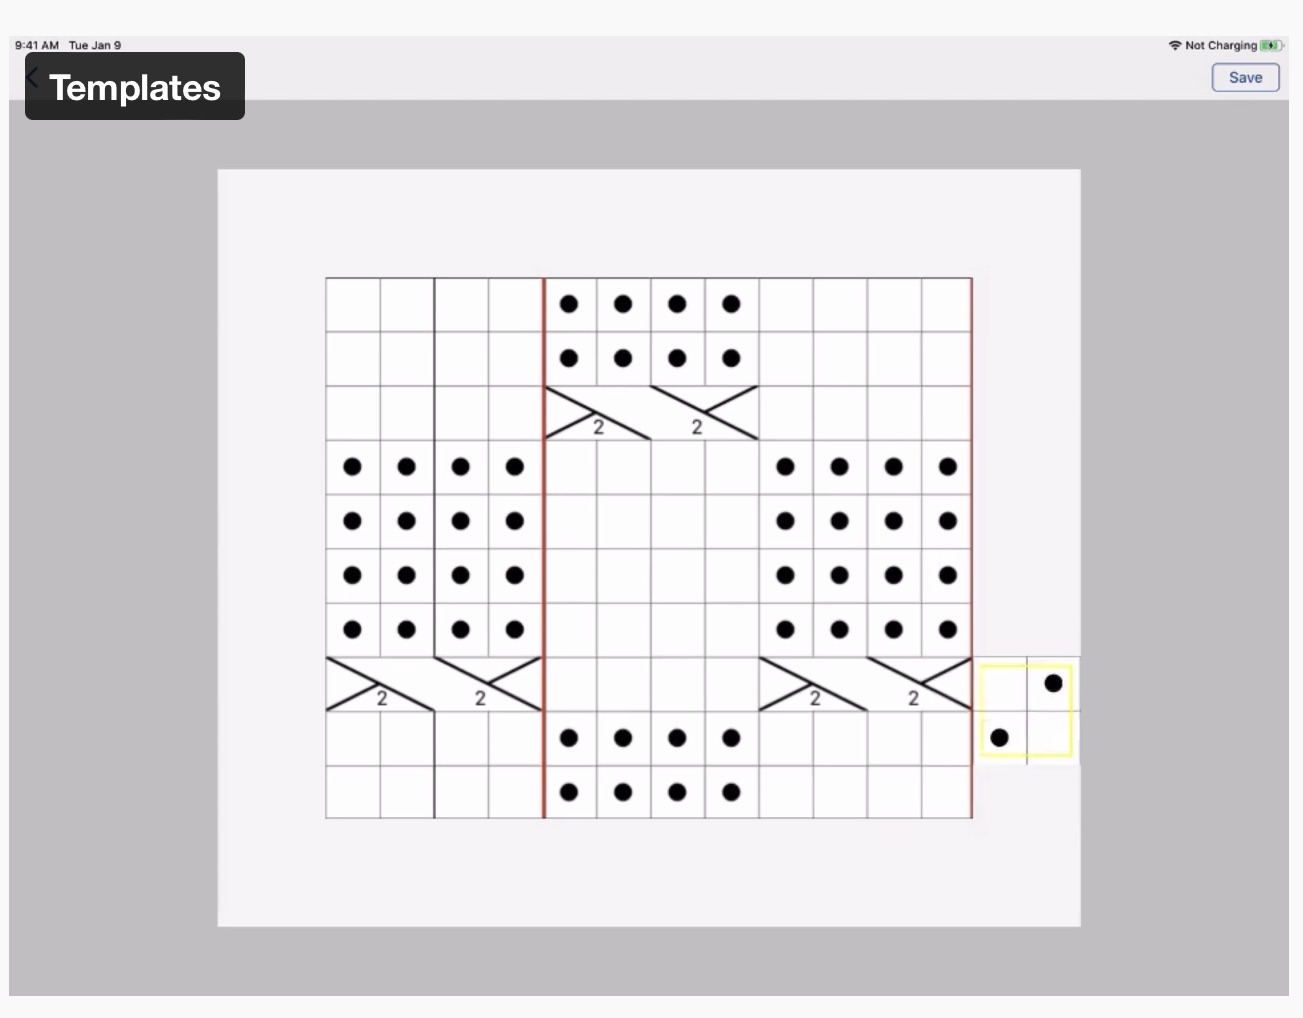
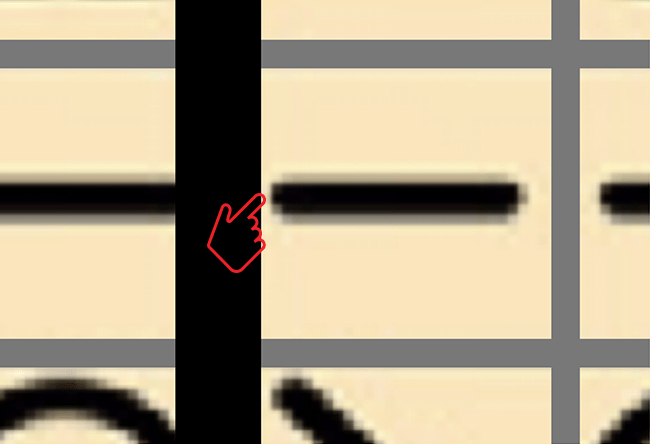
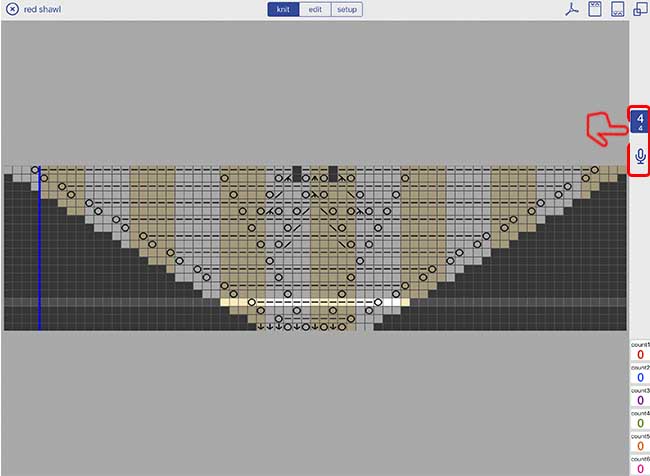
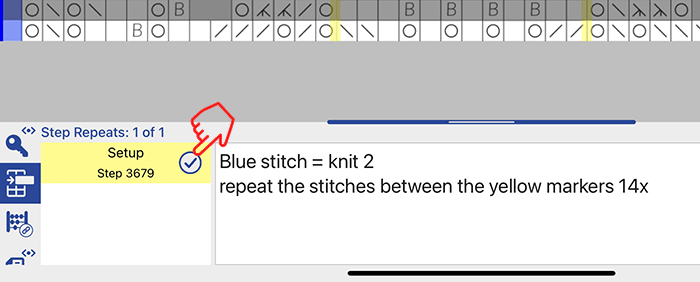
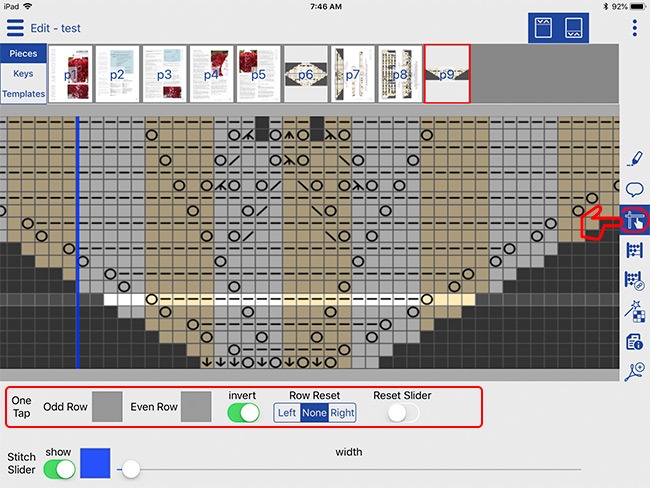
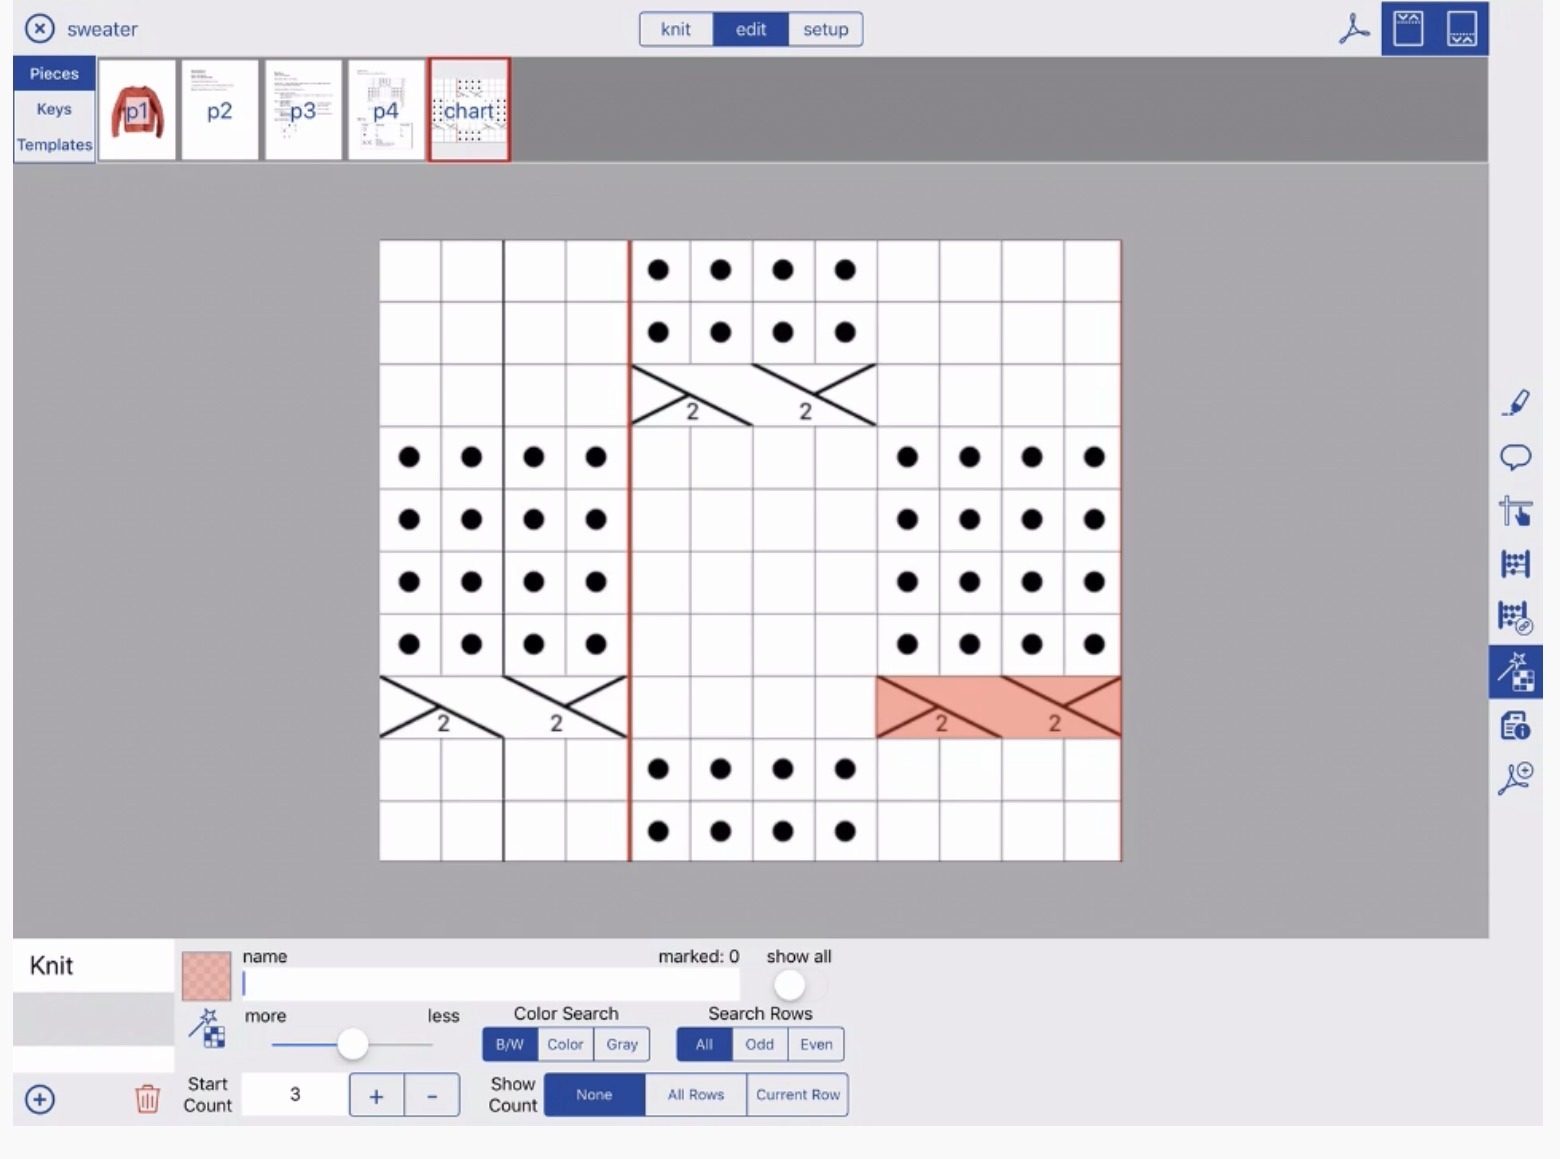
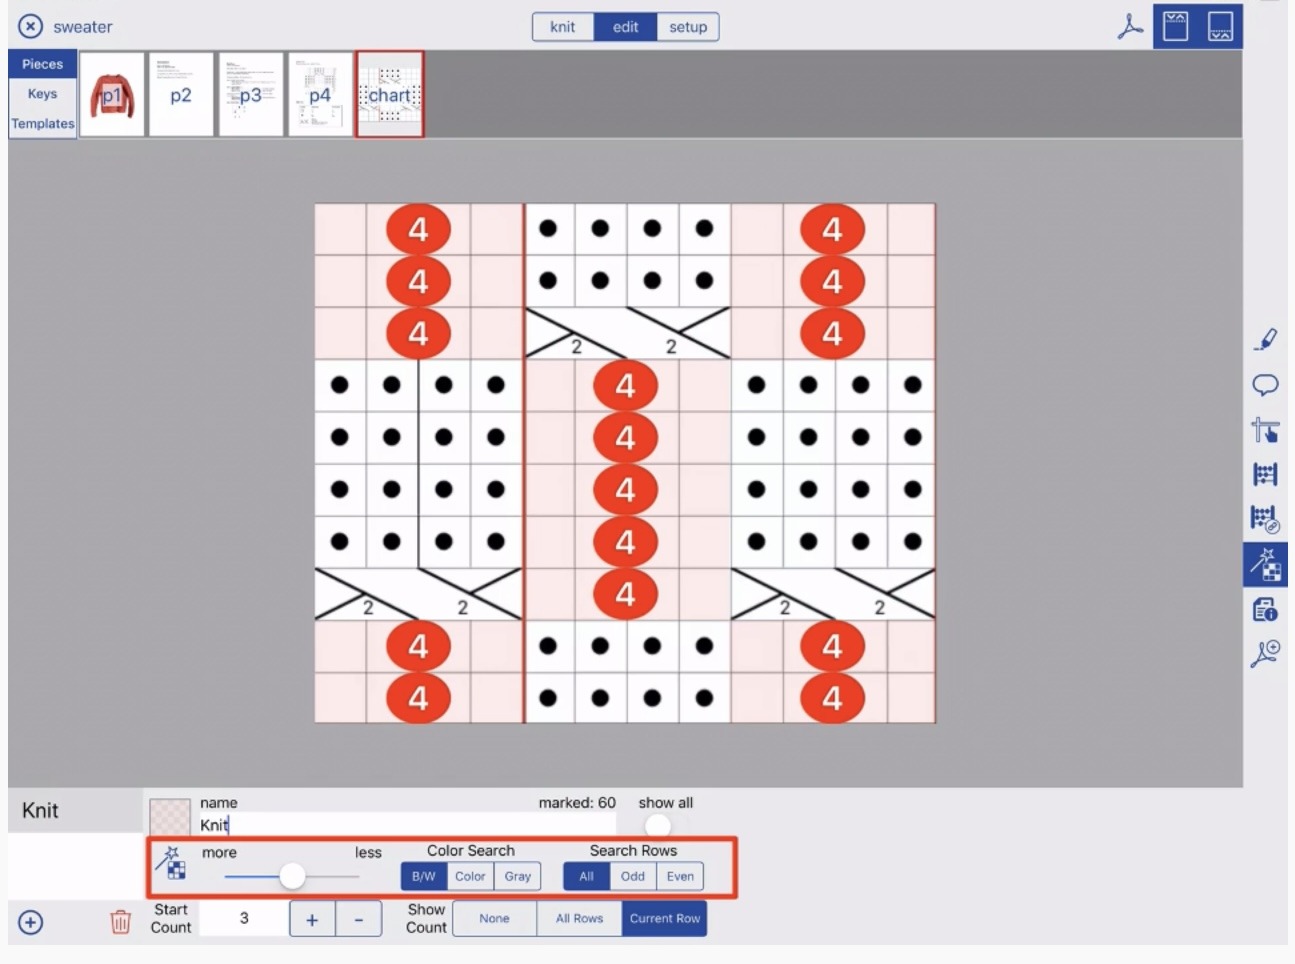
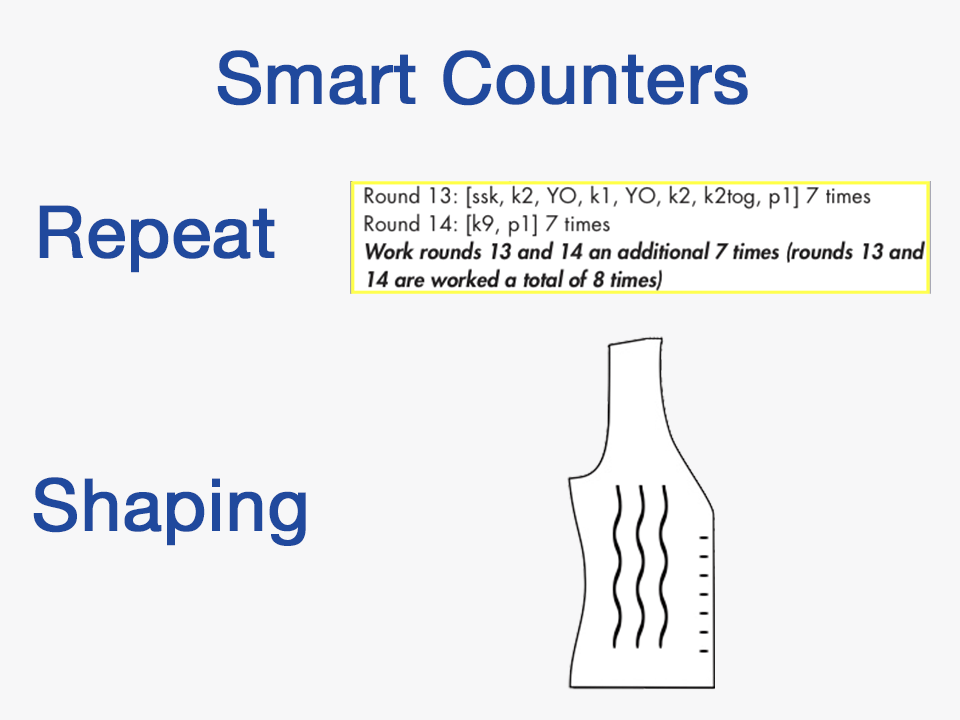
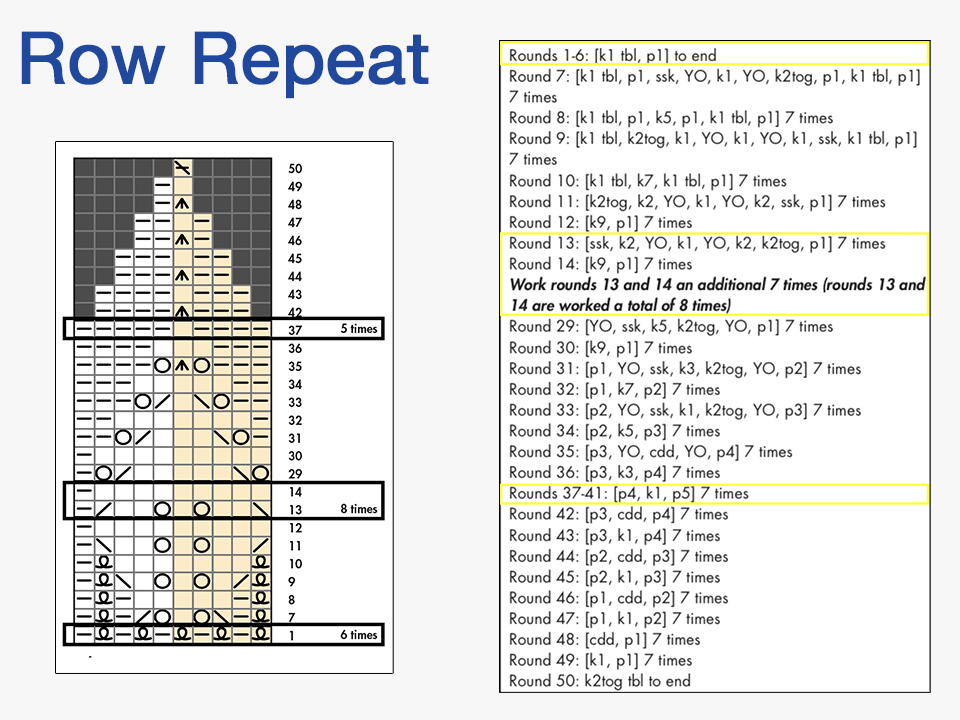
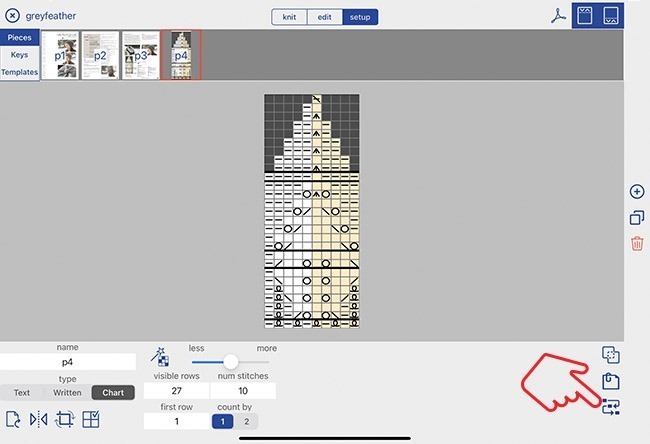
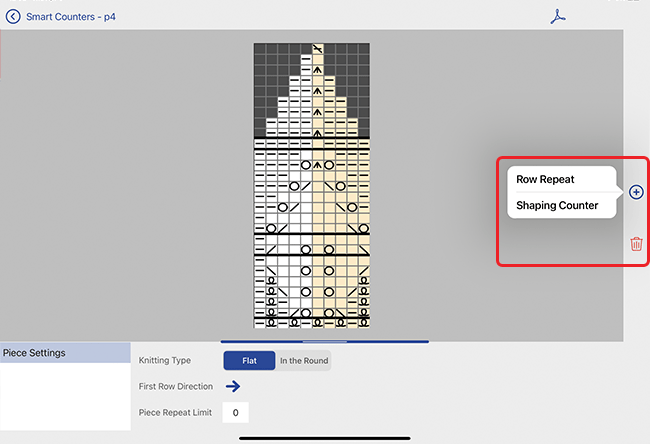
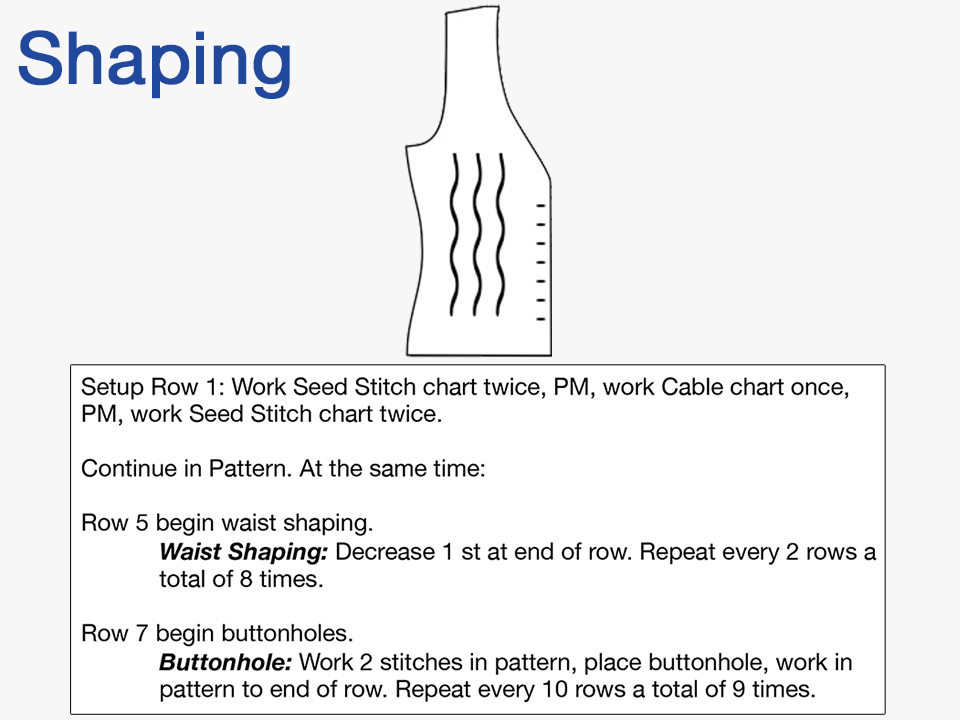
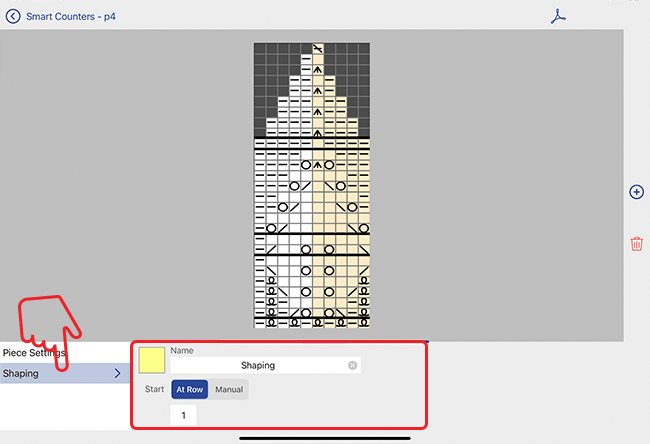
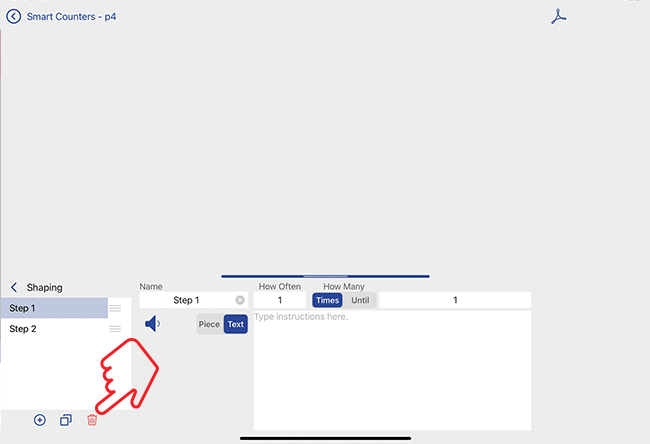
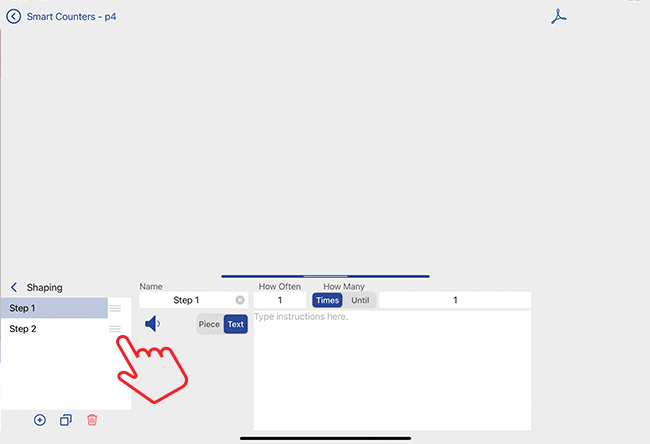
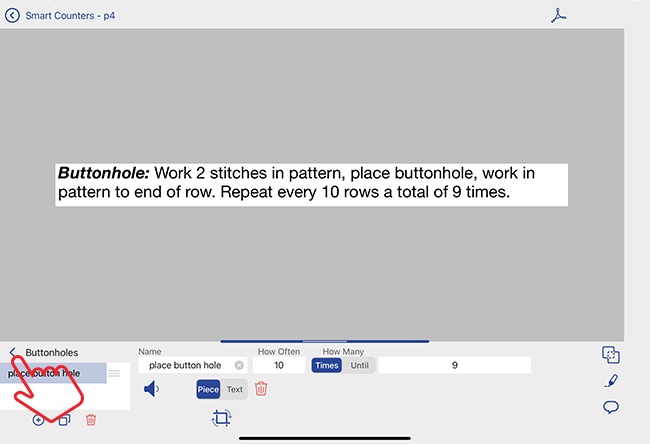
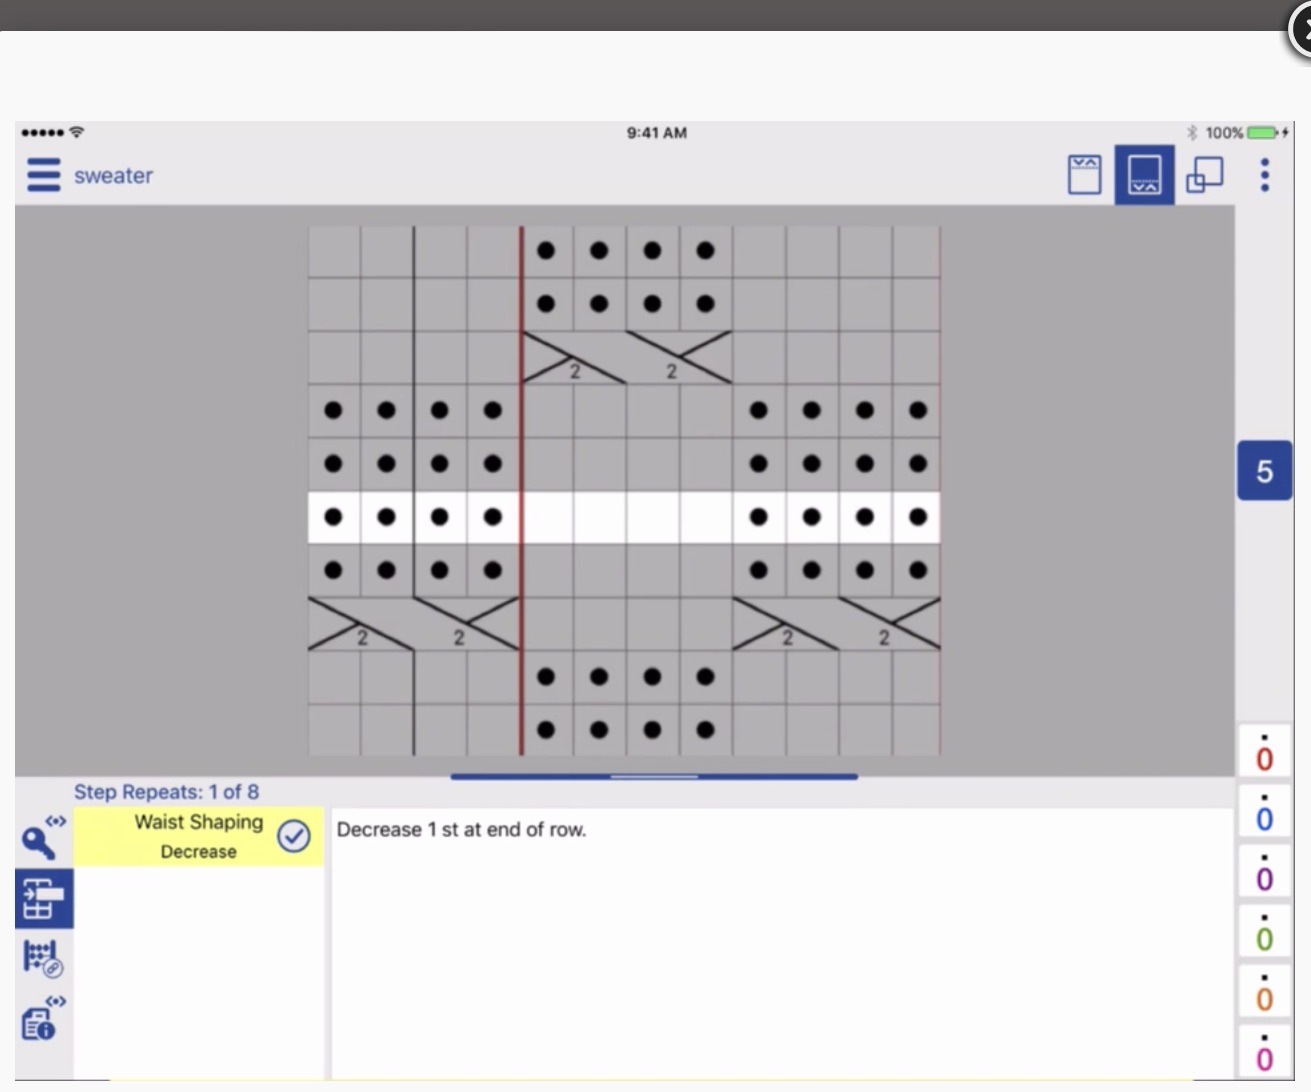
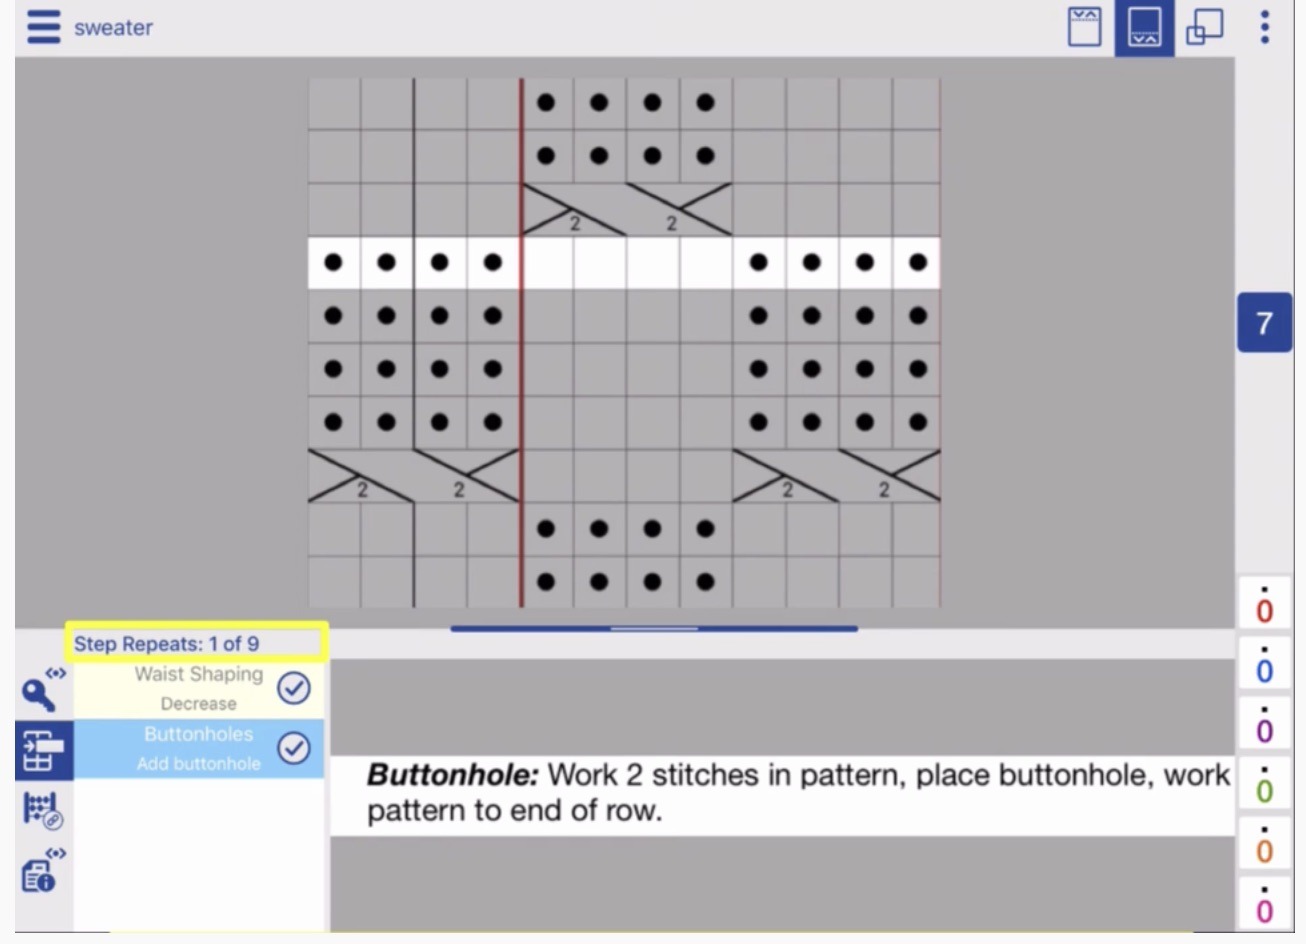
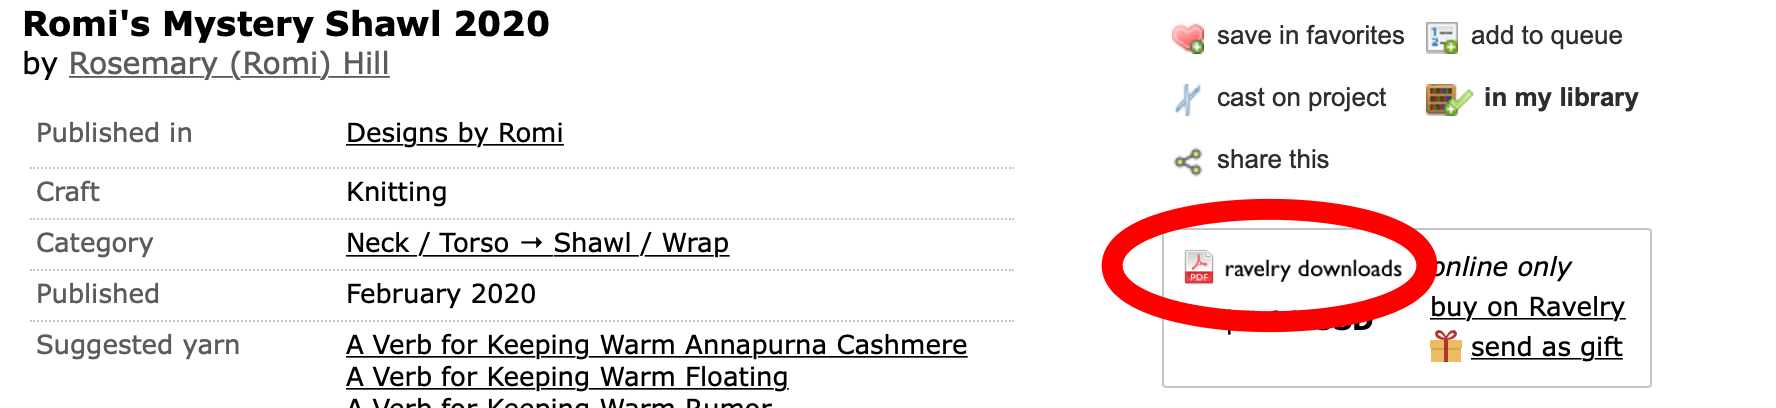