Joining Charts
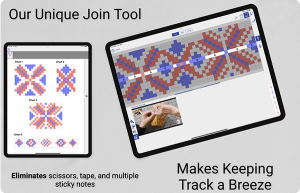
Often, designers that feature large charts in their patterns will split the chart into pieces to fit the instructions neatly on the page. This post details how to rejoin a chart so that you can work through the stitches in one piece.
As in our previous, we will use Romi Hill’s Asterope Shawl to illustrate the steps to creating a basic chart join.
Quick Jump Links
Jump down to any topic in this post with the links below:
Creating a Chart Piece
When we are joining several parts together into a single piece, we need to start by making the first part. We are going to work with a chart, so our first part will be a Chart Piece.
First, tap setup, followed by the plus (+) button. Select Chart Piece. Select the page that features the chart pieces you want to reunite. In this case, the charts are on page 7.

If needed (as we do in this case), tap the rotate button to rotate the page until it is upright.

There are two chart pieces on page 7 that need to be joined into one chart piece. Notice the flashing blue arrow located in the top left corner of the page. Drag your finger around the first chart to isolate the piece. Take care to select only the chart piece and not the additional lines outside the chart.

Tap the wand to create the chart piece. This will trigger a Review Results reminder. knitCompanion will automatically locate the chart’s edges—check that the visible row and stitch numbers are correct, and that the chart’s perimeter is properly aligned. If needed, you can edit the first row and change the count number (if the rows count by 1 or 2).

Joining the Next Part
With the first chart selected, it’s time to create the second chart piece to reunite the chart. Tap the join button in the lower left corner. Select Add New Part.

Tap the page where the other half of the chart lives—in this case, it’s page 7. Once again, rotate the page and then drag to select the second chart piece. Repeat the same process followed above, tapping the wand and checking the results to ensure the chart boundary is precise.

Once you’re satisfied, tap Align at the top of the app. Chart pieces can be repositioned by dragging them on the page. The chart with the outline can be dragged to any position.

In this case, I will drag the chart so that they connect at the proper point in the pattern. Zoom and scroll to ensure the charts have aligned properly. If, upon zooming in, you discover the parts don’t fit together properly, there was an error when setting up one of the parts. Tap Crop at the top to return to recheck the crop and grid for the new part. Or tap the (x) upper left to leave the join process to recheck the original part.

Tap Save to save your chart piece. Be sure you are happy with the chart before tapping Save, otherwise you’ll have to redo the pieces from the beginning. Notice the stitch and row count—it should accurately reflect your newly joined chart.

Working with Wide Charts
To begin knitting, tap knit at the top of the app. Zoom in to get a closer look at the assembled chart.

Use the Sliding Marker to assist in keeping your place and tracking progress as you knit across the larger chart piece. The left and right hand side of the chart can also be double tapped to progress the chart forward as you’re knitting.

If you’re knitting in the round or only right side rows are charted, you can also use the row reset function to return to the beginning of the chart when you advance the one-tap marker at the end of a row. To turn on row reset, click edit at the top of the app. Then, click the row reset button. Because I want the row to snap back to the right side of the chart, I will select Right from the Row Reset options. You also have the option for the sliding stitch marker to automatically travel back to the beginning of the row. This offers a single tap that not only advances your row marker, but also sets you up completely ready to start the next row.

Using Voice Commands for Wide Charts (Apple only)
In an earlier post, we covered the option to use Voice Control for the one-tap Marker. When working with Wide charts, Voice Control offers additional commands to automatically slide your chart one screen width to the right or left. The commands are “LEFT” and “RIGHT”. This is especially helpful when your chart is zoomed in and ends up several screens wide. You can also place a Stitch Marker at regular intervals across the chart, so you can see one at the right edge and one at the left all the way across. Now there is no need to put your knitting down to adjust your view, or even slide your stitch marker as you work across a very wide chart. Note that if you are using the Row Reset option described above, this will also activate when you use Voice Commands to advance your row, making the entire tracking process completely hands free.

We hope this guide to joining chart pieces into a single chart will help simplify crafting while using knitCompanion.
