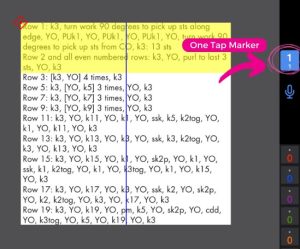
Setup Written Instructions with a One-Tap
In our previous post, we reviewed how to set up a chart using the Setup + Essentials add on to the knitCompanion app and how to work with a one-tap marker. This month, we’re reviewing how to set up written instructions. Using Setup for written instructions offers greater customization opportunities, such as One Tap Markers, Row Reminders, Voice Controls, and more. Once again, we’ll use the Asterope Shawl pattern by Romi Hill for our examples.
Setting up Written Instructions
To begin setting up written instructions, first open your project and tap “setup” in the upper right hand corner.

Tap the (+) in the right navigation bar, and select “Text Piece.”

From here, the app will present the full selection of PDF pages on screen. Choose the page with the text instructions you want to set up. In this case, our written instructions are on page 3. Click Next.

knitCompanion automatically creates a new page for your written instructions (in this case, page 9, shown below in the top menu). There are 3 different written instructions on this page. To tell knitCompanion which text instructions you wish to set up, drag your finger diagonally across your instructions. You will have the opportunity once you make the initial selection to crop your text piece further if necessary.

Once you’ve selected your text piece, tap the Crop button to see your text piece.

These written instructions start on Row 1, so the “first row” field can be left alone. However, the rows do not count by 1 (1, 2 ,3 ,4 , etc). The rows count by 2 (1, 3, 5, 7, etc) so we must set the “count by” field to 2.

To create a One Tap Marker, which will advance the pattern along with the counter, we need to set up the visible rows. There are 11 visible rows in the written instructions; however, Row 2 is a repeating row. For now, we must combine Rows 1 + 2 when we set the row height. (In a later post, we’ll talk about setting Row Reminders to remind us to repeat Row 2 on all even rows). This amounts to 10 visible rows. Input 10 in the visible rows field at the bottom of the screen.

Notice that knitCompanion has automatically added lines to the text piece. As written instructions often feature rows across several lines, you’ll need to manually adjust each of these lines to ensure the full rows are accounted for.
To adjust the height, click and drag the blue handle below the first line until the marker includes the full instructions. Repeat for each line. Click each line and drag the blue handle to fit the text for the row. Always start from the top and move downward.

If you need to add or remove a row, use the plus (+) and minus (-) buttons next to the “visible rows” field. If you manually input a new “visible rows” number, it will reset the whole text piece.

Tap Knit at the top of the app to begin working on the text piece.
 To advance in the pattern, click the counter on the left hand side of the app. Because we set count by to 2, our one-tap marker will automatically stop “between” each row. This will let us track our progress even for those between rows and get reminders and shaping on them.
In a future post, we’ll review creating a Row Reminder to use with the One Tap Marker. The Row Reminder is a great way to be able to see the between row instructions easily. Even when your between row is very simple it is great to have that reminder, especially in situations where you’ve put the project aside for some time.
