Setup a Chart
Crafters will always want to be able to work with ANY PATTERN. knitCompanion’s patented Setup tools have been created to offer individualized customization for working with all types of pattern instruction content. Over the course of this summer, we will explore the Setup tools and how to use them to make keeping track in any pattern (regardless of format or layout) much easier and more streamlined.
In this first post we are going to dive into the steps to Setup a Chart. This will enable the one tap marker, Magic Markers (for counting longer stitch runs, recoloring colorwork charts, and marking stitches), row reminders, repeat tracking and more. These are all topics we will explore in detail with coming posts, but for now let’s dive into Chart Setup.
Quick Jump Links
Jump down to any topic in this post with the links below:
Enter Setup
To begin setting up a chart, open your project and tap “setup” at the top.
- If you are on a smaller screen, use the 3 dots upper right to select your mode.
- If it is the first time you are using setup for your project you’ll see a prompt reminding you that Rotate will move to the setup area.

Make a New Piece
Tap the (+) on the right side and select “Chart Piece”. (Don’t worry, we will explore the other options in future posts!).

From here the app will present the full selection of PDF pages. Choose the page with the chart you want to set up. In this case, our chart is on page 6. Click Next.

knitCompanion automatically creates a new page for your chart piece and places it at the end of your existing pieces.
Setup the Chart
If needed, you can rotate your new piece using the rotate button bottom left so that the chart is upright. You should always rotate your page upright before you continue.
knitCompanion is pioneering new visual recognition technology, and can “see” the content on the page (this technology is also what adds the “magic” to our Magic Markers). Because a page may have more than one chart, you will drag your finger diagonally across the chart you are interested in. Remember to include all the edges of the chart inside the crop. After dragging you can adjust the crop lines by dragging them. You don’t need to be perfect, as long as the complete chart is contained inside the crop area the wand will do the rest.

Next, tap the chart wand at the bottom. knitCompanion’s visual recognition system will automatically detect the edges of the chart and the row and stitch counts.

Complete the Setup and Start Knitting
Next, set the first row of the chart and the count by. For this chart, the first row is 1 and the count by is 1. “count by” refers to how the rows ascend on the chart. If the chart shows 1, 2, 3, 4, the “count by” is 1. If the chart shows 1, 3, 5, 7 the “count by” is 2.

The wand will automatically overlay a grid on top of the chart. You will want to visual confirm that the grid is properly aligned with the grid of the chart. And be sure to check that the edges of the chart are properly captured. You can adjust the crop edges and the visible row and stitch numbers to make any necessary adjustments.

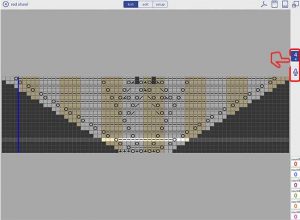
We’re ready to start knitting! Tap “knit” at the top of the screen. You’ll notice that knitCompanion automatically displays the One Tap Marker on the right. This button is connected to our new chart piece so that each time we tap it, we move forward a row. You can long tap if you need to frog back or reset your marker.

In an upcoming blog, we’ll discuss more details of the One Tap Marker and the advantages it offers.
